When to Grill on Charcoal: A Practical Timing Guide
Learn the optimal timing for charcoal grilling, including two-zone heat, vent control, safety tips, and step-by-step methods to achieve perfect sear and juicy interiors every time.

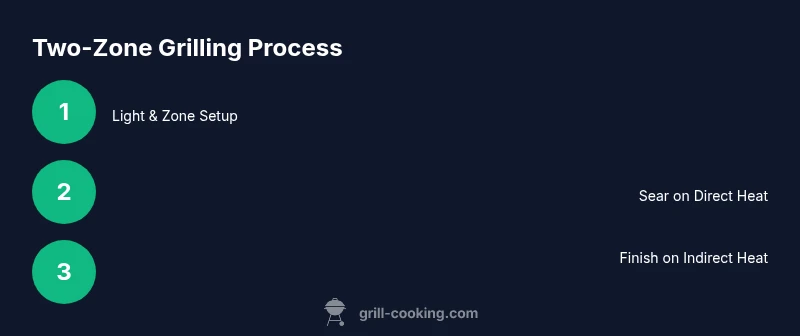
Set up a two-zone charcoal fire and use indirect heat for cooking through after searing. Start with a full chimney of charcoal until the coals are ashy. Spread for a hot direct zone and a cooler indirect zone, then adjust vents to hold steady temps. This timing approach maximizes sear and smoky flavor.
Why timing matters when grilling on charcoal
When you ask when to grill on charcoal, you’re really asking how to manage heat to achieve a perfect crust and a juicy interior. The timing isn’t mystical; it’s a repeatable system built on two-zone heat, proper vent control, and mindful cooking. A well-timed sear locks in juices while the interior climbs in a controlled pace, delivering crust, smoke, and tenderness in balance. According to Grill Cooking, timing hinges on heat zones, airflow, and the burn rate of your charcoal. The Grill Cooking team found that most successful sessions begin with a deliberate plan for where the heat will be and how long it will stay there. As you gain experience, you’ll learn to read the grill by color, aroma, and sound—signals that tell you when to flip, move to indirect heat, or let food rest. The core idea is simple: match heat intensity to the cooking stage—searing, finishing, resting—so each bite carries crust, smoke, and juiciness without overcooking.
Building a two-zone fire and reading the coals
Two-zone heating is the backbone of timing on a charcoal grill. Begin by lighting the charcoal until most of it is coated in gray ash. Use a chimney starter or a dedicated lighter to ensure a consistent burn. Once ready, form a hot zone on one side of the grate and leave the other side cooler for finishing. The hot zone sears; the cool zone finishes. Place the grate and lid to preheat, then check that the hot zone maintains high heat while the indirect zone remains steady for longer cooks. If the fire grows too intense, dial back oxygen with the vents and rearrange the coals. The timing here matters: you’ll need the hot zone ready before searing and the cooler zone ready before long cooks. With practice, you’ll gauge readiness by the coal color and the grate’s heat signature. A two-zone setup gives you control to achieve a perfect crust with a tender interior.
Direct heat searing vs indirect cooking for different foods
Direct heat is ideal for surface browning and flavor development, while indirect heat finishes cooking through without burning the exterior. For a steak or burger, start with direct heat to develop a crust, then move to indirect heat to reach the desired internal level. For chicken parts or pork chops, a quick sear followed by longer indirect cooking yields juicy meat with a safe interior. Fish benefits from a brief direct touch to crisp the skin, followed by indirect heat if needed. The timing strategy centers on the crust’s formation in the first minutes and a gradual interior rise afterward. The two-zone approach helps prevent undercooked centers while avoiding scorching. As you practice, you’ll learn how to pace each piece: a brief direct hit for rare/medium-rare, and longer indirect finishing for larger cuts.
Temperature management and vent control
Temperature control on charcoal relies on vents and ash management. Open vents to raise heat; close vents to lower it. Keep the lid on to trap heat and protect against flare-ups; avoid lifting the lid frequently as it interrupts the heat ladder. If the grill runs hot, partially close vents and shift more coals toward the indirect zone. If it runs cool, briefly open vents or add a small amount of charcoal. A reliable thermometer (grill or built-in) can help you track ambient temperature, while checking meat temperature ensures timing accuracy. Remember that even small adjustments to air flow can shift heat by hundreds of degrees, so make deliberate changes and observe the impact.
Lighting safely and reading readiness cues
Begin with a chimney starter to avoid lighter fluids and their flavor influence. Fill it, light, and wait for an even, ashy coating before transferring coals to the grill. Equip yourself with heat-resistant gloves and long-handled tongs. Have a spray bottle handy for flare-ups and a reliable meat thermometer for accuracy. Readiness cues include a consistent layer of gray ash on the coals, a steady grate temperature, and a subtle smoky aroma. Once you see uniform heat across the grate and the meat begins to sear, you’re ready to manage the transition between direct and indirect heat with confidence. Following these cues helps prevent hot spots and ensures even cooking across foods of different thicknesses.
Tools & Materials
- Charcoal briquettes or lump charcoal(Choose based on preference; lump burns hotter and faster, briquettes burn longer and more evenly)
- Chimney starter(Avoid lighter fluid; use natural ignition for clean flavor)
- Long-handled tongs(For turning and moving meat safely over heat zones)
- Heat-resistant gloves(Protect hands when handling hot grates or charcoal)
- Instant-read thermometer(Helpful for large cuts; not required for all grilling setups)
- Grill brush and oil(Season grates before cooking to prevent sticking)
- Vent-controlled grill cover(Close to trap heat during indirect cooking)
Steps
Estimated time: 40-45 minutes
- 1
Light the charcoal and set up a two-zone fire
Fill the chimney starter and light it until the coals are ashy. Dump the coal into the grill and push most of them to one side to create a hot direct zone, with a cooler indirect zone on the opposite side. Place the grate and leave the lid off briefly to let the setup stabilize.
Tip: Use the two-zone geometry to plan the first sear in the hot zone and the finish in the cooler zone. - 2
Preheat the grate and establish heat balance
With the lid closed, allow the grill to come to heat across both zones. The direct zone should be visibly hotter than the indirect zone. If you have a thermometer, aim for a clear contrast between the hot zone and the cooler area. This step ensures even heat distribution for searing and finishing.
Tip: If you see flames, move food to the indirect zone and adjust vents to reduce oxygen. - 3
Sear over direct heat
Place the food on the hot zone and sear until a crust forms, flipping once to create an even color. Minimize movement to encourage a crisp crust. For thick cuts, a brief initial sear is followed by transfer to the indirect zone to finish cooking.
Tip: Leave space between pieces to avoid crowding that lowers surface heat. - 4
Finish in indirect heat
Move the food to the indirect zone to finish cooking through without burning the exterior. Monitor internal temperature with a thermometer and adjust the grill temperature as needed by venting. Keep the lid on to trap heat and protect from flare-ups.
Tip: Avoid opening the lid too often; each opening causes heat loss and longer cook times. - 5
Rest and serve
Once the target internal temperature is reached, remove the meat and let it rest. Resting allows juices to redistribute, improving tenderness and flavor. Slice and serve after a few minutes.
Tip: Rest under loose cover to retain heat while juices re-distribute. - 6
Clean and maintain for next cook
While the grill is warm, scrape the grate and remove ash as needed. Wipe down the interior and check vents for any blockage. Regular maintenance improves heat retention and safety for future sessions.
Tip: Season grates again before the next cook to prevent sticking.
FAQ
What are the benefits of using a two-zone setup on charcoal?
A two-zone setup gives you a powerful sear in direct heat and controlled finishing in indirect heat, helping you avoid burnt exteriors and undercooked centers. It also reduces flare-ups by letting you move food away from the hottest zone as needed.
Two-zone setups let you sear and finish without burning, improving flavor and texture.
How do I know when charcoal is ready to cook on?
Charcoal is ready when a consistent layer of gray ash covers the coals and you see steady heat across the grate. If you see large flames, give the fire a moment to settle or move the food to the indirect zone.
Look for a uniform gray ash and steady heat before placing food on the grill.
Can I speed up lighting the charcoal?
Use a chimney starter for quick, even lighting and avoid lighter fluids that can alter flavor. Let the coals ash over before you begin cooking.
Chimney starters light charcoal quickly and evenly without adding flavors.
Is it safe to grill on a wooden deck with charcoal?
Grill on a stable, non-combustible surface, with a clear radius around the grill. Keep a water source or extinguisher nearby, and never leave the grill unattended.
Place the grill on a safe surface and maintain distance from flammable materials.
What foods benefit most from indirect cooking?
Thicker cuts (bone-in steaks, pork chops, chicken pieces) benefit from finishing over indirect heat to reach a safe internal temperature without burning the exterior.
Thicker cuts finish best with indirect cooking to ensure doneness.
Watch Video
Quick Summary
- Master two-zone heat to control searing and finishing
- Keep lid on to stabilize temperature during indirect cooking
- Adjust vents deliberately to tune heat, not instantly
- Sear first, then finish slowly to avoid overcooking
- Rest meat to lock in juices and flavor