Which Setting for Grill: How to Pick the Right Heat Level
Learn how to choose the right grill setting for direct searing, indirect cooking, and zone-based griling. Expert guidance from Grill Cooking helps home cooks achieve consistent doneness, juicy results, and fewer flare-ups.

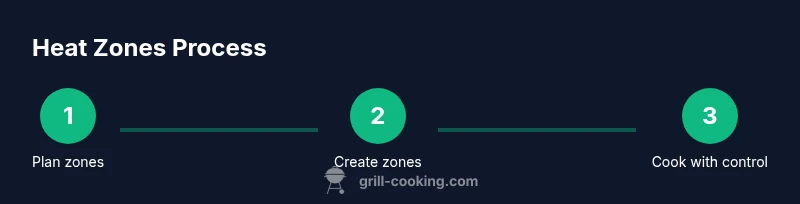
To grill successfully, you’ll learn when to use direct high heat, indirect lower heat, and zone cooking to match your recipe. Start by preheating the grill to your target zone, use a thermometer to monitor temps, and adjust vents or burners as needed. With practice, you’ll nail searing, even cooking, and juicy results every time.
Understanding Grill Settings: Direct vs Indirect vs Zone Heating
Direct heat means cooking with the flame or hot grate directly beneath the food. It's ideal for searing, establishing a crust, and finishing off fast with a crisp exterior. Indirect heat uses a cooler area of the grill away from the flame or hottest zone, allowing food to cook evenly through without charring. Zone heating combines both approaches by having one hot area for searing and a separate cooler area for finishing. On gas grills, you achieve zones by turning burners on and off or by adjusting their levels; on charcoal grills, you arrange coals to create a bright, hot side and a cooler, indirect side. The goal is to map your cooking plan to the grill's heat distribution. This approach is not about chasing one perfect temperature but about using the grill’s geometry to control heat flow. For most home cooks, the strategy is to start with a hot sear, then move the food to indirect heat to finish and rest. This method reduces flare-ups, improves crust formation, and yields more predictable doneness across different cuts and sizes.
How to Determine Your Target Temperature and Zone Layout
Your target temperature is driven by what you’re cooking and your preferred finish. High-heat searing is used for a crust and rapid exterior color; mid-range heat handles most quick-cook foods; and gentle, low heat is reserved for large or delicate items that need time to reach the correct internal temperature without drying out. Without a thermometer, use the grill's built-in cues: listen for the sizzle, measure the smoke activity, and observe the color of the crust forming. With a thermometer, you can read the surface temperature to guide zone placement and cooking time. Plan the cook by outlining a rough map: a hot zone for searing, a medium zone for intermediate cooking, and a cool zone for resting or finishing. Expect the exact temperatures to vary with weather, fuel type, and grill age. The Grill Cooking team recommends testing a few staple items (steak, chicken thighs, and a piece of sturdy vegetables) to calibrate your zones before tackling more complex recipes. This practice builds confidence and reduces guesswork when you’re under time pressure.
Practical Ways to Create Temperature Zones on Popular Grills
Gas grills are the easiest to zone because you can manage burners individually. For a two-burner setup, light only one side for a direct zone and leave the other side cooler as indirect. If your grill has more than two burners, arrange them so the outer ring stays hotter for searing and the inner area remains cooler for finishing. Charcoal grills let you sculpt zones by the arrangement of lit coals. Pile most of the hot coals on one half of the grate to create a direct, high-heat zone, and keep the opposite half relatively empty for indirect cooking. A two-zone setup is ideal if you’re dealing with thicker cuts or larger roasts. Portable grills or small backyard units benefit from a compact approach: use a metal pan or a foil shield to create a heat sink on the cooler side. Whichever method you choose, avoid crowding the food; air flow matters for even heating. The key is to maintain distinct hot and cool areas, then adjust the distance from the heat source as the food cooks.
Cooking Scenarios: When to Use Each Setting
Steak, burgers, and fast-cooking seafood benefit from a brief, intense sear over direct heat, followed by a short rest on indirect heat to finish the cook without over-charring. Thick bone-in cuts and large roasts need longer exposure to heat; begin with indirect heat, then finish with a quick sear at the end to develop crust without overcooking the interior. Chicken pieces with skin fare well with a two-zone approach: aim for crispy skin by direct heat, then reduce the heat and finish through indirect heat to a safe internal temperature. Vegetables like peppers, zucchini, and corn can tolerate a higher heat for char marks but also benefit from a brief rest on cooler grates to retain moisture. Fish cooks quickly and benefits from precise control; a bright, direct heat can crisp the skin, while finishing on the cooler side keeps the flesh tender. Temperature management changes by grill type; charcoal grills require more time to re-stabilize after lid openings, whereas gas grills recover quickly due to consistent burner output. In all cases, keep a close eye on internal temperature with a probe and avoid sudden temperature swings.
Tools, Accessories, and Techniques for Precise Heat Control
Equip yourself with a reliable instant-read meat thermometer; digital probes that allow you to monitor internal temps without lifting the lid; and heat-resistant gloves to protect hands during flipping and repositioning. A good set of long tongs, a sturdy grill brush, and a metal spatula help you manage searing and finishing steps safely. For charcoal cooks, a chimney starter makes quick, even ignition and reduces cold spots that complicate zone cooking. An infrared thermometer can help you quickly gauge grate temperature at a glance, though it’s most effective for surface readings rather than internal doneness. Live monitoring requires a thermometer in the meat and a read on the grate or ambient temperature to maintain the right zone balance. Place the food carefully on the grid, move it between zones as needed, and keep the lid closed whenever possible to stabilize heat. Remember to rest meat after removing from heat to allow juices to redistribute; this step is essential for achieving predictable doneness.
Common Pitfalls and Solutions for Consistent Grilling
Relying on visual guesswork is the most common pitfall. Use a thermometer and a timer rather than relying on color alone. Another mistake is too much lid lifting, which causes heat to escape and zones to collapse. Clarify your target zones before cooking and keep a lid on until you need to check progress. Searing for too long on direct heat can burn the surface while leaving the interior underdone; avoid this by establishing a watchful plan: sear briefly, then finish on the cooler side. Inconsistent fuel supply robs heat consistency; ensure your fuel source is steady and prepared in advance. Sanitizing surfaces is important but don’t over-wipe, or you’ll remove surface oils that protect meat and hinder caramelization. Finally, neglecting rest time can turn juices into dryness; allow a few minutes off heat before slicing. By planning zones in advance, you minimize errors and increase repeatability across cooks and recipes.
Safety and Maintenance Tips for Temperature Control
Never grill with damaged equipment or worn knobs; replace them to ensure accurate heat output. Use heat-resistant gloves and keep a safe distance from the flames; children and pets should be kept away. Regularly clean grates to prevent flare-ups caused by built-up grease, and check fuel lines on gas grills for signs of wear. When charcoal, ensure proper ventilation and avoid overloading the grill with lighter fluid after the initial ignition. Use a dedicated grill brush to clean at the end of the cook to prevent cross-contamination and ensure consistent heat in future sessions. Finally, store your tools in a dry, accessible place so you can respond quickly if heat needs to be adjusted during a cook.
How to Troubleshoot Common Grilling Temperature Issues
When heat seems too high, verify that vents are functioning and the lid is closing fully; a stuck lid or misaligned vent can cause temperature spikes. If the food cooks unevenly, re-check the zone balance and reposition the food to the hot or cool side as needed. If temperatures drift during cooking, confirm that burners are clean and not partially blocked, and ensure fuel supply is steady. For charcoal users, check for hot and cold spots by performing a quick two-zone test and re-arrange coals if needed. If the grill takes too long to preheat, inspect the grates for residue that blocks heat transfer and clean or replace as necessary. Lastly, always have a plan B: a foil shield or heat deflector can rescue a cook if your primary method isn’t performing as expected.
Tools & Materials
- Digital meat thermometer (instant-read)(Probe remains outside handle; aim for sub-60 second readings.)
- Heat-resistant grilling gloves(Leather or aramid fibers; ensure cuff protects wrists.)
- Long-handled tongs(No clamps; use to turn and move food safely.)
- Grill brush with stiff bristles(Clean grates between meals to minimize flare-ups.)
- Infrared thermometer (optional)(Quick grate-temperature checks; not needed for doneness.)
- Chimney starter (for charcoal grills)(Fast, even ignition; reduces cold spots.)
- Aluminum foil or heat-safe pan(Helps create a makeshift indirect zone or catch drippings.)
Steps
Estimated time: 60-90 minutes
- 1
Identify cooking goal
Decide what you’re cooking and the desired finish. If searing is the priority, plan a brief direct-heat phase; otherwise, plan indirect cooking first and a quick finish.
Tip: Write down the dish, thickness, and target doneness to guide zone setup. - 2
Preheat to the target zone
Close the lid and bring the grill to your hot zone or your indirect zone, depending on the recipe. Use the thermometer to verify the zone is ready before placing food.
Tip: Allow the grill to reach stable heat before you begin searing. - 3
Create a direct-heat searing zone
Position food over the hottest part of the grate or burners for a rapid crust. Don’t crowd the surface; space helps air flow and caramelization.
Tip: Keep a watchful eye on color; flip early if you see heavy browning. - 4
Sear briefly on direct heat
Sear 1–3 minutes per side depending on thickness. The goal is crust formation, not thorough cooking.
Tip: Use a timer; resist the urge to move food too often. - 5
Transition to indirect heat for finish
Move the food to the cooler zone to finish cooking through without burning. Check internal temperature with a probe.
Tip: Keep the lid closed to maintain heat balance during the finish. - 6
Rest and finalize
Remove from heat a bit before the target temp and let rest; carryover heat will finish the process.
Tip: Resting preserves juices and yields juicier results. - 7
Evaluate results for next time
Note the doneness, crust color, and timing. Use these notes to refine zone layout for similar future cooks.
Tip: Log what worked and what didn’t to improve consistency.
FAQ
What is the best setting for searing steak?
Direct high heat creates a crisp crust while locking in juices. Sear briefly on the hot zone, then move to indirect heat to finish, using a thermometer to confirm doneness.
Direct high heat gives a great crust; sear briefly and finish with indirect heat using a thermometer.
How do I create temperature zones on a gas grill?
Turn on only the burners you need for the hot zone and leave others off or low to form a cooler zone. If your grill has multiple burners, counterbalance by turning some to low while others stay high, then close the lid to stabilize.
Use separate burners to form hot and cool zones; keep the lid closed to stabilize heat.
Can I grill with only one heat setting for everything?
Not ideal. Different foods need different heat experiences. Zone cooking helps you tailor heat to each stage of the cook.
One heat setting usually isn’t enough; zones let you tailor heat to each part of the cook.
How long should I preheat and how often should I check temps?
Preheat until the surface feels hot and the surface thermometer indicates readiness; check temps when you add or flip food, not constantly.
Preheat until it’s hot, then check temps as you cook rather than constantly.
Is indirect heat better for chicken?
Indirect heat helps chicken cook evenly through the thick parts and prevents scorching on the outside.
Yes, indirect heat helps chicken cook evenly without burning the skin.
What is zone cooking on charcoal and why use it?
Zone cooking on charcoal uses a hot area and a cooler area to manage flare-ups and ensure moisture retention.
Zone cooking with charcoal helps control flare-ups and keeps meat moist.
What tools help monitor heat most effectively?
A reliable thermometer and probe setup is the best way to monitor heat without guessing.
Use a thermometer and probes to track heat accurately.
Watch Video
Quick Summary
- Use direct heat for searing and indirect heat for finishing.
- Create distinct hot and cool zones for better control.
- Monitor both meat temperature and grate temperature.
- Rest meat to lock in juices and finish carryover cooking.
- Practice zoning on your specific grill to build confidence.