What to Do on the Grill: Master the Basics
Learn practical, step-by-step grilling techniques including heat management, prep, direct and indirect methods, and finishing touches for consistently great results on the grill.

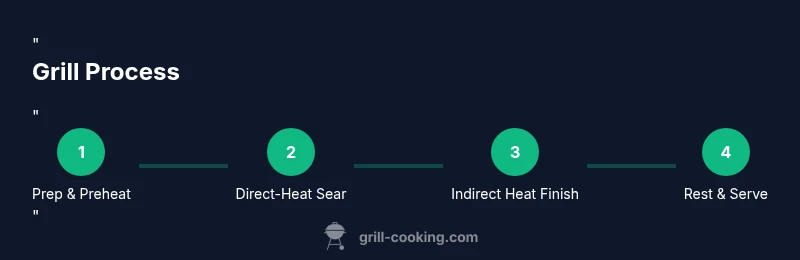
What you will achieve is a clear, repeatable plan for grilling: preheat properly, manage direct and indirect heat, sear for flavor, finish with gentle cooking, rest, and serve. This guide covers essential tools, safety, and timing so you can consistently get delicious results on the grill.
What to do on the grill: a practical framework for success
According to Grill Cooking, the first step in mastering what to do on the grill is to adopt a simple, repeatable routine. Start with a clear goal for each cook, then move through heat management, prep, and timing. The Grill Cooking team found that cooks who plan in advance—knowing direct vs indirect heat, and where to place foods—achieve juicier results with less guesswork. This block lays out the framework you’ll apply to proteins, vegetables, and seafood alike, with concrete examples you can use tonight. You will learn how to map smoke and heat, control flare-ups, and rest meats for maximum tenderness. The outline here is designed for home cooks who want reliable, chef-like results without needing fancy gear or years of experience.
As you read, keep in mind that the goal is consistent results across different foods. We’ll examine heat zones, timing windows, and safety habits that reduce risk and improve flavor. The emphasis is on practical steps you can follow in a real backyard, whether you’re using gas, charcoal, or a pellet grill. This approach emphasizes fundamentals—clean grates, proper temps, and a mindful rest period—so you can adjust for your grill and your pantry. The core idea is simple: plan, preheat, sear, move to indirect heat when needed, rest, and serve.
Heat management: direct heat vs indirect heat and when to use them
Direct heat is the fast lane for searing and creating those attractive grill marks that boost flavor and texture. Indirect heat is your ally for thicker cuts, larger vegetables, or gentle, even cooking through the center. The trick is to map your food to the right zone before you start cooking. For thinner items like flank steak or shrimp, direct heat is ideal for quick caramelization, while a thick cut like a bone-in ribeye benefits from a sear followed by finishing on indirect heat. Vegetables can benefit from a quick sear to lock in moisture, then finish on indirect heat to avoid charring or drying out. In practice, set up two zones: one hot, one cooler, and switch foods between them as needed. The end goal is even color on the surface, a proper crust, and a juicy interior.
To optimize results, preheat the grill to the appropriate temperatures—about 450–500°F for searing and 350–375°F for finishing. Remember that different grills behave differently: charcoal grills spike heat quickly but can fluctuate; gas grills are more controllable but still require smart zone planning. Lining up your strategy before you cook reduces guesswork and makes timing more predictable.
Grill setup and safety: prep, tools, and essential safety habits
A safe, well-prepped grill is the foundation of great results. Begin with a clean grill grate; a quick brush removes old residue that can cause sticking or flare-ups. Preheat to target temperatures, then wipe the grate with a light coat of oil or use a spray bottle to prevent sticking. Tools you’ll rely on include long-handled tongs, a thermometer, and heat-resistant gloves. Keep a spray bottle handy to control minor flare-ups without losing heat. Wear closed-toe shoes, tie back hair, and keep kids and pets away from the grill area. When using charcoal, allow the coals to ash over; for gas, verify all burners are lit and the flame is steady before cooking. Fire management is easier when you work with two zones, monitor temps with an instant-read thermometer, and avoid moving food excessively, which can cause temperature swings and uneven doneness. Grill safety is non-negotiable: never leave a lit grill unattended and always have a water or sand bucket nearby for emergency use.
Grill Cooking recommends keeping a dedicated brush for grates and a separate tool kit for each grilling session. By integrating these safety habits into every cook, you’ll build consistency and reduce the risk of accidents or poor results.
Selecting food and prepping: meat, fish, and vegetables
The starting lineup for any grill session includes proteins, seafood, and vegetables prepared with balanced moisture and fat content. For meat, choose cuts appropriate for grilling: steaks, chops, or chicken thighs with good marbling perform best when seared and finished with indirect heat. For seafood, opt for sturdy fillets or shellfish that won’t fall apart at high heat, such as salmon, shrimp, or scallops. Vegetables like asparagus, corn on the cob, peppers, and zucchini respond well to quick sears and direct heat. Prep begins in the kitchen: pat meats dry to promote crust formation, season generously, and bring items to near room temperature to ensure even cooking. If you’re marinating, keep it simple and avoid acidic marinades that can begin to break down texture too aggressively. Oil lightly to improve browning and help heat transfer. A well-prepped lineup reduces the need to rush, allowing each component to reach its ideal doneness while avoiding overcooking.
With practice, you’ll learn how to choose foods that pair well with your grill’s heat profile and your timing windows, leading to balanced flavors and textures across the plate.
Direct-heat techniques: searing, grill marks, and timing
Direct heat is your skillet-on-a-grill: a fast, intense zone that creates crust and color. To maximize crust, pat food dry, season generously, and place items on the hottest part of the grate. Avoid moving them too soon to prevent tearing or sticking. For steaks and other proteins, a 1–2 minute initial sear per side, followed by a flip and another 1–2 minute sear creates a crisp exterior and a rosy interior when combined with correct thickness. Shrimp, scallops, and vegetables respond well to shorter sear times, with finish times adjusted for thickness. Timing hinges on thickness, ambient grill temperature, and whether you’re cooking with or without a lid. An internal temperature target helps prevent overcooking: chicken should reach 165°F, pork 145°F with a rest, and beef varies by desired doneness. Remember to respect your grill’s heat consistency and adjust distance from the flame as needed to prevent scorching.
A practical tip is to rotate foods 90 degrees during the sear to achieve even grill marks and more uniform browning.
Indirect-heat and finishing: gentle cooking and resting
Indirect heat is used to finish items that need more time than direct heat alone provides. After a quick sear, move thick cuts and larger vegetables to a cooler part of the grill to finish evenly without burning the exterior. Lids on or off will influence heat distribution, so experiment with your grill to determine the best approach for each item. Rest is an essential part of grilling: let meat and fish rest for a few minutes after removal from the grill. This allows juices to redistribute and improves tenderness. For stronger flavors, glaze or baste during the final minutes of cooking, then rest. If you notice persistent flare-ups, temporarily remove items and close the vents to starve the flames, then reintroduce food once the heat settles.
Resting keeps juices from spurting out when you cut into meat, resulting in a juicier bite. Indirect heat also helps with thicker vegetables or proteins that require longer cook times, ensuring you’re not sacrificing texture for speed.
Flavor development: seasoning, oiling, sauces, and finishing touches
Flavor development on the grill is a balance of seasoning, fat management, and timing. Start with a well-balanced seasoning blend that enhances the natural flavors of your proteins and vegetables. A light coating of oil on the surface helps with browning and prevents sticking. If you use a sauce or glaze, apply in the final minutes so it caramelizes without burning. Resting is part of flavor preservation; it allows juices to reabsorb and ensures a more flavorful bite. Consider fresh herbs, citrus, or a final brush of herb oil to brighten flavors after your food comes off the grill. Practice makes progress: vary your rubs and marinades to discover what suits your palate and grill type. With time, you’ll establish a preferred flavor profile that complements your favorite grill foods.
For a balanced meal, think about color, texture, and aroma as you plan your plate. A well-seasoned crust, a moist interior, and a vibrant vegetable side create a memorable grilling experience that keeps people coming back for more.
Practical meal plan: a sample grill menu you can try tonight
To illustrate how the framework translates into a real cook, try this practical plan: start with a simple yet flavorful menu of grilled flank steak with a chimichurri glaze, complemented by lemon-garlic asparagus and grilled corn on the cob. Begin by preheating and cleaning the grate while you pat steaks dry and season with salt, pepper, and a rub of cumin and paprika. Sear the steak on direct heat for 2–3 minutes per side to develop crust, then move it to indirect heat to finish to your preferred doneness. While the steak rests, toss asparagus with olive oil and sea salt, and place on the grill for 6–8 minutes, turning as needed. Grill corn on the cob until kernels are lightly charred and tender. Finish with a bright chimichurri sauce and a squeeze of lemon. This plan demonstrates how to coordinate multiple items with different cook times, a key skill for any backyard pitmaster.
If you’re cooking for a crowd, prep components in advance and keep flavors balanced so you can deliver a cohesive meal quickly. This approach makes it easier to maintain grill temperature while handling multiple foods, and offers a reliable template for future cookouts.
Common mistakes and quick fixes: avoid common pitfalls
Common mistakes include overcrowding the grill, which lowers surface temperature and causes steaming rather than searing; flare-ups caused by excess fat or marinades; and under-searing thick cuts, which leaves the center underdone. Quick fixes: give space between items, wipe the grate clean, and move items to indirect heat when flare-ups threaten to burn. If you observe uneven cooking, rotate items and adjust the grate height or distance from the flame. Always use a thermometer to verify doneness to your preferred level of doneness rather than relying on color alone. Another frequent error is not letting meat rest after cooking; resting redistributes juices for a more succulent bite. Implementing these fixes will help you consistently produce better grill results and feel more confident on the grill.
Tools & Materials
- Long-handled tongs(At least 18 inches; helps you manage food safely from a distance)
- Grill brush(Stiff-bristle or wire-brush type; use after preheating and before cooking)
- Instant-read thermometer(Probe type; check internal temps for accuracy)
- Heat-resistant gloves(Protect hands up to high grill temps; avoid bare hands)
- Long-spatula(Flat, wide blade for turning and flipping without breaking food)
- Oil spray or brush(Lightly oil grates or food to reduce sticking)
Steps
Estimated time: 60-75 minutes
- 1
Preheat and prep
Begin by cleaning the grates, then preheat the grill to your target temperature. While the grill warms, pat proteins dry, trim excess fat, and season. Proper preheating helps create a crust and prevents sticking. Allow 10–15 minutes for preheating depending on your grill type.
Tip: Oil the grates just before adding food to improve browning and deter sticking. - 2
Set up heat zones
Create two heat zones: direct heat for searing and indirect heat for finishing. Place thicker items on the cooler zone to finish through without burning the exterior. This step ensures even cooking and a better crust.
Tip: Keep a water spray bottle handy to quickly control minor flare-ups without losing heat. - 3
Sear with direct heat
Sear food on direct heat to develop a flavorful crust. Avoid moving too soon; allow a crust to form before flipping. For steaks, aim for 1–2 minutes per side depending on thickness and desired doneness.
Tip: Rotate 90 degrees halfway through each side for attractive crosshatch marks. - 4
Finish on indirect heat
Transfer larger or thicker items to indirect heat to finish cooking evenly. Monitor with a thermometer and aim for target internal temps. Lid on or off will depend on your grill; use a lid for slow renders or larger cuts.
Tip: Check temperature in the thickest part of the meat away from bones or cartilage. - 5
Rest and plate
Remove from heat when near target temperature and rest covered loosely for 5–10 minutes. Resting lets juices redistribute, keeping meat moist. Slice against the grain for tenderness.
Tip: Reserve some pan drippings to make a quick pan sauce if desired. - 6
Sauce or glaze in final minutes
Apply sauces or glazes during the last few minutes of cooking to avoid burning sugars. A light glaze adds flavor without overpowering the meat.
Tip: Watch sugar levels; burned glaze can taste bitter and ruin texture. - 7
Clean-up and quick maintenance
After cooking, brush grates again while warm to remove residue. Inspect hoses or connections on gas grills and re-place any tools. Proper maintenance extends grill life and improves performance.
Tip: Turn burners to high for a few minutes after cooking to burn off residue for easier cleaning.
FAQ
What heat is best for grilling?
For searing, use high direct heat around 450–500°F. For finishing and thicker cuts, move the food to indirect heat around 350–375°F. Adjust based on grill type and thickness of your food. Always check internal temperature to ensure doneness.
High heat for searing, then indirect heat to finish; check internal temps to confirm doneness.
How do I prevent foods from sticking?
Preheat and clean the grates, oil either the grate or the food lightly, and avoid turning food too early. Pat meats dry and use dry rubs to promote crust formation.
Preheat and oil the grates, pat dry, and let crust form before flipping.
Should I oil the grill or the food?
Oiling the grates helps prevent sticking; oiling the food can also aid browning. If you’re worried about flare-ups, oil the grates lightly and keep food well-spaced.
Oil the grates lightly to prevent sticking, or oil the food if you prefer; avoid heavy coatings.
How long should meat rest after grilling?
Rest meat for 5–10 minutes after cooking to allow juices to redistribute. Thicker cuts benefit more from longer rests.
Let meat rest for about 5 to 10 minutes to keep juices inside.
Gas or charcoal: which is better for beginners?
Gas grills are easier to control and start quickly, making them friendly for beginners. Charcoal offers more traditional flavor and heat dynamics but requires more setup and patience.
Gas is easier to learn on; charcoal gives classic flavor but needs more practice.
Watch Video
Quick Summary
- Know your heat zones and use direct vs indirect heat strategically
- Preheat, clean, and oil grates to prevent sticking
- Sear for crust, finish with indirect heat for even doneness
- Rest meat to retain juices and improve tenderness
- Always use a thermometer for safe, accurate doneness