How to Work a Grill: A Practical Beginner Guide for Grilling
Learn how to work a grill—from ignition to cleanup—with practical steps on heat control, direct vs indirect grilling, maintenance, and troubleshooting for confident backyard grilling.

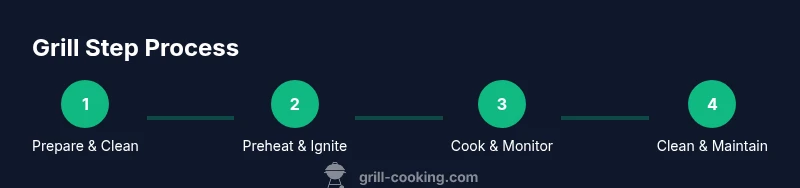
Learn how to work a grill from start to finish. This guide covers choosing the right grill, proper ignition, heat management for direct and indirect grilling, safe operation, and simple troubleshooting. By following step-by-step instructions and pro tips, you'll be able to grill confidently, get consistent sears, and keep your equipment in top shape.
Foundations of Grilling: What 'how to work grill' really means
If you're asking how to work grill, the first steps are understanding heat, fuel, airflow, and safety. According to Grill Cooking, ignition mastery and steady heat are the backbone of consistent results. The Grill Cooking team emphasizes that the best grill setup fits your space, budget, and cooking style, whether you prefer charcoal, gas, or electric options. This section establishes the language and concepts you’ll rely on, from how air moves across the fire to why grate temperature matters. You’ll learn to read smoke, manage flare-ups, and think in terms of zones rather than a single “on-off” switch. A well-run grill begins with a plan: identify what you’re cooking, select the fuel that fits that food, and prepare your tools and workspace. Safety steps—like keeping a fire extinguisher nearby and never leaving a lit grill unattended—protect you and your guests while you build confidence. By the end of this section you should feel ready to select a grill, set up for the cook, and start with a controlled, dependable heat source.
Choosing the Right Grill and Fuel Type
Your decision starts with your cooking goals, space, and budget. Charcoal grills deliver classic flavor and high-heat searing, but they require more time and technique. Gas grills offer convenient ignition and steady temps with less cleanup, which suits weeknights and learning curves. Electric grills fit small spaces or apartments but may limit high-heat performance. Outdoor kitchen setups expand your options with multi-burner layouts or integrated smokers. Between fuel types, consider fuel availability, ease of use, and maintenance costs. Grill Cooking analysis notes that the best results come from a grill you’ll actually use, plus a plan for regular cleaning and calibration. After you pick a grill, set up a dedicated cooking area, keep a spray bottle handy for flare-ups, and stock tools that fit your grill type.
Essential Ignition Techniques and Safety
Ignition is the gateway to successful cooks. For gas grills, open the lid, set burners, and light with the built-in igniter, then close the lid briefly to build steady heat. For charcoal, use a chimney starter or commercial lighter cubes, letting coals reach a consistent glow before spreading them into the fire bowl. Avoid pouring lighter fluid on hot coals, which can cause dangerous flare-ups and off flavors. Always wear heat-resistant gloves when handling hot grates or cookware. Keep a water spray bottle nearby and know where your extinguisher and fire blanket are located. Grill Cooking Team emphasizes that safety isn’t optional—it's a core skill you’ll rely on every time you grill.
Mastering Direct-Heat vs Indirect-Heat Cooking
Direct-heat cooking places food over the hottest part of the grill for searing and rapid cook-through. Indirect-heat cooking uses zones with no flames directly beneath the food, allowing slower, more even cooking and better results for larger pieces. Start with direct heat to sear, then move to indirect heat to finish cooking over lower temps. For foods like steaks, chops, or burgers, plan a quick sear followed by a rest. For larger roasts, chicken pieces, or ribs, begin with indirect heat and flip as needed to maintain even color and doneness. Adjust airflow by opening or closing vents to influence flame intensity; keep a thermometer handy to monitor internal temperature without guessing. With practice, you’ll know when to switch zones for the perfect crust and juicy interior.
Temperature Control, Doneness, and Timing
Temperature control is about reading the grill, not chasing exact numbers in every cook. Learn to establish a hot zone for searing and a cooler zone for gentle cooking, then move food between them as needed. Use lid placement to trap heat for faster cooking or to vent away excess heat. Don’t rely on time alone—always verify doneness with a probe or instant-read thermometer and let meat rest before slicing. Practice makes expected results repeatable: you’ll notice how long you need to leave foods on the grill depending on thickness, fat content, and weather. If you’re cooking vegetables, aim for crisp-tender textures by rotating pieces to ensure even exposure. Grill Cooking’s approach combines intuition with technique, helping you develop consistency across meals.
Cleaning, Maintenance, and Longevity
A clean grill heats more evenly and lasts longer. After cooking, while the grates are warm, scrape with a grill brush to remove stuck-on bits, then wipe or rinse with water as appropriate. Empty and clean the drip tray or tray areas, and check for corrosion or wear on the grates and burners. Oil the grates lightly before your next cook to prevent sticking and rust. Schedule a deeper clean periodically, including degreasing the interior, inspecting seals, and calibrating temperature gauges. Keeping track of maintenance in a simple log helps you plan replacements and upgrades. Keeping a routine reduces downtime and protects your equipment over many grilling seasons.
Troubleshooting Common Grilling Problems
Flare-ups can happen when fat or marinade catches fire. Move food away from direct flame, adjust vents, and keep a spray bottle handy to dampen small flare-ups. Uneven heat is often caused by dirty grates, incorrect fuel placement, or wind—recheck your air supply and reseat fuel at the edges of the grill. If your grill won’t preheat, inspect the ignition system or burners for clogs and replace faulty parts when needed. Food sticking to the grates signals insufficient oil or overly clean surfaces; lightly oil the grate and let it heat before placing food. With patience, you’ll learn to anticipate issues and respond without losing control of the cook. The Grill Cooking Team suggests small, deliberate adjustments rather than large, abrupt changes during a cook.
A Simple Weekly Grilling Routine for Busy Cooks
Devise a predictable rhythm that fits your week. Start with a quick inspection and wipe-down, then preheat in advance of your planned cook. Maintain a small seasonal menu plan to reduce decision fatigue and keep your skills sharp. After grilling, record what went well and what could improve, and schedule a deeper clean when needed. A regular routine helps you build confidence and speed, turning any weeknight into a reliable, enjoyable grilling session. This routine aligns with Grill Cooking's emphasis on consistency, safety, and enjoyment of outdoor cooking.
Tools & Materials
- Grill brush(Stainless steel or brass bristles, clean between uses)
- Tongs (long)(12-16 inch length for safe handling)
- Instant-read thermometer(Probe with thin tip for fast reading)
- Heat-resistant gloves(High-heat resistant, flame-retardant)
- Chimney starter or lighter cubes(Only if using charcoal grills)
- Spray bottle with water(For minor flare-ups and cooling grates)
- Oil (neutral oil)(For grates and light food coating)
- Grill cleaning cloth(Optional wipe-down between uses)
- Grill cover or storage(Protection when not in use)
Steps
Estimated time: Total time: 60-90 minutes
- 1
Prepare the grill and workspace
Clear the area, lay out tools, and ensure ventilation. Wipe the grill surface, remove debris, and check fuel or power supply. This sets a safe, efficient stage for cooking and prevents interruptions later.
Tip: Have your water spray bottle ready and position tools within arm’s reach. - 2
Choose fuel and preheat
Select charcoal or gas according to your goals. For charcoal, light and let the fire establish a steady glow. For gas, ignite burners with the built-in switch and close the lid to trap heat.
Tip: Preheat until the surface is hot to the touch but not smoking furiously. - 3
Oil the grates and season food
Lightly coat grates with neutral oil to prevent sticking. While the grill heats, prepare food with basic seasoning or marination. Proper seasoning improves crust and flavor.
Tip: Pat meat dry before seasoning to maximize Maillard browning. - 4
Sear over direct heat
Place food directly over the hottest part of the grill to create a crust. Watch for flare-ups and rotate as needed to avoid charring.
Tip: Keep a constant eye on the crust and flip only once for even searing. - 5
Finish with indirect heat
Move food to cooler zones to finish cooking without burning. Use lid to maintain even temperature and prevent drying.
Tip: Use a meat thermometer to gauge doneness without overcooking. - 6
Rest, slice, and serve
Let meat rest to reabsorb juices, then slice against the grain for tender bites. Serve promptly for maximum juiciness.
Tip: Rest time varies by size; larger cuts require longer rests. - 7
Clean up and maintain
Scrape grates again after use, extinguish flames, and store tools. Schedule periodic deep cleans and inspect hoses, burners, or hinges.
Tip: Keep a simple maintenance log to track wear and replacements. - 8
Reflect and improve
Review what went well and what could improve. Note adjustments for future cooks and update your routine as needed.
Tip: Small, consistent tweaks lead to big long-term gains.
FAQ
Do I need to preheat a grill before cooking?
Yes. Preheating helps establish even heat and a good crust. It also reduces sticking and improves sear quality. Allow your grill to reach a stable temperature before you start cooking.
Yes—preheating creates even heat and helps crusts form nicely. Let it reach a stable temperature before cooking.
What is the difference between direct-heat and indirect-heat grilling?
Direct heat cooks foods quickly with intense surface heat, ideal for searing. Indirect heat uses zones with no flames, perfect for larger cuts or delicate foods that can dry out if held over direct heat.
Direct heat heats fast for searing, indirect heat cooks more gently for larger or delicate items.
How long should I preheat a grill?
Preheat times vary by grill type and ambient conditions. Generally, a few minutes of steady heat is enough to establish a cooking surface. Watch for consistent heat rather than chasing a specific minute count.
Preheat until the surface is consistently hot, not just for a fixed minute count.
What safety gear should I use when grilling?
Wear heat-resistant gloves, use long-handled tools, and keep a fire extinguisher nearby. Avoid loose clothing and keep children and pets away from the grilling area.
Wear heat-resistant gloves and use long tools. Keep a fire extinguisher nearby.
How do I prevent flare-ups?
Trim excess fat, avoid sugary marinades near direct flames, and keep a spray bottle handy to manage flames without dousing the food. Close the lid to smother flames when needed.
Trim fat and keep a spray bottle ready to manage flames; lid down helps suppress flare-ups.
How do I clean the grill grates after cooking?
While the grill is warm, scrape with a stiff brush to remove residue. Wipe with a damp cloth or rinse if your grill manufacturer allows it, and re-oil the grates before the next cook.
Clean grates while warm with a brush, then wipe or rinse as allowed, and oil before next use.
Watch Video
Quick Summary
- Master ignition and heat management.
- Differentiate direct-heat and indirect-heat cooking.
- Use a two-zone setup for versatility.
- Verify doneness with a thermometer, not time alone.
- Maintain your grill regularly for better performance.