Learn How to Grill Classes: A Home Cooks Guide to Skillful Grilling
Discover how to enroll, prepare, and succeed in grilling classes. This comprehensive guide covers choosing the right program, building essential skills, and turning classroom lessons into confident, flavorful grilling at home.

Learn how to grill classes by understanding what they cover, how to choose a course, and how to apply what you learn to real grilling sessions. This guide walks you through selecting a program, evaluating instructors, preparing equipment, and scheduling practice time so you can level up your charcoal and gas grilling skills.
Why Learn Through Grilling Classes
Learning to grill through structured classes accelerates your journey from novice to confident cook. In a well-designed course, you’ll move beyond ad-hoc grilling attempts to a repeatable method that yields consistent results, no matter the cut or fuel you choose. According to Grill Cooking, hands-on instruction helps you translate theory—heat control, smoke management, sanitation, and timing—into tangible skills you can apply in your own backyard. By observing experts in action, receiving immediate feedback, and practicing under safe supervision, you reduce the guesswork that often leads to overcooked meat or uneven sear marks. For most home cooks, the fastest path to improvement is a combination of guided demonstrations and deliberate practice. Classes also demystify equipment choices, helping you select the right grill, heat source, and accessories for your goals. You’ll learn to read meat temperatures, manage direct and indirect heat, and adjust seasoning for different proteins. The payoff is not just better food; it’s greater confidence, fewer wasted ingredients, and a more enjoyable grilling routine that you can repeat every weekend.
How to Choose the Right Grilling Class
With dozens of options, picking the best class starts with clarity about your goals. Decide whether you want beginner fundamentals, advanced techniques like multi-zone cooking, or specialized topics such as smokers and pellet grills. Look for courses that emphasize hands-on time rather than a lecture-only format. Check the instructor’s credentials and the class size; smaller groups usually mean more direct mentoring. Consider the schedule, location, and duration of each session, and compare pricing in relation to what’s taught. Helpful signals include a defined syllabus, milestones, and opportunities for Q&A. If possible, read recent reviews from home cooks with similar goals. Finally, confirm safety policies and equipment rules—some programs require you to bring protective gear or specific tools. A quality program will provide a clear progression, starting with fundamentals and advancing to refined techniques, with measurable benchmarks to gauge progress over weeks or months.
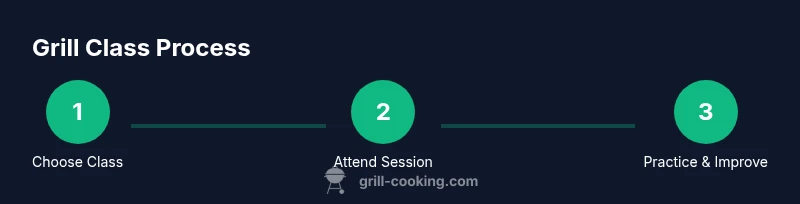
What a Typical Class Looks Like
Most grilling classes begin with a safety briefing and a quick equipment check, followed by a live demonstration of a core technique. In a well-run session you’ll participate in several rounds: searing, indirect cooking, and finishing with sauces or rub application. Instructors narrate decisions aloud—why you choose direct heat for a crust, or why you close the lid to build pull with smoking—and then invite you to try the steps yourself. Expect a run-through of temperature targets, timing cues, and plate presentation. You’ll taste results as a group, discuss variables like grill temperature, fuel type, and ambient wind, and receive targeted feedback. Many programs incorporate short quizzes or practice challenges to reinforce learning. Even a single class can shift your approach, making you more deliberate about heat zones, rest time, and restocking your grill toolkit. Remember that consistency comes from repetition, not a single spectacular outcome.
Essential Gear and Prep Before Class
Before you walk into the first class, assemble a practical gear set and prepare your kitchen workflow. The basics include heat-resistant gloves, a reliable digital thermometer with a probe, long-handled tongs, a sturdy spatula, a sharp knife for prepping, and an apron to stay clean. You’ll likely need a reliable instant-read thermometer, a grill brush for cleanup, and a portable timer to track resting times. Bring a notebook or a mobile device to jot down notes and a small bottle of oil or a spray bottle for even seasoning. Pack a water bottle and maybe a few sample ingredients to experiment with after class. If your class uses specific rubs or sauces, confirm whether these are provided or if you should bring your own, and ensure you’re not bringing any prohibited items into the cooking area. Packing smartly helps you focus on learning rather than scrambling for tools.
Skills You'll Build in Classes
Grilling classes develop a suite of practical skills that transfer directly to home cooking. You’ll gain confident heat management across direct and indirect zones, learning to read grill cues and regulate airflow. You’ll practice searing to achieve crusty surfaces while preserving juiciness, and you’ll understand when to flip, rest, or apply a finishing glaze. You’ll also build timing discipline—coordinating seasoning, temperature changes, and resting periods so each course finishes at the same time. Safety habits become second nature, from handling hot grates to managing flare-ups. Finally, you’ll refine flavor development through rubs, marinades, sauces, and concentration on sauce-building balance. As you progress, you’ll create a personal technique map: the best process for chicken thighs, the trick for steak crust, the art of low-and-slow for ribs, and a reliable method for vegetables.
Practice Beyond the Class
Because skill grows with deliberate practice, a robust plan outside of class is essential. Schedule short practice sessions during the week, focusing on one technique per block. Start with a simple protein and recreate your class steps, gradually introducing variation in thickness, fat content, and cut. Keep a practice log: note the grill temperature, fuel type, weather conditions, and your timing decisions. Capture photos of results to assess crust, color, and doneness. Use a thermometer to verify internal temps and compare outcomes against your target. If you can, set up a home practice station with a dedicated grill zone, tongs, a cutting board, and a timer. End each week with a quick review of what worked and what didn’t, then adjust your upcoming practice plan accordingly.
Common Mistakes and How to Avoid Them
New grillers often fall into predictable traps that derail progress. Common mistakes include neglecting heat management (failing to establish a stable flame or air flow), overcrowding the grill (which stifles crust formation), and skipping the rest period that seals in juices. Another frequent error is relying on time alone rather than internal temperatures. Don’t forget sanitation: dirty grates and cross-contamination threaten flavor and safety. Finally, beginners sometimes assume every meat performs the same on the grill; learn the temperature targets for different proteins and plan the process around those targets. The antidote is a deliberate, repeatable routine: preheat, monitor, flip once, rest, and plate with intention. Small, repeated improvements compound into dramatic gains over a few weeks.
How to Get the Most from Instructors
Maximize your learning by engaging actively with your instructor. Ask specific questions, pause to take notes, and request demonstrations for any technique that isn’t clear. Bring a short list of goals and be prepared to discuss what success looks like for you. Respect class safety rules, but don’t be shy about seeking feedback: ask for video tips or slower, staged explanations. After class, review your notes, compare the outcome with the instructor’s guidance, and record adjustments you plan to try next time. A good instructor provides a roadmap, not just recipes; use their feedback to build a personalized practice plan.
Building a Personal Grilling Plan
Concluding your introductory journey with a personal plan guarantees continuous improvement. Start with a four-week cycle: week one mastering direct-heat searing, week two refining indirect cooking, week three experimenting with rubs and sauces, and week four combining all elements into a complete meal. Set concrete benchmarks for each week—temperature targets, crust quality, and resting times—so you can measure progress. Schedule weekly practice blocks, aiming for at least two sessions per week if possible. Maintain your notes in a dedicated notebook or app, and review your results every Sunday to decide what to adjust for the next cycle. The key is consistency: small, regular steps beat sporadic, intense bursts of effort.
Tools & Materials
- Heat-resistant grilling gloves(FDA-grade or silicone; 400°F+ protection)
- Digital instant-read thermometer(Probe thermometer with fast response)
- Long-handled tongs(12-inch or longer for safe handling)
- Grill brush and scraper(Stiff-bristle-free preferred; clean grates)
- Meat thermometer or probe with continuous read(Helpful for accuracy during practice)
- Chef’s knife and cutting board(For prepping meat and vegetables)
- Apron(Protect clothing; keep charcoal dust off)
- Spray bottle or oil mister(Lightly oil grates or food for even searing)
- Notebook or cooking journal(Record temps, timings, outcomes)
- Chimney starter or charcoal basket(Only if using charcoal grills)
- Gas grill accessories (as applicable)(Tools recommended by instructor)
Steps
Estimated time: 6-8 weeks
- 1
Clarify your grilling goals
Identify which proteins, techniques, and flavors you want to master. Write clear, measurable goals (e.g., perfect ribeye crust, 125°F chicken, 2-zone heat mastery) and align them with the class you choose. This clarity guides your practice and helps instructors tailor feedback.
Tip: Set SMART goals and revisit them after each class cycle. - 2
Find suitable classes
Compare beginner and intermediate options, check the format (hands-on vs demonstration), class size, and instructor credentials. Read reviews from cooks with similar goals and verify safety and equipment policies before enrolling.
Tip: Claim at least one practical takeaway per session when selecting a course. - 3
Check gear requirements
Review what you must bring and what is supplied. If you’re missing fundamental tools, acquire them before the first class to avoid delays. Ensure you have appropriate clothing and a supportive chair or table for notes.
Tip: Bring a small tasting sample and a notebook for quick reflections. - 4
Register and pre-read
Complete registration and review any pre-class materials or safety guidelines. Some programs require medical forms or consent to fire safety rules. Completing these in advance keeps the class on schedule.
Tip: Ask the coordinator for a pre-class checklist and syllabus ahead of time. - 5
Attend with a learning plan
Arrive early, participate actively, and follow the instructor’s demonstrations. Take notes on technique, temperature targets, and timing cues. Practice what you learned after the session using your own gear.
Tip: Take notes on one technique per session to avoid overload. - 6
Practice between sessions
Schedule regular practice blocks and repeat core steps, introducing slight variations in cut, fat, or rub. Use a practice log to track outcomes and adjust your plan weekly.
Tip: Aim for consistent practice 1–2 times per week. - 7
Record results and feedback
Document outcomes, temps achieved, crust quality, and any instructor feedback. Use photos and temps to compare progress over time and refine your technique map.
Tip: Solicit specific feedback right after a session for precise improvements. - 8
Build a personal grilling plan
Create a four-week plan focusing on direct heat, indirect heat, seasoning, and sauce balance. Schedule weekly practice blocks and set measurable milestones to keep you moving forward.
Tip: Treat each cycle as a mini-project with clear goals and a demo-ready result.
FAQ
What exactly is a grilling class and what does it cover?
A grilling class is a guided, hands-on learning session that teaches heat control, equipment use, food safety, and flavor development. Expect demonstrations, practice rounds, and feedback from an instructor. Topics vary by level and focus, from fundamental searing to advanced indirect grilling and sauces.
A grilling class is a hands-on learning session with demonstrations, practice, and feedback to improve heat control, safety, and flavor.
Do I need prior experience to join a class?
Most programs accommodate different skill levels. Beginners typically start with fundamentals, while advanced students tackle multi-zone cooking or smokers. Check the course description to match your current comfort level.
Most classes accept beginners, but check the level to ensure it matches your skills.
What should I bring to my first class?
Bring any required protective gear, a notebook, a pen, and a positive attitude. If the program lists specific tools, check whether they’re provided or you should bring your own. Dress for heat and wind, with close-toed shoes.
Bring protective gear, a notebook, and any required tools; wear safe clothing.
How long does it take to see progress from grilling classes?
Progress varies by individual practice, but most students notice improved control and flavor within a few weeks of regular practice. Consistent feedback and deliberate practice accelerate results.
Most people notice quicker progress within weeks with steady practice and feedback.
Are online grilling classes as effective as in-person ones?
Online formats can teach theory and techniques, but hands-on feedback is often limited. If you choose online, supplement with live practice and seek feedback from a local mentor or partner chef.
Online lessons work for theory, but hands-on feedback is best from in-person classes.
Watch Video
Quick Summary
- Define clear grilling goals before enrolling.
- Choose a program with hands-on practice and milestones.
- Prepare essential gear and arrive ready to learn.
- Practice regularly between classes to reinforce skills.
- Track results and adjust your plan for continuous improvement.