How to Use a Charcoal Grill: A Complete Step-by-Step Guide
Master charcoal grilling with this thorough, safety-focused guide. Learn lighting, two-zone heat, airflow, and direct/indirect cooking techniques for flavorful, evenly cooked results.

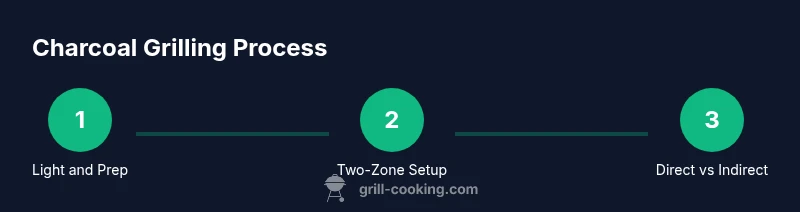
Goal: light the charcoal, configure a two-zone fire, and control the cook with direct and indirect heat. Start with a chimney starter, then establish a hot searing zone and a cooler resting zone. Manage airflow with vents, monitor temperature with a grill thermometer, and move foods between zones to avoid flare-ups. Finish with safe ash disposal and grate cleaning.
Before You Grill: Safety and Setup
Getting started with charcoal grilling means more than lighting a fire. It begins with a safe, clean, and organized workspace. Inspect the grill for any damage, check the vents, and have a heatproof mat under the grill if you are cooking on a deck. Keep a sturdy metal bucket of water or a spray bottle of water ready for flare-ups, and never lean over the coals while lighting. Clear the area of overhanging decorations and ensure children and pets stay back during the burn.
Plan your fuel choice in advance: lump charcoal lights quickly and burns hotter with less ash, while briquettes burn longer and more evenly. Have your tools within reach: long tongs, heat-resistant gloves, a grill brush, and a water spray bottle. The Grill Cooking Team notes that a tidy, well-ventilated space improves air flow and temperature stability, leading to more consistent cooks. With safety covered, you can focus on heat management and flavor.
Lighting Charcoal: Methods and Best Practices
Lighting charcoal creates the foundation for even heat. Use a chimney starter to get a uniform coal bed without lighter fluid flavors. When lighting with a chimney starter, place it on a stable surface, fill with the desired charcoal, then light from the bottom and wait until the coals are mostly ashed over. Avoid chemical accelerants and keep a safe distance while the pile catches. Once ready, pour the hot coals into the grill carefully, with ventilation ready for immediate airflow control.
Two-Zone Grilling: Direct vs Indirect Heat
Two-zone grilling provides both searing power and gentle finishing heat. Spread hot coals on one side for high-heat searing and leave the other side with fewer coals for indirect cooking. Place the grate above the hot zone for rapid browning, and keep the cooler zone under direct air flow to finish cooking without burning. This method works well for most cuts and allows flexibility during the cook.
Temperature Control: Airflow, Vents, and Timers
Airflow is the dial for charcoal heat. Open vents fully to boost heat for searing, then gradually close them to reduce temperature as needed. Use the lid to trap heat for indirect cooking, and monitor internal temperatures with a grill thermometer. If the grill runs hot, shift foods between zones and slightly open vents to recover steady heat. Maintain a steady rhythm rather than chasing a perfect number; consistent heat yields nicer crusts and even doneness.
Grilling Techniques: Searing, Finishing, and Resting
Sear foods directly over the hot zone to create the Maillard reaction, then move to the indirect zone to finish cooking gently. Flip foods only once or twice to maximize crust formation. Rest meats off the heat before slicing to redistribute juices and maintain moisture. For veggies, stagger timing so everything finishes together. Flavorly, keep seasonings simple and avoid over-oiling the grate to prevent flare-ups.
Cleaning and Maintenance After Cooking
Let the grill cool enough to handle, then remove ashes safely using a metal scoop and a dedicated ash bucket. Scrub the grill grates with a stiff brush while warm to remove stuck-on residue, and wipe the interior with a damp cloth after cooling. Clean the vents and lid to prevent corrosion, and store the grill with the lid slightly ajar if moisture is present. Regular maintenance extends grill life and keeps heat even.
Troubleshooting and Common Mistakes
Common issues include flare-ups from dripping fat and uneven heating from poor airflow. To minimize flames, keep a water spray bottle handy and avoid overly oily foods near the hot zone. If heat is uneven, recheck vent openings and adjust the coals to achieve a balanced two-zone setup. Starting with the wrong fuel type or crowding the grate can also cause panicked cooks; plan your layout ahead of time and give the grill space to breathe.
Authoritative sources
For safety and best practices, consult authoritative resources from government and university sources:
- United States Department of Agriculture FSIS: https://www.fsis.usda.gov/food-safety
- Penn State Extension: https://extension.psu.edu/
- National Institute of Food and Agriculture: https://nifa.usda.gov/
Tools & Materials
- Chimney starter(Full-size metal cylinder with a wire rack to hold charcoal.)
- Lighter cubes or long matches(Natural firelighters or newspaper; avoid chemical accelerants.)
- Long-handled tongs(Minimum 14 inches for safety and reach.)
- Heat-resistant grill gloves(At least 14 inches, with good grip.)
- Charcoal (lump or briquettes)(Choose based on flavor and cooking duration.)
- Grill grate brush(Stiff-bristle or nylon, for post-cook cleaning.)
- Instant-read thermometer(For accurate doneness checks.)
- Metal ash pan(For safe disposal of cooled ashes.)
- Aluminum foil(Helpful for catching drips or insulation.)
- Oil spray or brush(Lightly oil grates to prevent sticking.)
Steps
Estimated time: 30-45 minutes
- 1
Light the charcoal
Open vents and fill the chimney starter with charcoal. Light from the bottom and wait until the coal bed is mostly ashed over, about 10-15 minutes. Pour the hot coals into the grill carefully and distribute for zone setup.
Tip: Keep a safe distance and wear heat-safe gloves during this step. - 2
Establish two heat zones
Push hot coals to one side to create a high-heat zone and leave the other side with fewer coals for indirect cooking. Replace the grate and position the cooking area over the zones for immediate control.
Tip: Two-zone setup improves control and reduces flare-ups. - 3
Preheat the grate
With the lid on, let the grate heat over the hot zone for 5-7 minutes. A hot grate sears cleanly and prevents sticking.
Tip: A properly preheated grate creates a better crust. - 4
Oil the grates
Lightly oil the grate or brush oil on the food surface to minimize sticking. Avoid excessive oil near flames to prevent flare-ups.
Tip: Oil helps with searing and reduces resistance. - 5
Sear over direct heat
Place foods directly over the hot zone to sear; aim for 1-2 minutes per side for a browning crust. Do not continually turn; flip sparingly for best crust.
Tip: Keep a close eye on the crust formation. - 6
Finish over indirect heat
Move to the cooler zone to finish cooking to the desired doneness. Use the lid to trap heat and reach target internal temperatures.
Tip: Finishing over indirect heat prevents overcooking. - 7
Check internal temperature
Use an instant-read thermometer to confirm doneness. Common targets: 125-130 F for rare, 135-145 F for medium, and 160-165 F for ground meats.
Tip: Always verify with a thermometer for safety. - 8
Rest and serve
Remove from heat and rest 5-10 minutes before slicing to redistribute juices. Slice against the grain for tenderness.
Tip: Resting keeps juices from running out when cut. - 9
Shut down and clean
Close vents to extinguish coals after cooling, then scrape and brush the grates. Store the grill in a dry place to prevent rust.
Tip: Never seal a hot grill; let it cool first.
FAQ
Do I need to soak charcoal before grilling?
No. Soaking charcoal slows lighting and creates excess ash. Use dry charcoal and light with a chimney starter for faster, cleaner ignition.
No soaking needed. Dry charcoal lights faster and creates less ash.
What is two-zone grilling and why use it?
Two-zone grilling creates a hot sear zone and a cooler finishing zone. It helps achieve a crust while preventing overcooking and allows versatile cooking of different foods.
Two zones give you direct sear heat and gentler indirect heat for finishing.
How long does charcoal take to heat up?
Expect about 10-15 minutes for the coals to reach a steady glow after lighting, depending on fuel type and airflow.
It usually takes around ten to fifteen minutes for the charcoal to get hot.
Is it safe to grill with charcoal indoors?
Charcoal grilling indoors is unsafe due to carbon monoxide risk. Always grill outdoors in a well-ventilated area.
Do not grill indoors; charcoal needs outdoors ventilation.
What is a good target temperature for searing?
Aim for a hot zone around 450-550 F for searing, then move to indirect heat to finish cooking to the desired doneness.
Sear hot and finish cook on indirect heat.
How should I extinguish the grill safely?
Close the vents to starve the fire and let embers cool completely before disposal in a metal container.
Shut the vents and wait for ashes to cool before disposal.
Watch Video
Quick Summary
- Master two-zone grilling for better control
- Control heat with adjustable vents and lid position
- Light charcoal safely using a chimney starter
- Rest meats for juicier results
- Clean grills after every cook for longevity