Starting a Charcoal Grill with a Chimney: Step-by-Step Guide
Master the skill of lighting a charcoal grill with a chimney starter. Step-by-step instructions, safety tips, airflow control, and clean-up hacks from Grill Cooking to help home cooks achieve even heat and flavorful results.

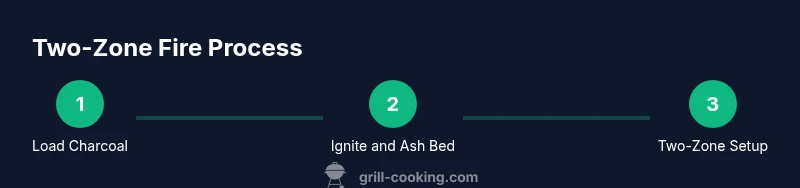
You’ll light a charcoal grill with a chimney starter, create a two-zone fire for direct and indirect heat, and preheat the grill before cooking. You’ll need a chimney starter, charcoal, lighter material, gloves, tongs, and a stable workspace. This method delivers fast, even ignition and better control over temperature.
Understanding Chimney Starter Basics
A charcoal chimney starter is a simple, efficient tool designed to light charcoal quickly and evenly without relying on lighter fluid. By drawing air through the charcoal from below, the chimney creates a hot, consistent core of burning coals. This makes starting a charcoal grill with a chimney much cleaner and more predictable than traditional lighter methods. For home cooks, the chimney approach reduces flare-ups and speeds up the time to heat, so you can get to the grill sooner with less guesswork. In practice, you’ll fill the chimney with your preferred charcoal (lump or briquettes), light a small starter under the bottom, and let the fire breathe until the coals are ashy and ready to dump into the grill. Grill Cooking’s guidance emphasizes technique and safety to help you achieve reliable results every session.
Safety Considerations Before You Light
Before you ignite the charcoal, take a moment to set up a safe grilling station. Use a nonflammable surface away from dry grass, low-hanging branches, or any combustibles. Wear heat-resistant gloves and long tongs to handle hot coals, and keep a spray bottle handy for managing minor flare-ups. Ensure children and pets are at a safe distance. Ventilation matters: use the grill outdoors with clear air, and avoid enclosed spaces where smoke can accumulate. If you’re new to starting a charcoal grill with a chimney, follow local fire safety guidelines and keep a small fire extinguisher within reach. By prioritizing safety, you protect yourself and those around you while you build confidence with your gear.
What You Need Before Lighting
Gather all essential tools and ingredients before you start. You’ll want a chimney starter filled with charcoal, crumpled newspaper or natural fire starters, long grill tongs, heat-resistant gloves, and a sturdy surface to work on. Have a charcoal brush for cleanup and a timer or watch to monitor ignition. If you plan to monitor temperature, an instant-read thermometer or grill thermometer helps you track the heat accurately. Keep a small bucket of water or sand nearby for quick, controlled actions if needed. With everything within reach, you’ll streamline the process of lighting and managing the fire when starting a charcoal grill with a chimney.
Setting Up the Chimney Starter for Even Burn
Start by randomly loading the chimney with your chosen charcoal, aiming for a loose, even distribution rather than packing it tight. Do not overfill beyond the top, and leave some vertical space for air to flow. Place dry newspaper or a fire starter under the bottom section of the chimney and light it from multiple points to ensure a quick, consistent ignition. Give the chimney a gentle shake after the first few minutes to help any clumps break apart and promote even burning. The goal is a core of glowing coals with a light ash coating forming on their surface, indicating a steady burn is underway.
Lighting the Chimney Starter
As soon as you light the starter under the chimney, keep hands and face away from the hot metal and let the flames climb through the charcoal. Expect the process to take several minutes; you’ll know it’s ready when the top coals are gray with ash and there’s a steady glow in the center. When the coal bed has formed, carefully dump the hot cinders into the grill grid, spreading them to create a two-zone fire. Secure the lid or close vents on the grill to help control airflow as you transition from ignition to steady cooking temperature. This method minimizes fuel waste and promotes even startup.
Building a Two-Zone Fire for Versatile Grilling
A two-zone fire gives you a direct, high-heat zone for searing and an indirect zone for slower cooking or resting. Once the coals are dumped, arrange them on one side of the charcoal grate to form a compact hot area and leave the opposite side clear for indirect cooking. This setup lets you get a quick sear on items like steaks or chops and then move them to the cooler zone to finish without burning. If you’re grilling thinner cuts, you can use the hot edge for a fast sear and then slide the meat to the cooler area to reach the desired internal temperature without overcooking.
Transferring Coals and Preheating the Grill
Spread the hot coals evenly to establish the two zones, then place the cooking grate back on the grill. Open the vents fully for the initial preheat and close them gradually to reach your target temperature. Allow the grate to heat for 5–10 minutes with the lid closed, which sears the surface and helps burn off any residual moisture. After preheating, wipe the grate clean with a brush to prevent sticking, then oil lightly to promote even browning. This preparatory phase sets the stage for consistent results when you start cooking with confidence.
Temperature Control During Cooking
Temperature management hinges on airflow. Opening vents increases oxygen, raising the temperature; closing vents reduces airflow and lowers the heat. For high-heat searing, keep the vents wide open and monitor combustion. For longer cooks, maintain a steady mid-range by balancing the intake and exit vents. If you notice excessive smoke or flare-ups, briefly relocate food to the indirect zone and close the lid to stabilize the temperature. Practice and patience pay off, enabling you to dial in precise heat when starting a charcoal grill with a chimney.
Troubleshooting Common Issues
If the chimney starter seems slow to ignite, check for damp paper or improper lighting; replace the fuel and light again. Wind can blow out flames, so shield the setup with a windbreak or position the grill in a protected area. If you dump the coals and they aren’t evenly ashy, shake the grate gently to reposition and ensure consistent contact with the hot surface. For stubborn flare-ups, move the meat to the indirect side and use a spray bottle with water or a small amount of oil to manage the flames. By identifying the common causes and adapting your method, you’ll become adept at starting a charcoal grill with a chimney in varying conditions.
Cleaning, Storage, and Maintenance
After cooking, let the grill cool completely before cleaning. Remove ash promptly and store the chimney starter and tools in a dry place to prevent rust. Inspect the grate, replace any worn grates or components, and wipe down surfaces with a mild cleaner. Regular maintenance, including oiling the grates and checking vents for obstructions, extends the life of your equipment and keeps your grilling sessions efficient. A consistent cleaning routine also reduces flavor carryover between cooks, helping you deliver cleaner, more consistent results when starting a charcoal grill with a chimney in future sessions.
Tools & Materials
- Charcoal chimney starter(Choose a sturdy metal model with a solid handle and a grate at the bottom)
- Charcoal (lump or briquettes)(Select based on flavor preference; use a mix for balance)
- Crumpled newspaper or natural fire starters(Newspaper should be dry; natural starters burn longer and cleaner)
- Long-handled tongs(For safe movement of hot coals)
- Heat-resistant gloves(At least 450°F/232°C protection)
- Grill brush(For cleaning the grate after preheating)
- Instant-read thermometer (optional)(Useful for verifying grill temperature during longer cooks)
Steps
Estimated time: 15-25 minutes
- 1
Gather and prep your equipment
Collect the chimney starter, charcoal, lighter materials, gloves, and tongs. Set up a stable workspace on a nonflammable surface outdoors. This initial setup prevents scrambling later and keeps you safe as you begin starting a charcoal grill with a chimney.
Tip: Place a metal tray under the setup to catch any falling embers and keep the area clean. - 2
Fill the chimney with charcoal
Loosely fill the chimney to the top without compacting. Loose packing allows air to flow and results in a more even burn. The goal is a full core of coals that ignite consistently.
Tip: Avoid overfilling; too much charcoal can smother the flame and slow ignition. - 3
Prepare the lighter fuel
Place crumpled newspaper or a natural fire starter beneath the chimney. Light it from multiple points to create an even ignition path. The flame should travel upward through the charcoal as it heats.
Tip: If using newspaper, keep it dry and avoid oversized sheets that smother the flame. - 4
Ignite and monitor
Light the starter and let the chimney burn until the top coals are coated with a light layer of ash, usually around several minutes. This indicates the coals are ready to dump and form a proper fire bed.
Tip: Stand back when you dump to avoid sudden flare-ups. - 5
Dump the coals into the grill
Carefully dump the hot coals into the grill, forming a two-zone fire by placing most coals on one side. This arrangement enables searing on the hot side and indirect cooking on the cooler side.
Tip: Spread the coals evenly to create a stable surface for the grate. - 6
Preheat the grate
Place the cooking grate back on and close the lid. Allow 5–10 minutes for the grate to heat before cooking. Preheating ensures better searing and reduces sticking.
Tip: Brush the grate clean and oil lightly before placing food on it. - 7
Adjust vents for temperature
Open the vents for hotter cooking and close gradually to reduce heat. Use a steady, controlled airflow to maintain the desired temperature during direct and indirect cooking.
Tip: Smaller adjustments yield bigger temperature changes; move slowly. - 8
Begin cooking on the appropriate zone
Sear items on the hot zone, then move them to the indirect side to finish. This approach balances rapid browning with controlled doneness and reduces the risk of burning.
Tip: Keep an eye on food thickness; thicker cuts benefit from more indirect time. - 9
Clean and store after use
Let everything cool, then clean the grate and ash bucket. Store the chimney starter and tools in a dry place to prevent rust and prolong life.
Tip: Regular cleaning reduces cross-flavor and makes future starts faster.
FAQ
What is a chimney starter and why use it?
A chimney starter is a metal cylinder that lights charcoal quickly by pulling air through the charcoal. It provides clean ignition without lighter fluid, helping you achieve an even heat and reducing flare-ups. This method is ideal for starting a charcoal grill with a chimney because it’s fast and reliable.
A chimney starter is a metal cylinder that lights charcoal quickly by pulling air through the fuel, giving clean ignition and even heat for reliable grilling.
How long should I let the chimney burn before dumping?
Let the coals burn until they’re coated with a light layer of ash on the outer edges and the center glows. This typically takes several minutes, but it varies with charcoal type and wind. Don’t rush the process; waiting ensures an even heat bed.
Wait until the coals are ashy and glowing in the center, which usually takes several minutes and varies by conditions.
How do I create a two-zone fire?
Dump the hot coals on one side of the grill, leaving the other side empty. This forms a high-heat zone for searing and a cooler indirect zone for finishing a cook or gentle roasting.
Put most hot coals on one side to create a direct and indirect cooking area.
Can I reuse ashes or should I clean after every cook?
Dispose of ashes when completely cool and clean the grate before the next cook. Regular cleaning helps prevent flavor carryover and ensures safer, more predictable heat.
Dispose of cool ashes and clean the grate; it helps prevent flavor transfer and keeps heat consistent.
What if it’s windy outside?
Wind can accelerate burns and cause unpredictable temps. Use a windbreak or shield the setup, and adjust vents slowly to maintain steady airflow.
Wind can change heat quickly, so shield the grill and adjust vents slowly.
Is a thermometer necessary?
A thermometer helps gauge grill temperature, especially for longer cooks, but you can estimate heat with vent adjustments and observation of the flame.
A thermometer is helpful for precise temps, but you can pilot temperatures with vents and observation.
Watch Video
Quick Summary
- Master the chimney starter for quick, clean ignition.
- Create a two-zone fire for versatile cooking.
- Control temperature with vents and airflow.
- Keep safety and cleanliness at the core of every cook.
- Practice makes consistent results when starting a charcoal grill with a chimney.