What Do You Need to Grill with Charcoal
Discover the essential gear, fuel options, and setup for charcoal grilling. A practical guide from the Grill Cooking Team for beginners and seasoned grillers.

This guide explains what you need to grill with charcoal: the right fuel (lump charcoal or briquettes), a reliable lighter or chimney starter, airflow-control tools, heat-safe gloves, and cleanup gear. You’ll learn setup, safety, and timing so you can start grilling confidently on your next outdoor cookout. What you’ll accomplish: assemble gear, light the fire, and cook with two-zone heat.
What you need to grill with charcoal
Grilling with charcoal begins long before the first flame. You don’t just dump charcoal into the grate—you assemble a complete setup that supports even heat, steady airflow, and safe handling. The essentials fall into four categories: fuel, ignition, tools, and protection. According to Grill Cooking, starting with quality fuel and a clean grate makes flavor development more predictable and grilling safer. Choose lump charcoal for faster lighting and higher heat, or briquettes for longer, steadier burns. For ignition, a chimney starter or dedicated lighter cubes work best and avoid excess lighter fluid close to hot coals. Essential tools include long-handled tongs, heat-resistant gloves, a spray bottle for flare-ups, and a grill thermometer (either a dedicated device or a grill-surface thermometer). Add a brush for cleaning, a pan for indirect cooking, and a drip tray for moisture management. With these basics, you can build a reliable two-zone fire and ramp up flavor with confidence.
Fuel options: lump charcoal vs briquettes
Charcoal fuels come in two main forms, each with distinct virtues. Lump charcoal is made from natural hardwoods, lights quickly, and delivers a lively, responsive burn with hotter spots—great for searing and quick cooks. Briquettes are uniform in size and composition, burn longer and more evenly, which helps when you’re cooking for a crowd or maintaining a steady temperature over extended periods. Your choice affects heat management, flavor, and cleanup. For most beginners, a mix of lump for the initial grill and briquettes to extend burn time works well. Always avoid treated or infused charcoals, which can impart unwanted flavors and smoke.
Lighting methods and ignition basics
Reliable ignition sets the foundation for a successful cook. A chimney starter is the easiest, cleanest option, delivering hot, evenly lit coals in minutes without chemical odors. If you prefer lighter fluid, use it sparingly and only with natural charcoal, never on a hot grill. For a safer start, place the starter on a heatproof surface, fill with charcoal, light from the bottom, and wait until the coals are mostly ashed over before spreading them. Remember that proper ventilation is essential—keep lids open while lighting, and close them only after the initial burn when you start cooking.
Tools and gear you should own
Beyond the basics, thoughtful gear makes charcoal grilling easier and safer. Long-handled tongs (12–18 inches) reduce burns, while a heat-resistant glove protects your hand when moving hot grates or coals. A digital thermometer or a grill-side thermometer provides real-time feedback on doneness without guesswork. A sturdy brush or scraper helps keep grates clean, which prevents sticking and preserves flavor. A spray bottle is handy for suppressing minor flare-ups without dumping water on hot coals. For indirect cooking or resting, a metal pan or cast-iron skillet can catch drippings and create flavorful havens for vegetables and sides.
Direct heat vs indirect heat: how to use both
Charcoal grilling shines when you use both heat zones. Direct heat is ideal for searing steaks, burgers, or chops—place the food directly over the hottest coals to achieve a caramelized crust. Indirect heat shines for larger cuts or items that require longer cook times—move them to the cooler side of the grill or set up a raised rack above the coals. Creating a two-zone setup lets you finish cooking with controlled airflow and less risk of scorching. Start with a hot direct zone to sear, then shift to indirect to finish through, with the lid on if possible to trap heat and keep temps steady.
Temperature control basics: vents, airflow, and placement
Vent control is the most powerful tool on a charcoal grill. Opening vents fully increases airflow, raising temperature and accelerating ignition; closing them slows the burn. Place the coals in a two-zone setup to create a hot zone and a cooler zone. Use the lid to trap heat when needed, and adjust vents on the lid and body to stabilize temperatures. A reliable thermometer helps you target temperatures for different foods and stages of cooking. Consistent airflow and careful heat management ensure predictable results and prevent overheating.
Safety first: handling hot coals and flare-ups
Working with hot coals requires respect for heat and proper gear. Always grill in a well-ventilated, outdoor area away from flammables. Wear heat-resistant gloves, use long tongs, and keep a spray bottle handy for minor flare-ups rather than pouring water directly onto hot coals. Never add lighter fluid to burning coals; if you need to start a new load, allow coals to cool partially before adding more fuel. Maintain a clear workspace and never leave a lit grill unattended with children or pets nearby.
Food prep and seasoning for charcoal grilling
Flavor comes from proper seasoning and smart prep. Dry rubs, marinades, and brines can be used well before grilling to heighten flavor; however, avoid salting heavy meat too early as it can draw moisture. Pat meats dry before seasoning to promote a good crust, and oil the grates lightly to prevent sticking. Let meat rest to room temperature for 15–30 minutes before grilling, and season again after searing if desired. For vegetables and sides, toss with a small amount of oil and salt and treat them as you would meat: high heat for quick searing or indirect heat for softer textures.
Managing heat zones during cooking
Two-zone cooking is essential for charcoal grilling efficiency. Keep hot coals on one side for searing and use the cooler side for slower, controlled cooking. Use lid placement to trap heat and regulate airflow, and adjust vents to maintain targets. When you flip or move food, work quickly to avoid heat loss. For cooks with multiple items, start them in order of duration, placing longer cooks on indirect heat and finishing with direct heat for a crust.
Finishing touches and resting meat
After cook time, rest proteins to redistribute juices and finish carryover cooking. Tent loosely with foil for 5–10 minutes, then slice and serve. Resting reduces moisture loss and yields a juicier bite, especially on thicker cuts. A light, final seasoning can brighten flavors just before serving. For vegetables, a final drizzle of olive oil and a pinch of salt can elevate taste after resting.
Cleaning, maintenance, and storage after grilling
Cleaning is essential to prolong grill life and flavor consistency. While the grill is warm (not hot), brush grates to remove residue. Empty ashes and clean the interior walls and vents to prevent buildup. Inspect the tool set and replace worn handles or brushes as needed. Store charcoal in a dry, sealed container to prevent moisture and mold. Regular maintenance, including a quarterly grate inspection and vent cleaning, keeps flavor profiles consistent across grills.
Tools & Materials
- Charcoal (lump charcoal or briquettes)(Choose based on flavor preference and burn rate)
- Chimney starter(Fast, even ignition without lighter fluid)
- Lighter or matches(If not using a chimney starter)
- Long-handled tongs(12–18 inches for safe handling)
- Heat-resistant gloves(Protect hands when moving coals or lifting the grate)
- Grill brush and scraper(Clean grates before and after cooking)
- Spray bottle(For gentle flare-up control (water appx. 5–10 sprays as needed))
- Instant-read thermometer(Tracks internal temps for accuracy)
- Drip pan or cast-iron skillet(Indirect-cooking support and flavor-building)
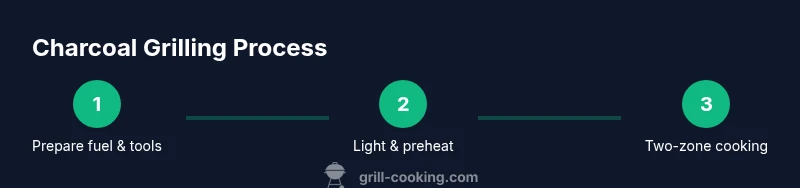
Steps
Estimated time: 45-60 minutes
- 1
Gather gear and fuel
Assemble charcoal, ignition method, tools, and safety gear. Check the grill for cleanliness and ensure you have a dry, ventilated space. Review your recipe and set up your two-zone layout before lighting.
Tip: Have a dedicated area for tools to avoid cross-contamination and keep flames contained. - 2
Set up a two-zone fire
Arrange the coals to create a hot zone for searing and a cooler zone for finishing. Use the indirect area for items that need even cooking without burning. Place a drip pan on the cooler side if you’re cooking liquids or vegetables.
Tip: A two-zone layout reduces hot spots and gives you flexibility during cook. - 3
Light the charcoal
Light the charcoal using a chimney starter or other ignition method. Wait until the coals are covered with light gray ash, which indicates they’re at peak ready. Spread them for the two-zone setup.
Tip: Avoid adding food until the flames settle to a steady glow. - 4
Preheat the grill
Close the lid to trap heat and preheat the grill surface. Ensure the temperature is suitable for your planned cook—higher heat for searing, moderate heat for finishing. Check with a thermometer if available.
Tip: Let the grill reach the target zone before placing food to ensure even cooking. - 5
Sear, then move to indirect
Sear food directly over the hottest area to develop crust, then transfer to the cooler zone to finish cooking through without burning. Keep an eye on flare-ups and move meat away if flames surge.
Tip: Pat dry before searing to promote a good crust and reduce steam during cooking. - 6
Monitor and adjust heat
Use vents and lid position to regulate airflow and maintain target temps. Flip as needed, avoid constant lifting of the lid, and rely on a thermometer for accuracy.
Tip: Small vent tweaks can dramatically shift temperature; make changes gradually. - 7
Rest and serve
Let meat rest after cooking to redistribute juices. Rest vegetables and smaller items briefly off-heat. Slice against the grain for tenderness and serve promptly.
Tip: Rest times vary by cut; longer rests for thicker steaks improve juiciness. - 8
Clean and store equipment
While the grill is warm, brush grates and clear ash. Clean tools and store fuel in a dry place. Proper maintenance improves flavor outcomes on future cooks.
Tip: Regular maintenance reduces buildup and keeps grill performance consistent.
FAQ
Do I need lighter fluid to start charcoal?
Not necessary if you use a chimney starter; it can be avoided entirely with proper ignition. If you do use lighter fluid, apply sparingly and allow it to burn off before cooking.
You can skip lighter fluid entirely if you use a chimney starter. If you do use it, use very little and let it burn off.
Which is better for flavor: lump charcoal or briquettes?
Both work well. Lump charcoal lights quickly and can add a brighter, more dynamic flavor, while briquettes burn longer and provide steady heat for longer cooks. Many cooks mix both to balance heat and burn time.
Both work; lump gives quick heat and bold flavor, briquettes burn longer for steady temps.
How long should I preheat a charcoal grill?
Aim for a 10–15 minute preheat period until the coals are glowing and covered in light ash. This ensures even heat distribution before you start cooking.
Preheat for about ten to fifteen minutes until the coals glow and ash over.
What temperatures should I target for searing vs cooking?
Use a high heat for searing to develop a crust, and switch to moderate heat for finishing. Rely on a thermometer for accuracy rather than guesswork.
Sear on high heat, finish on moderate heat, and use a thermometer to stay within target temps.
How do I control flare-ups safely?
Keep a spray bottle handy and move food away from flames temporarily. Close vents if flames get out of control and avoid pouring water onto hot coals.
Spray for flare-ups and move food to indirect heat; close vents if needed.
How should I clean the grill after charcoal grilling?
Brush the grates while warm to remove residue, empty ashes, and wipe down interior surfaces. Store charcoal in a dry container to prevent moisture and mold.
Brush while warm, empty ashes, and store fuel dry and sealed.
Watch Video
Quick Summary
- Assemble essential gear before lighting.
- Use two-zone heat for flexible cooking.
- Control airflow with vents for stable temps.
- Rest meat to maximize juiciness and flavor.