How to Put Charcoal in Grill: A Complete Step-by-Step Guide
Learn how to put charcoal in grill correctly—lump vs briquettes, chimney starter lighting, airflow, indirect heat setup, and essential safety tips for consistent, flavorful grilling.

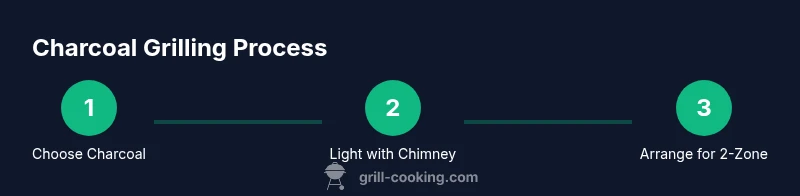
In this guide you’ll learn how to add charcoal to a grill correctly, whether you’re using lump charcoal or briquettes. We cover fuel choices, the chimney starter method, lighting techniques, airflow management, and essential safety steps to achieve even heat and minimize flare-ups. Follow these steps to reach your target temperature quickly and grill with confidence.
Essentials: Charcoal Types and Equipment
According to Grill Cooking, starting with the right fuel sets the foundation for successful grilling. Charcoal comes in two main forms: lump charcoal—irregular, fast-lighting chunks that burn hot and respond quickly—and briquettes—uniform shapes that burn longer with steady heat. Your choice depends on the recipe, timing, and personal preference. For searing at high heat, lump charcoal often delivers quicker flame and a crisper crust; for longer cooks, briquettes provide a predictable heat profile.
Beyond the fuel, you’ll need a few essential tools. A chimney starter is the fastest, cleanest way to light charcoal evenly without lighter fluid. Long-handled tongs, heat-resistant gloves, and a sturdy grill brush keep you safe during setup and cleanup. Consider an instant-read thermometer to monitor grill surface temps without lifting the lid. If you’re new to charcoal grilling, practice lighting and preheating with a small amount of charcoal to learn how quickly your grill responds in your environment. This section covers choosing charcoal, estimating quantities, and prepping your grill so you can put charcoal in grill with confidence.
Choosing Charcoal: Lump vs Briquettes
Your choice between lump charcoal and briquettes shapes the heat, ash production, and flavor. Lump charcoal is mostly wood, naturally, with irregular shapes that increase airflow variability but offer intense, high-heat searing. Briquettes are manufactured, uniform in size, and burn longer with steadier heat, which makes them ideal for low-and-slow cooks. Consider the cooking time, grill size, and weather when deciding. In windy conditions, briquettes’ uniformity helps, while lump charcoal can respond faster to temperature changes in a quick sear. Grill Cooking recommends testing a small batch of both types if you’re unsure; you’ll learn how each behaves in your grill and environment. Regardless of your choice, avoid burned or dusty charcoal—clean coals burn better and produce less soot on the grate.
Tools and Setup You’ll Need
Before you touch a match, gather the tools and materials. Essential items include:
- Charcoal (lump or briquettes) – the fuel that will heat your grill.
- Chimney starter – a dedicated device to light charcoal evenly without lighter fluid.
- Long lighter or matches – for a controlled ignition.
- Long-handled tongs – to move hot coals safely.
- Heat-resistant gloves – to protect your hands when the grill is hot.
- Grill brush – for cleaning grates before and after cooking.
- Instant-read thermometer – to monitor grate and air temperatures.
Optional but helpful:
- A lid with a built-in thermometer or an external thermometer for precise heat control.
- A fireproof heat shield or tray to catch ash and embers.
This section keeps you organized so you can proceed to lighting with confidence and stay safe while you learn how to put charcoal in grill.
Preparing the Charcoal: Steps Before Lighting
Prepare your charcoal by deciding on the cooking method. For quick, high-heat searing, fill the chimney starter about halfway with lump charcoal; for longer cooks, fill it to the top with briquettes. Break larger chunks into smaller ones if they won’t fit. If using briquettes, consider mixing in a few lump pieces to adjust heat and airflow. Pour the lit charcoal into the grill or use the chimney starter to load the hot coals onto the grate, depending on your setup. Remove any ash from the bottom of the grill so air can flow freely. Position the ashes to create an initial airflow path toward the vents for control. The aim is to create a stable bed of hot coals ready for top-down cooking. As you prepare, keep safety in mind: tie back hair, wear gloves, and keep flammable materials away from the grill.
Lighting Charcoal: The Chimney Starter Method
The chimney starter is the preferred method for fast, clean ignition. Fill the chimney with charcoal, place a few crumpled newspaper or a commercial starter below the base, and light the paper. The flames will climb through the charcoal until the briquettes or lumps glow with a light ash. When the smoke turns gray and the charcoal is coated in white ash, they are ready to transfer to the grill. Use heat-resistant gloves to lift the chimney, and dump the coals into the center for a two-zone setup or along the edges for indirect heat. Do not dump a chimney full of lit coals if your grill is not ready to receive heat. Allow a few minutes for the air to circulate after lighting to avoid fuel odor or flare-ups.
Arranging the Coals for Direct vs Indirect Heat
Direct heat: pile the hot coals in the primary cooking zone beneath the grate to create high heat for searing. Indirect heat: bank the coals to one side or create a halo around the edge of the grate to keep food cooking with the lid closed and airflow controlled. For even heat, spread the coals in a single layer under the grilling area and place the grate back on to resume cooking. A two-zone setup makes it easier to sear and then finish at lower temperatures without removing the meat from the grill. Use the vents to fine-tune the draft and steady the temperature. Test the heat by holding your hand 5-6 inches above the grate; if you can only hold it for a few seconds, you’re at high heat; longer holds indicate medium or low heat.
Controlling Temperature and Airflow
Heat control on a charcoal grill is all about airflow. Open vents wide for hotter temperatures and close them for lower heat. A well-lit bed of coals combined with a properly vented lid yields a stable temperature range. If the grill runs hot, either seal cracks, reduce the air intake, or add a small amount of unlit charcoal to balance. For cold-weather cooking, preheat longer and monitor the temperature more often, as ambient air cools the grill faster. An infrared thermometer can help check grate temperature without opening the lid, reducing heat loss. Practice, record outcomes, and adjust next time for consistency. Grill Cooking’s approach emphasizes methodical vent management and avoiding excessive fuel changes that destabilize heat.
Safety First: Fire Prevention and Handling Hot Grates
Charcoal grills present burn hazards. Always grill in a well-ventilated area and keep a water spray bottle or a bucket of water handy for minor flare-ups. Wear protective gloves, tie back long hair, and avoid loose clothing. Never use lighter fluids on hot coals or after the fire has started; instead, rely on the chimney starter for ignition. Keep children and pets away from the grilling zone, and place coals in an approved metal container for disposal when cool. Clean grease and fat buildup promptly to reduce flare-ups. By following these safety practices, you’ll reduce accidents and choose the right approach when learning how to put charcoal in grill.
Troubleshooting Common Issues
If your grill takes too long to light, check that the starter is working, the vent settings are correct, and you’re using dry charcoal. If flames flare up, damp charcoal or too much lighter fluid can cause spitting; keep the lid closed to smother flames and adjust vents. If heat is uneven, ensure the coals are evenly distributed for a two-zone setup and check for air leaks around the lid. When the grate is too hot, fan the coals lightly with the lid open and adjust the vents to reduce fuel. If you notice off-flavors or excessive smoke, it may be the fuel quality or moisture content; replace stale charcoal and dry storage. With the right technique and practice, you’ll be able to control heat reliably and master how to put charcoal in grill.
Tools & Materials
- Charcoal (lump or briquettes)(Choose lump for quick heating; briquettes for longer, steadier heat)
- Chimney starter(Essential for clean, even lighting)
- Long lighter or matches(Use to ignite starter safely)
- Long-handled tongs(Safely move hot coals)
- Heat-resistant gloves(Protect hands during handling)
- Grill brush(Clean grates before and after cooking)
- Instant-read thermometer(Monitor grate/air temps)
- Lid lifter(Convenience for lid management)
Steps
Estimated time: 25-35 minutes
- 1
Prepare the workspace
Clear the area and lay out tools. Inspect the grill for damage and ensure the lid is open while you work. This prevents accidents and helps you observe airflow from the start.
Tip: Keep a clear buffer zone: at least three feet of unobstructed space around the grill. - 2
Select and measure charcoal
Decide between lump charcoal and briquettes based on your planned cook. Measure and fill the chimney starter to the recommended level for your chosen fuel type.
Tip: Break large chunks for better airflow and even lighting. - 3
Set up the chimney starter
Place the starter on a stable, nonflammable surface. Add the charcoal, ensuring the bottom is evenly distributed for uniform ignition.
Tip: Place crumpled newspaper or a starter below the starter for a reliable flame. - 4
Light the charcoal
Light the starter from multiple points and allow the flames to climb through the charcoal until it’s ashed over. Avoid lifting the lid during ignition.
Tip: Wait for a light-gray ash coating for consistent heat. - 5
Dump and arrange coals
Carefully dump the hot coals into the grill. Create a two-zone setup for versatile cooking, with direct heat in one area and indirect heat in another.
Tip: Bank coals to one side for indirect heat if you plan to finish with the lid on. - 6
Heat the grate
Place the grate back on and allow it to preheat with the lid open for several minutes. This helps season the grate and prevents food from sticking.
Tip: Use a quick wipe with oil on a hot grate to minimize sticking. - 7
Set vents for temp control
Open vents fully for high heat or partially close them for lower heat. Fine-tune the draft by adjusting the lid vents as needed.
Tip: Tiny changes in vent position can significantly impact temperature. - 8
Start cooking
Place food on the direct zone for searing, then move to indirect heat to finish if needed. Monitor internal temperatures and adjust airflow as you cook.
Tip: Don’t peek too often; each lift causes heat loss.
FAQ
What is the easiest charcoal to use for beginners?
For beginners, briquettes offer steady, predictable heat and less flare-ups. Lump charcoal can be more challenging to manage but delivers high heat for searing. Start with briquettes to learn timing and airflow, then experiment with lump charcoal as you gain experience.
For beginners, briquettes are easiest because they burn steadily. You can try lump charcoal later to explore quicker heat for searing.
Should I use lighter fluid or a chimney starter?
Avoid lighter fluid for most charcoal grills to prevent chemical flavors. A chimney starter is safer, faster, and produces cleaner heat without chemical residues. It’s the preferred method in serious grilling circles.
Skip lighter fluid. Use a chimney starter for clean ignition and great flavor.
How do I know when the charcoal is ready to cook?
Charcoal is ready when it’s glowing and coated with a light layer of white ash. This indicates even heat and reliable performance for cooking. Avoid cooking on charcoal that’s still dark and smoking heavily.
Wait until the coals glow and are ashed over for steady heat.
Can I reuse charcoal for another cook?
You can reuse partially burned charcoal, but performance diminishes after multiple uses. Separate unspent coals and combine with fresh briquettes for a better restart. Always ensure the grill is fully cooled before reusing components.
You can reuse some coals if they’re still hot and clean, but performance varies.
What’s the difference between direct and indirect grilling with charcoal?
Direct grilling places food directly over the hot coals for searing. Indirect grilling uses a barrier of heat on one side or around the grill’s perimeter, ideal for larger cuts or foods that require slower cooking. Many cooks use a two-zone setup to switch between both as needed.
Direct is for searing; indirect is for slower cooking with even heat.
What safety steps are essential when lighting charcoal?
Always grill in a ventilated area, wear protective gloves, and keep kids/pets away. Never use water on hot coals; use a proper extinguisher or water bucket if needed. Keep a metal container for cooled coals and clean grease to prevent flare-ups.
Follow basic safety: vented area, gloves, away from kids, and no water on hot coals.
Watch Video
Quick Summary
- Choose lump or briquettes based on cook time and heat stability.
- A chimney starter enables clean, even lighting without lighter fluid.
- Create a two-zone setup for versatile direct/indirect grilling.
- Control temperature primarily with vents and lid position.