How to Grill on a Charcoal Grill: A Complete Guide for Home Cooks
Learn to grill on a charcoal grill with a practical, step-by-step approach: lighting, heat zones, direct/indirect methods, temps, safety, and resting for juicy, flavorful results.

By the end of this guide, you’ll grill on a charcoal grill with flavorful, evenly cooked results. You’ll master lighting for reliable heat, create direct and indirect zones, manage temperatures with a thermometer, and rest meat for juiciness. According to Grill Cooking, prep, patience, and mindful flame control yield the best flavor and texture.
What makes charcoal grilling special
Charcoal grilling delivers a smoky, robust flavor that gas grills can’t fully replicate. The heat comes from burning charcoal briquettes or lump charcoal, which creates a dynamic, high-heat environment that rewards attention to airflow and timing. According to Grill Cooking, the magic happens when you balance fire management with steady heat and careful cooking times. The Grill Cooking team found that stable heat with minimal flare-ups leads to consistently juicy burgers, seared steaks, and well-charred veggies. You’ll learn to read smoke, manage flare-ups, and use a thermometer to hit target doneness as you gain confidence around the grill. Expect a learning curve, but the payoff is depth of flavor that’s hard to beat with gas.
- Charcoal flavor: a smoky, caramelized crust
- Heat control: airflow, vents, and fire management
- Patience: planning and resting for best texture
Grill Cooking emphasizes that practice builds intuition: which foods tolerate a quick sear, and when to shift to indirect heat for larger cuts. The more you grill, the more precise your timing becomes, and the more consistently delicious your results will be.
Essential gear and setup
Before you light your charcoal grill, make sure you have the right tools and a clean, well-prepared cooking area. A quality chimney starter helps you ignite coals quickly without lighter fluid. Long-handled tongs, a sturdy grill brush, and an instant-read thermometer are your best friends at the grill. Keep a spray bottle of water handy for minor flare-ups, and consider heat-resistant gloves for safer handling. Choose the type of charcoal you prefer—lump charcoal for a hotter, faster burn and briquettes for steady, longer heat. Lastly, a seasoned grate makes searing easier and reduces sticking, so oil it lightly before cooking.
- Chimney starter speeds up ignition and avoids chemical flavors
- Long tongs and a grill brush are essential for safety and cleanliness
- An instant-read thermometer ensures doneness without guesswork
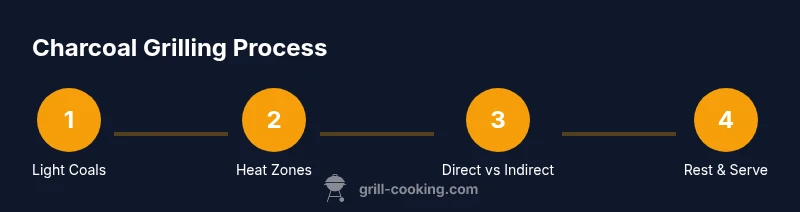
Lighting the grill and establishing heat zones
Start by filling a chimney starter with your chosen charcoal. Light it with a natural firelighter or crumpled paper, and wait about 10–15 minutes until the coals are ashy-gray and glowing. While the coals catch, prep the grill surface and set up a two-zone setup: a high-heat direct zone for searing and a cooler indirect zone for finishing. When the coals are ready, pour them into one half of the grill for direct heat and leave the other half empty for indirect cooking. Open vents fully to maximize airflow and control temperature with the lid and dampers. Keeping the lid closed during cooks helps maintain stable temps and reduces flare-ups.
Direct vs indirect cooking: when to use each
Direct heat is your friend for quick sears, burgers, chops, and thin steaks. Indirect heat shines for larger cuts, bone-in pieces, and foods with long cook times. Move items between zones as needed: sear over direct heat for 1–3 minutes per side, then transfer to indirect heat to finish to desired doneness. For vegetables, you can place them on skewers or a grill basket over direct heat, turning as needed for even charring. The two-zone setup lets you adapt on the fly if temps rise or fall unexpectedly.
Temperature targets, doneness cues, and resting
Aim for high heat (roughly 450–550°F/230–290°C) for searing, then drop to medium heat for finished cooking. Use a meat thermometer to verify doneness: steaks at 130–135°F (medium-rare), 135–145°F (medium), and chicken to at least 165°F (internal temperature). Rest meat for 5–10 minutes before slicing to redistribute juices. Resting is not optional—it dramatically improves juiciness and texture, especially after a bold sear. Keep in mind carryover cooking will raise temps a few degrees once removed from the heat.
Safety and best practices
Grill in a well-ventilated outdoor area and keep a fire extinguisher or baking soda nearby for flare-ups. Never use gasoline or kerosene to light charcoal. Keep kids and pets away while the grill is hot, and wear protective clothing. Clean the grates while hot to remove residues, and store coals in a metal container away from flammables. Use common sense with hot surfaces, never reach over the grill, and stay attentive—charcoal can flare unpredictably when fat drips hit hot coals.
Authoritative sources
- https://www.fsis.usda.gov/food-safety/safe-food-handling-and-preparation-meat-and-poultry/grilling-meat-safety
- https://extension.umn.edu/food-safety/grilling-safety
- https://www.cdc.gov/foodsafety/keep-food-safe.html
Practical troubleshooting and common mistakes
- Not allowing charcoal to fully ignite leads to uneven heat. Resolve by giving coals 10–15 minutes to ash over before cooking.
- Frequent opening of the lid causes heat loss; keep the lid closed to maintain temperature.
- Searing without oiling the grate can cause sticking; oil the grate lightly and wipe away excess.
- Overloading the grill with food or vents can stall airflow; adjust vents to keep a steady flame.
- Using low-quality charcoal reduces heat and creates more ash; choose quality briquettes or lump charcoal for consistent results.
Final tips before you grill
Always preheat with the lid closed for consistent temps. Use a thermometer and rest times to ensure doneness. Practice with smaller cuts to dial in your timing, then scale to larger roasts. Clean the grill after every cook and store charcoal in a dry space to maintain performance.
Tools & Materials
- Charcoal (lump or briquettes)(Amount depends on grill size; plan for 1–2 bags per session.)
- Chimney starter(2–3 kg capacity; use to light coals quickly.)
- Long-handled tongs(12 inches minimum for safe handling.)
- Instant-read thermometer(Probe for accurate internal temps.)
- Grill brush(Wire brush or scraper for clean grates.)
- Heat-resistant gloves(Extra protection during handling.)
- Oil for grate(Light spray or brush on grates before cooking.)
- Spray bottle of water(For minor flare-ups.)
Steps
Estimated time: 40-60 minutes
- 1
Light the charcoal
Fill the chimney starter, light it, and wait 10–15 minutes until the coals are ashy-gray and glowing. This ensures a clean, hot bed of coals for predictable heat.
Tip: Use natural firelighters or crumpled paper for even ignition; avoid lighter fluid during initial lighting to prevent off-flavors. - 2
Establish heat zones
Dump the hot coals to create a two-zone setup: one side direct for searing, the other indirect for finishing. Place the grate accordingly and keep vents wide open for airflow.
Tip: A two-zone setup gives you flexibility to sear and finish without constant flipping. - 3
Prepare the grate
Open lid, brush the grate clean while it’s hot, and lightly oil the grates to prevent sticking. A clean, oiled surface improves non-slip searing.
Tip: Oil after cleaning while the grate is still hot to help the oil adhere. - 4
Prep the meat
Pat meat dry, season or marinate as desired, and bring to near room temperature for even cooking. Dry surfaces brown better, giving you a nicer crust.
Tip: Salt or brine ahead of time for moisture retention; pat dry immediately before placing on the grill. - 5
Sear then finish
Sear over direct heat 1–3 minutes per side to form a crust, then move to indirect heat to finish to target doneness, using a thermometer to guide you.
Tip: Flip foods only once or twice to maintain crust formation and even cooking. - 6
Rest and serve
Let meat rest 5–10 minutes after removal from the grill to redistribute juices. Slice against the grain for tenderness.
Tip: Resting is essential for flavor—don’t skip this step even for quick cooks.
FAQ
What’s the fastest way to light a charcoal grill?
Using a chimney starter with natural firelighters or crumpled paper provides quick, even ignition without chemical flavors. Allow the coals to burn until they’re ashy-gray before cooking.
Light with a chimney starter instead of lighter fluid for a clean start and even heat.
How can I maintain a stable temperature on a charcoal grill?
Control temperatures with properly opened vents, a two-zone setup, and minimizing lid openings. Move food between direct and indirect zones as needed and monitor with a thermometer.
Keep vents open to control airflow and use a two-zone setup to stay steady.
Should I use lighter fluid?
Lighter fluid is optional for some cooks, but many prefer chimney starters for a cleaner flavor and faster, more predictable lighting.
A chimney starter gives reliable heat without chemical flavors.
How long should I preheat the grill?
Preheat for about 10–15 minutes with the lid closed to achieve an even, consistent heat and a good sear.
Preheat about 10 to 15 minutes for stability.
Can I grill vegetables directly on a charcoal grill?
Yes. Skewer or use a grill basket to cook vegetables over direct heat, turning to prevent scorching. For best results, toss in oil and season well.
Direct heat works well with vegetables if you keep them moving and oiled.
Watch Video
Quick Summary
- Master heat zones for even cooking
- Direct sear followed by indirect finish is versatile
- Use a thermometer for precise doneness
- Rest meat to lock in juiciness