How to Get Charcoal Grill Started
A thorough, beginner-friendly guide to lighting a charcoal grill, establishing two-zone heat, and maintaining even temps for perfect grilled results.

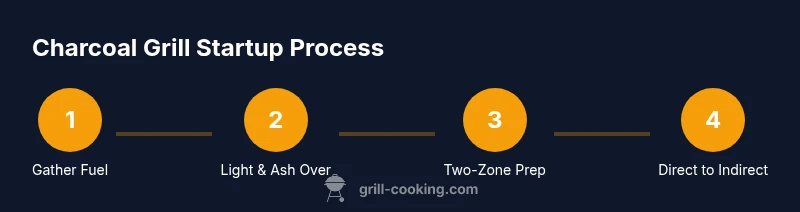
You’ll start a charcoal grill by loading a chimney starter, lighting the coals, and transferring them to a two-zone fire. Open the vents for airflow, let the coals ash over, and create a hot direct zone plus a cooler indirect zone. This setup gives you reliable ignition, steady heat, and flexible cooking options.
Gathering the Right Charcoal
Charcoal quality and type deeply influence ignition speed, heat consistency, and flavor. According to Grill Cooking, lump charcoal lights quickly and burns hot with uneven heat, while briquettes burn more steadily and longer, which is ideal for longer cooks. For most beginners, a balanced approach—mostly briquettes with some lump mixed in—offers predictability without sacrificing flavor. Start by selecting charcoal that matches your planned cook times: shorter cooks benefit from lump, longer cooks benefit from briquettes. Inspect the bag for uniform size and minimal dust; chunk size should be similar to ensure even burning. Prepare enough fuel for a two-zone setup: a dense bank of coals on one side for high heat and a lighter, even layer on the opposite side for indirect cooking. Keep a small metal scoop, long tongs, and a fireproof tray handy to move fuel safely. Finally, ensure your grill is clean and dry; moisture in charcoal creates steam and smoke you don’t want.
Setting Up a Chimney Starter
A chimney starter is one of the cleanest ways to ignite charcoal. Begin by filling the starter with charcoal, avoiding packing too tightly so air can flow. If you’re using briquettes, leave a small gap between pieces; for lump, a light mound works best. Place two or three sheets of newspaper or a dedicated fire starter under the bottom grate, and light the paper at several spots. Let the flame rise through the charcoal until the surface glows and the edges darken. Wait until the coals are covered with a light gray ash on the outside, typically 8–12 minutes depending on fuel and wind. When ready, wear heat-proof gloves and pour the hot coals into the grill grate, distributing them for a two-zone pattern: a dense, hot bank on one side and a cooler, even layer on the other. Preheat the grate before cooking to ensure a good sear.
Lighting Methods and Safety
While a chimney starter is preferred, you can also use other safe lighting methods. Avoid pouring lighter fluid over hot coals, which can cause dangerous flare-ups and uneven ignition. If you choose to use fire starters or crumpled newspaper, ensure they’re placed properly under the starter and away from your hands. Keep a spray bottle of water handy for minor flare-ups and move food away from the hot zone if flames surge. Always wear heat-resistant gloves and use long-handled tongs when adjusting hot coals or repositioning the grate. Working in a well-ventilated area is essential to prevent smoke buildup and carbon monoxide accumulation.
Getting the Grill to the Right Temperature
Temperature control hinges on airflow. Open the vents fully for fast ignition and higher heat, then adjust gradually to reach the target range for your planned cook. If you notice excessive smoke or a cold bed of coals, increase airflow by opening the vents wider. Conversely, if the grill runs too hot, partially close the vents to slow combustion. Allow the grate to preheat for 5–10 minutes with the lid closed if you’re aiming for a strong sear, then keep the lid on for indirect cooking when needed. Remember: heat control must be deliberate, not reactive. The Grill Cooking team emphasizes practice and observation as the most reliable tools for dialing in temps over time.
Spreading and Managing the Coals
Transfer the hot coals to the grill and create a two-zone fire: a dense, hot zone for direct grilling and a cooler area for indirect cooking. If you’re using briquettes, stack them in a pyramid or ring on the hot side to produce an even, intense burn. For lump charcoal, spread pieces more evenly to avoid cold spots. Add a thin layer of unlit charcoal on the far side if you anticipate longer cooks. Place the cooking grate back on and give it a few minutes to heat up. This setup enables you to sear foods quickly and then move them to the cooler zone to finish without burning. Using a two-zone system also helps manage flare-ups by moving the food away from the hottest area while flames dissipate.
Indirect vs Direct Grilling with Charcoal
Direct heat is ideal for burgers, chops, and thin steaks, while indirect heat shines for larger or tougher cuts. With a two-zone bed, start foods over the hot zone to sear, then transition to the cooler area to finish. Lidded cooking traps heat and creates oven-like conditions, perfect for thicker items. For very thin items, you can keep the lid off to preserve the crisp exterior while maintaining a lively surface sear. The choice between direct and indirect should be guided by thickness, fat content, and desired doneness. The Grill Cooking approach encourages planning your cook in stages and adjusting levels of heat as you go.
Maintaining Temperature During Cooking
Keep a steady rhythm by frequently monitoring vents and lid position. If you add fuel, do so gradually to avoid sudden spikes in temperature. Use the thermometer built into many grills, or rely on the hand-test method: hold your hand 5 inches above the grate; if you can’t hold it for more than 2–3 seconds, you’re in the high-heat range. For longer cooks, add a small amount of charcoal halfway through to replenish the bed. Keep the grill clean and free of excess ash to maintain airflow. If temperature drifts, adjust vents and, if needed, shift food between zones. Consistency comes from deliberate, incremental adjustments rather than large, reactive moves.
Common Pitfalls and Quick Fixes
Common mistakes include overloading fuel, under-ventilating, and ignoring ash buildup in the vents. Keep ash under control—too much ash on the vents reduces airflow. Wind can also affect burn rate; shield the grill with a windbreak or position it away from gusts. If the flame surges, move food to the indirect zone and briefly close the vents to calm the fire. Don’t rush the preheat; a cold grate slows searing and invites uneven cooking. If you consider searing on a flat grill, wait for a proper halo of ember and a hot grate before placing meat. By anticipating these issues, you’ll avoid common grilling frustrations and get more consistent results.
Cleaning and Aftercare for the Next Grill
After cooking, close the lid and vents to starve the fire, then safely dispose of ashes once they’re completely cool. Clean the cooking grate with a stiff brush to remove stuck-on fat and debris, rinse with water if needed, and dry thoroughly. Wiping the interior surfaces with a damp cloth helps remove residue. Store tools and extra charcoal in a dry place to prevent moisture problems. Regular maintenance, including checking vents and ash catcher, extends the life of your grill and improves flavor consistency for future cooks.
Tools & Materials
- Charcoal (lump and/or briquettes)(Choose a mix or follow recipe guidance for flavor and heat consistency.)
- Charcoal chimney starter(Essential for clean, efficient ignition without lighter fluids.)
- Paper towels or fire starters(Used under the starter to ignite the coal safely.)
- Long-handled tongs(For moving hot coals and adjusting food without burns.)
- Heat-resistant gloves(Protect hands during ignition and setup.)
- Grill brush or scraper(Clean grate before cooking to prevent sticking.)
- Thermometer for grill(Useful for gauging temperature, not strictly required.)
- Spray bottle of water(Handle minor flare-ups safely.)
Steps
Estimated time: 25-40 minutes
- 1
Prepare tools and fuel
Place the chimney starter, charcoal, and essential tools within easy reach. Check vents and ensure the grill is on a stable, nonflammable surface. If using briquettes, plan for a slightly denser load; for lump, leave space for airflow. This setup minimizes delays once you light the fire.
Tip: Having everything ready reduces cross-steps and keeps you focused on ignition. - 2
Fill the chimney starter
Load the chimney starter with charcoal, avoiding packing too tightly to allow air to circulate. For lump charcoal, a light mound works best; for briquettes, a looser layer helps ignition. Place the starter on the grate and prepare to light.
Tip: Don’t overfill; a crowded starter slows ignition and wastes time. - 3
Light the starter and wait for coals to ash
Light the paper or fire starters in several spots. Let the flame climb, and watch as the charcoal begins to glow and edges turn gray. Wait until the coals are evenly coated with a light gray ash, which signals they’re ready to transfer.
Tip: If you see heavy smoke at first, that’s normal—once ash forms, airflow improves. - 4
Dump coals and set up two zones
Pour the hot coals into the grill grate, spreading them to form a dense hot zone on one side and a cooler bed on the other. Use a metal tool to create a blank space between zones for airflow.
Tip: Two-zone setup lets you sear over direct heat and finish with indirect heat. - 5
Open vents and preheat the grate
Open the air vents to establish airflow and bring the grate to heat. Allow 5–10 minutes for the grate to warm so food can form a good sear without sticking.
Tip: A properly preheated grate prevents food from sticking and helps even cooking. - 6
Start cooking with direct heat, then move as needed
Place thin items directly over the hot zone for quick searing. Move thicker or fattier pieces to the cooler zone to finish without burning. Cover with the lid to trap heat for deeper cooks.
Tip: Searing first locks in juices; indirect heat finishes to desired doneness. - 7
Monitor and adjust temperatures
Keep an eye on vents and lid position. If temps rise too fast, slightly close vents; if they drop, open them wider. Add small amounts of charcoal if needed, rather than dumping everything at once.
Tip: Small, controlled adjustments provide steadier heat than large swings. - 8
Finish, extinguish, and clean
Once cooking is done, close vents to starve the fire and let ashes cool. Clean the grate, wipe surfaces, and store tools properly for the next grilling session.
Tip: Don’t forget to dispose of ashes only when fully cooled to prevent fires.
FAQ
Do I need lighter fluid to start charcoal?
No. A chimney starter with paper or a fire starter provides reliable ignition without chemical accelerants. This also minimizes grill odors and flare-ups.
No lighter fluid needed if you use a chimney starter.
How long does it take for coals to be ready?
Using a chimney starter, coals typically ash over in about 10–15 minutes, depending on fuel type and weather. Waiting until they’re fully ashed ensures consistent heat.
Usually about 10 to 15 minutes.
What is two-zone cooking and why use it?
Two-zone cooking uses a hot direct zone for searing and a cooler indirect zone for finishing. It prevents burning and improves control over doneness.
Sear on the hot side, finish on the cooler side.
Lump charcoal vs briquettes—what’s better for beginners?
Briquettes offer steadier, longer heat; lump lights quickly and can heat hotter, but with more variability. A blend can balance reliability and flavor.
Briquettes are steadier; lump burns hot but unevenly.
Can I cook without a lid?
For most grills, using the lid maintains consistent heat and cooks more evenly, especially during longer cooks. If you’re grilling burgers, you may cook with the lid off for speed.
Yes, using the lid helps with even cooking.
Watch Video
Quick Summary
- Prepare charcoal with a chimney starter for quick ignition
- Establish a two-zone fire for versatile cooking
- Control heat with precise vent adjustments
- Preheat the grate before cooking
- Always extinguish and clean after grilling