Can You Grill When It's Cold Outside? A Practical Winter Grilling Guide
Learn how to safely grill outside in cold weather with gear tips, heat management, and step-by-step instructions from Grill Cooking. This guide covers wind control, fuel planning, and food-safety strategies for winter grilling.

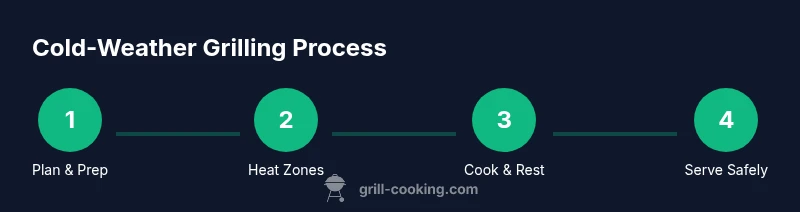
By the end of this guide, you will be able to grill safely outside in cold weather and still achieve juicy results. You’ll learn essential gear, heat management, wind protection, and timing strategies. The Grill Cooking team found that with proper planning, disciplined temperature control, and vigilant safety, winter grilling is not only possible but enjoyable.
Can Cold Weather Grilling Work? Why It Is Possible
Can you grill when it is cold outside? The short answer is yes, with the right approach. Cold air cools your grill and slows heat buildup, which can extend cooking times and demand more fuel. However, winter grilling remains practical for many proteins and vegetables, especially when you use the lid to trap heat and create a stable cooking environment. The Grill Cooking team has tested setups in wind and snow and found that heat stability, wind protection, and a reliable fuel supply are the three most important variables. When you approach winter grilling as a heat management problem rather than a purely high heat problem, you can achieve delicious results. Remember that a two zone setup lets you sear quickly and finish with indirect heat, which is especially helpful in cold conditions. Safety stays paramount: slippery surfaces, exposure to moisture, and gusty winds require deliberate planning and weather-aware gear. Can you grill when it is cold outside is less about the temperature and more about how you shield, insulate, and tempo your cook.
Essential Gear and Setup for Winter Grilling
Winter grilling starts with a sturdy plan and the right gear. Invest in wind protection such as a dedicated windbreak or a sheltered outdoor area, and keep a reliable lid on your grill to trap heat. A digital instant-read thermometer helps you monitor internal temperatures precisely, while heat resistant gloves and a sturdy heat-safe mat prevent accidents from hot surfaces. Fuel considerations matter too: have a reliable supply of charcoal or gas, and anticipate longer burn times so you don’t run short mid cook. Use a weather-appropriate grill cover to protect components from moisture. Organize your station so you can move between searing and finishing zones without stepping into cold air. A small fire-safe thermometer and a timer can help you track minutes in the cold. As you plan, remember to work with the weather rather than against it, and test your setup before cooking a full meal.
Temperature, Heat, and Fuel Management in Cold Weather
Heat management is the core skill for winter grilling. Start with a properly heated grill that reaches the target temperature before you place meat on the grate. In cold weather, a two-zone setup is advantageous: establish a hot zone for searing and a cooler zone for finishing with indirect heat. Expect longer preheat times and monitor fuel levels frequently to avoid mid cook shortages. The goal is to maintain a steady air temperature around the grill and prevent sudden drops when doors or lids are opened. For meats, use a reliable thermometer to check internal temperatures and account for carryover cooking. In general, beef and pork should reach safe internal temps as recommended by food safety guidelines, and poultry should be cooked through with a safe internal temperature. Adapting your cooking times to the outdoor temperature ensures consistent results and minimizes overcooking or undercooking.
Wind, Windbreaks, and Shelter: Protecting Your Heat
Wind can significantly sap heat, so shielding your grill is essential. Position your grill away from gusty openings and place a windbreak on the windward side. Even a simple plywood panel or a purpose-built windscreen can dramatically improve heat retention. When possible, set up near a wall or fence to reduce crosswinds. A covered porch or a temporary shelter can transform a windy day into a viable grilling session. Always ensure there is adequate ventilation, and never trap heat in an enclosed space that could lead to dangerous gas buildup. The combination of wind protection and proper lid usage keeps temps more stable and reduces flare-ups caused by gusts.
Food Prep, Defrosting, and Meats in Cold Weather
Defrost meats in a cool room or fridge before cooking and pat them dry to promote better browning. Cold weather can slow down browning, so ensure your grill is adequately preheated and the surface is clean. Sanitation remains crucial: wash hands and utensils, avoid cross-contamination, and keep raw proteins separate from ready to eat foods. Marinades and rubs can remain the same, but you may adjust timing if your grill temperature fluctuates with outside conditions. Always bring meats to a safe handling temperature before they hit the grill to prevent bacterial growth and ensure even cooking. When grilling in winter, choose tougher cuts that can tolerate longer cooking times and benefit from extended heat exposure.
Cooking Techniques for Even Doneness in Cold Weather
To maximize even doneness in cold weather, use a two zone approach and monitor with a thermometer. Sear over a hot zone to develop flavor and crust, then move to the cooler zone to finish. Close the lid during cooking to retain heat and reduce temperature swings caused by door openings. For larger cuts, consider starting them on indirect heat and finishing with a quick sear. Rest meat briefly after cooking to let juices redistribute. If outdoor temperatures drop drastically, you may need to extend cooking times by 10–25 percent, so plan accordingly and use a meat thermometer to confirm doneness.
Pro Tips, Pitfalls, and Troubleshooting
Pro tip: preheat longer than you would in milder weather to offset heat loss. Always use windbreaks and keep a stable supply of fuel. Common pitfalls include chasing heat instead of managing it, opening the lid too often, and ignoring meat carryover temps. Troubleshooting wind or cold may involve adjusting the lid position, elevating the meat closer to the heat, or using a foil shield to maintain warmth for delicate items. Safety reminders: wear non-slip shoes, keep a dry work area, and have a plan for handling flare-ups. With patience and practice, winter grilling becomes a reliable part of your cooking routine.
Authority Sources and Real-World Data
For winter grilling guidance, refer to trusted food safety and extension sources. The USDA and state extension services offer temperature guidelines, food safety practices, and handling tips that remain valid in cold conditions. Always check local weather advisories and follow manufacturer guidelines for your grill. This article integrates general principles from federal and educational sources to help you grill confidently outdoors even when the temperature drops. Grill Cooking emphasizes that preparation, shelter, and heat management are the pillars of successful winter grilling.
Authority Sources
- USDA Food Safety and Inspection Service: http://www.fsis.usda.gov
- Centers for Disease Control and Prevention: http://www.cdc.gov/foodsafety
- Penn State Extension: https://extension.psu.edu/winter-grilling-tips
Tools & Materials
- Grill (gas or charcoal)(Ensure it is in good working condition and clean before use)
- Windbreak or shelter(A windscreen or sheltered area reduces heat loss)
- Digital instant-read thermometer(For accurate internal temps; prefer one with fast response)
- Heat-resistant gloves(Keeps hands safe during handling hot grates)
- Grill brush and scraper(Keep grill grates clean for better searing)
- Extra fuel supply (charcoal or gas)(Have a little more on hand than you think you need)
- Thermal-safe grill mat or tray(Useful for rest areas and preventing slips)
- Windproof timer(Helps manage cooking intervals without opening lid)
Steps
Estimated time: 60-120 minutes
- 1
Check weather window
Review the forecast and pick a time with light or moderate wind. Position your grill in a safe, open area away from structures and flammable materials. Prepare your station entirely before lighting to minimize time spent in the cold.
Tip: Scan wind direction and adjust your windbreak before lighting. - 2
Preheat and set heat zones
Preheat the grill to your target temperature and establish a hot sear zone and a cooler finishing zone. Use the lid to trap heat and reduce temperature fluctuations once you start cooking.
Tip: Aim for a slightly longer preheat to compensate for cold air immersion. - 3
Set up windbreaks and shelter
Place wind barriers on the windward side and ensure the grill area remains clear of moisture. Keep the grill cover on when not actively cooking to maintain warmth inside the cooking chamber.
Tip: Keep a dry path from the grill to the prep area to avoid slips. - 4
Prep meat and seasonings
Pat meat dry, apply rubs or marinades, and bring to a safe handling temperature before cooking. Moisture on the surface can hinder browning, so ensure surfaces are dry before hitting the grate.
Tip: Season just before cooking to preserve surface moisture balance. - 5
Cook with a two-zone method
Start by searing over the hot zone, then move to the cooler zone to finish. Keep lid closed as much as possible to stabilize heat and reduce cold-air drafts.
Tip: Use the thermometer to monitor internal temps frequently. - 6
Check doneness and rest
Verify internal temperature with a thermometer and allow meats to rest briefly before serving. Resting helps juices redistribute, yielding juicier results even in colder air.
Tip: Rest for 3–5 minutes for most cuts; larger roasts may need longer. - 7
Shut down safely and clean up
Turn off heat sources, extinguish charcoal safely, or close gas controls. Clean grates and vents to prevent moisture buildup, then store tools and fuel securely.
Tip: Dry surfaces after cleanup to minimize rust and corrosion. - 8
Evaluate and adapt for next time
Reflect on heat stability, fuel use, and timing. Note what worked and what didn’t to refine your setup for future cold sessions.
Tip: Keep a simple log for quick improvements on future cooks.
FAQ
Is winter outdoor grilling safe?
Winter outdoor grilling can be safe when you follow basic food safety rules, maintain equipment properly, and cook to safe temperatures. Plan ahead for wind, moisture, and fuel needs to prevent flare-ups and undercooking.
Yes, winter grilling is safe when you follow safety basics and cook to proper temperatures.
What are the best tools for cold-weather grilling?
A digital thermometer, windbreaks, heat resistant gloves, and a sturdy weatherproof cover are essential. Having two-zone heat capability helps manage browning and doneness in cold conditions.
Use a thermometer and windbreaks for best results in cold weather.
Does wind affect cooking times?
Yes. Wind can carry away heat, increasing cooking times and making temperature control harder. Shielding the grill helps keep temps stable and reduces flare-ups.
Wind can slow cooking; use a barrier to stabilize heat.
Should I marinate differently in cold weather?
There is no major change in marinade approach; focus on keeping meat cold before cooking and avoid leaving it on the counter longer than safe. Temperature control during cooking remains the key factor.
Marination times stay the same if you control cooking temps.
Is it better to grill indoors when it is extremely cold?
Indoor grilling is feasible only with proper ventilation and equipment designed for indoor use. If outdoor conditions are extreme, consider alternative cooking methods or plan for a milder day to grill outside.
If weather is extreme, consider indoor options or postpone outdoor grilling.
What foods are best for winter grilling?
Steaks, pork chops, sausages, root vegetables, and sturdy peppers work well because they tolerate longer cook times and still brown nicely under wind protection.
Great choices include steaks, sausages, and sturdy vegetables.
Watch Video
Quick Summary
- Plan heat with wind protection in mind
- Use two-zone cooking for reliable results
- Monitor temps with a thermometer
- Keep food handling safe and clean
- Rest meat to finish juicy and safe