How to Grill When It's Raining: A Practical Guide
Learn how to grill in the rain with shelter, heat management, and food-safety strategies from Grill Cooking. This practical guide covers gear, setup, and step-by-step techniques for rainy-weather grilling.

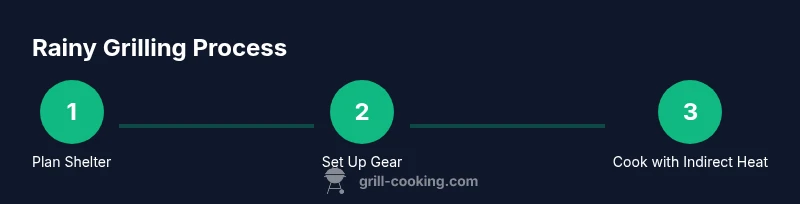
Grilling in the rain is doable with the right setup. Build a sheltered, wind-safe grilling station, use indirect heat, and keep flames controlled with stable charcoal or a gas grill under a canopy. Preheat carefully, monitor temperatures, and keep food safe with proper timing. The Grill Cooking team emphasizes safety, patience, and practice for consistent results.
Why Rainy Weather Demands Outdoor Cooking Adjustments
If you're wondering how to grill when it's raining, you can still pull off delicious results with proper shelter and heat management. According to Grill Cooking, the core challenge is keeping the heat stable, the grill dry, and the food safe while weather disrupts airflow and moisture condenses on surfaces. Embrace rain-aware planning and you convert a soggy forecast into a successful grilling session.
Key considerations:
- Safety first: avoid metal surfaces becoming slippery; stay clear of downed electrical lines, and watch for lightning.
- Shelter matters: you need a dedicated rain shelter, windbreaks, and solid ground to place your grill.
- Heat strategy: rain cools the grill's surface and strips away moisture; indirect heat and lid use help maintain steadier temps.
In practice, many rain-friendly setups center around a sturdy canopy or portable shelter, a dry prep area, and a plan for wind direction. The Grill Cooking team recommends practicing your setup before guests arrive so you can move confidently when precipitation begins. With the right approach, rain can even calm the grill as you finish sauces and sides.
Shelter and Setup: Creating a Rainproof Grilling Station
A rainproof station starts with a solid shelter that blocks direct rainfall and reduces wind intrusion. Position the grill away from edges where gusts can push moisture onto hot surfaces. Use a windbreak or a dedicated canopy anchored to the ground, not merely a shade cloth. Ground protection matters—lay down a dry, non-slip mat and consider a raised platform to keep the grill stable and away from puddles.
Create a logical workflow: dry prep zone, grill area, and a safe space for utensils and marinades. Keep towels, mitts, and thermometers within arm’s reach so you don’t have to step into the rain. A compact, portable shelter can be deployed quickly, but ensure it’s sturdy enough to withstand gusts. Finally, test your lighting and accessibility so you don’t fumble in wet conditions. According to Grill Cooking, a well-planned shelter reduces heat loss and improves control over flare-ups in wet weather.
Choosing the Right Equipment for Rainy Grilling
Rain demands equipment that resists moisture and maintains grip. Prefer grills with well-sealing lids and stable handles, plus wind guards to protect the flame from gusts. Add a heavy-duty grill cover when not in use and keep a dry, heat-safe workspace for staging food. Footwear and clothing matter too: non-slip shoes and a water-resistant apron help you stay safe and comfortable. A reliable thermometer is essential for accurate doneness, while a secondary heat source like a small propane heater can offer extra warmth for chilly evenings. The goal is to keep heat consistent without fighting the weather, so choose gear that minimizes moisture exposure and maximizes grip and control.
Heat Management: Indirect vs Direct Grilling in Wet Weather
Rain cools the grill surface and changes airflow patterns, so indirect heat becomes a valuable strategy. Use a two-zone setup when possible, with the heat source on one side and the food on the cooler section. Close the lid to trap heat, and avoid opening too often—each lid lift dumps valuable energy. If you’re using charcoal, bank the coals to a side and place a heat-safe pan to catch moisture; for gas grills, keep the burners adjusted to a steady simmer and shield the grill with the canopy lid to maintain temperature. Start with moderate heat and gradually increase as you monitor weather and air movement. This approach helps you manage slower sears and uneven heating common in rain.
Food Safety and Timing in Rainy Conditions
Wet weather demands careful attention to food safety. Keep raw ingredients separate from cooked items, and avoid leaving perishable foods uncovered. Use a thermometer to verify internal temperatures and follow established safety guidelines; if you’re unsure, cancel or postpone to avoid foodborne illness. Marinate and season in a shaded, dry area, then finish cooking with the grill lid closed to preserve heat and reduce surface moisture. Remember that rain can lengthen cooking times, so plan additional rest and hold times to maintain safety and quality. Grill Cooking recommends keeping cold foods cold and hot foods hot with clear timing and proper storage between steps.
Practical Rainy Grilling Techniques with Examples
Technique 1: Foil steam packets for moisture and even cooking. Layer proteins and aromatics in foil, seal tightly, and place the packet on indirect heat under the shelter. The steam helps keep meat juicy while you avoid opening the lid frequently.
Technique 2: Wind-assisted grilling with a wind guard. Position a metal wind guard on the windward side to stabilize heat and reduce moisture loss. Cook proteins using indirect heat, then finish with a quick sear over higher heat once the shelter has warmed.
These approaches minimize flare-ups and heat loss, enabling reliable results even when conditions aren’t cooperative. Practice a few test runs during light drizzle to dial in timing and fuel use. The goal is repeatable results rather than heroic attempts in bad weather.
Weather Considerations: Wind, Rain, and Lightning Safety
Check local forecasts before you start, and be prepared to respond to changing conditions. If a storm or lightning is forecast, seek shelter indoors and postpone the grill session. Even light rain can become windy gusts that disrupt airflow and safety if you’re not prepared. Keep your cooking area dry and well-lit, and maintain a clear escape route. The Grill Cooking team emphasizes that safety and smart planning trump persistence in unsafe weather. If in doubt, stop grilling and wait for better conditions.
Troubleshooting Common Rainy-Grill Problems
Problem: Steam and moisture condense on food, delaying browning. Fix: Keep the lid closed longer during searing phases and use indirect heat to maintain a stable temperature.
Problem: Slippery surfaces and tool handling risk. Fix: Wear non-slip shoes, keep towels handy, and use heat-resistant gloves for grip and protection.
Problem: Wind-driven flames and flare-ups. Fix: Use wind guards, keep a water spray bottle handy for safe flare buffering, and adjust the grill height or shelter position to dampen the breeze.
Problem: Wet fuel and damp charcoal/gas lines. Fix: Store fuel in a dry bag, protect fuel connections from moisture, and avoid lighting when damp conditions threaten stability. The right shelter and careful handling reduce these common issues.
Getting Comfortable: Practice, Routine, and Cleanup After Rain
Develop a rain-ready routine that you can repeat: set up shelter, preheat, prep ingredients in a dry zone, cook with indirect heat, and perform a final sear if weather permits. After cooking, close the lid, let the grill cool briefly, then wipe down grates and dry all surfaces. Store tools and unused fuel in a dry place to prevent corrosion. Regular practice under light drizzle helps you refine timing and coordination, turning rain into a predictable factor rather than an obstacle.
Tools & Materials
- Weatherproof canopy or portable rain shelter(Sturdy, anchored to the ground; avoid lightweight tents that can topple in wind)
- Windbreak panels or outdoor screens(Place on the windward side to stabilize heat)
- Non-slip outdoor mat(Keeps footing safe and prevents slips on wet surfaces)
- Dry towels and cloths(Essential for quick wipe-downs and moisture control)
- Heat-resistant gloves(Protect hands when handling hot grates and equipment)
- Infrared or probe thermometer(Helps ensure safe and accurate doneness without guesswork)
- Grill cover or tarp(Protects grill when not in use and during short downtimes)
- Stable outdoor table or cart(Keeps prep area organized and dry)
- Extra fuel (charcoal or gas canisters)(Maintain steady heat; store in dry place)
- Dry storage bins for ingredients(Prevents contamination and keeps prep area tidy)
- LED work light or headlamp(Improves visibility as daylight fades or weather darkens)
Steps
Estimated time: 60-90 minutes
- 1
Assess weather and set shelter
Check the forecast and choose a sheltered location. Ensure the canopy is secure and tall enough to avoid crowding around the grill. Confirm you have dry access to all tools and ingredients.
Tip: If lightning is possible, postpone—safety first. - 2
Position windbreaks and prep zone
Place windbreak panels to shield the grill from prevailing gusts. Set up a dry prep area with towels and a near-by table, all within shelter.
Tip: Test airflow by briefly warming the grill lid to feel for drafts. - 3
Preheat with indirect heat
Light the grill and establish indirect heat first. Close the lid to trap heat, preventing rapid cooling from rain.
Tip: Avoid opening the lid too soon; each opening saps heat. - 4
Prepare food safely in dry zone
Season and marinate items away from the grill in a dry area. Keep raw ingredients separate from cooked foods.
Tip: Have a dedicated tray for marinating to avoid cross-contamination. - 5
Cook with controlled heat
Move food to indirect heat as needed. Use the grill lid to maintain stable temperatures and prevent flare-ups from rain-induced moisture.
Tip: For thicker cuts, finish with a brief sear over higher heat once temps stabilize. - 6
Monitor doneness with thermometer
Check internal temperatures with a reliable thermometer. Adjust time based on readings rather than guesses.
Tip: Cross-check with a second thermometer if available for accuracy. - 7
Finishing touches and sauce timing
Apply glazes or sauces near the end to avoid burning while rain is still active around the grill.
Tip: Keep sauces on the cool side to prevent sugar scorching in rain. - 8
Cleanup and dry storage
Allow everything to cool in the sheltered area, then wipe grates and dry tools before storing.
Tip: Dry everything thoroughly to prevent rust and corrosion after rain exposure.
FAQ
Is it safe to grill in the rain?
Yes, with proper shelter, steady heat, and avoidance of storms. Always follow local weather advisories and use heat protection and non-slip gear.
Yes, you can grill in the rain if you set up a sturdy shelter, manage heat carefully, and avoid storms.
What kind of shelter works best?
A sturdy canopy or shelter anchored to the ground with wind protection around the grill is ideal.
A sturdy canopy with wind protection around the grill keeps you dry and stable.
Gas or charcoal in the rain—which is better?
Gas grills handle rain more predictably; charcoal can work with a wind guard but requires more attention to weather changes.
Gas grills are often easier in rain, but both can work with the right shelter.
How long does rainy grilling take?
Times vary by food and heat; expect longer adjustments due to moisture and wind, and rely on a thermometer for doneness.
Cooking times can increase in rain; use a thermometer to verify doneness.
What safety gear helps during rain?
Non-slip shoes, heat-resistant gloves, and dry towels are essential for safe handling and cleanup.
Wear non-slip shoes, heat-resistant gloves, and keep towels handy.
Should I grill if thunder is approaching?
If thunder is audible or lightning is nearby, seek shelter indoors and postpone the grill.
If you hear thunder or see lightning, stop and move indoors.
Watch Video
Quick Summary
- Plan shelter and heat strategy before lighting.
- Use indirect heat to tame rain-induced temperature drops.
- Prioritize food safety with thermometer checks.
- Protect gear and surfaces from moisture to extend life.
- Practice rainy sessions to build reliable routines.