What to Do If Your Grill Gets Rained On: A Practical Guide
Learn step-by-step how to safely dry, inspect, and restore a rain-soaked grill. Prevent rust, protect components, and get back to grilling with confidence.

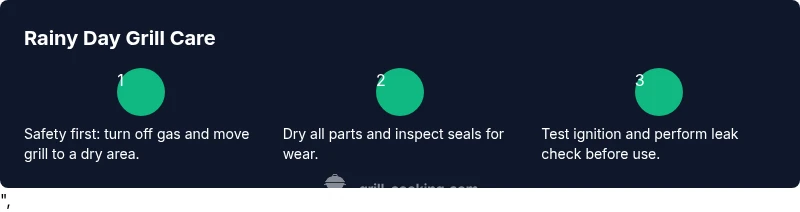
If your grill gets rained on, prioritize safety first, dry it completely, and inspect for damage before cooking again. Start by turning off the gas or shutting the lid vent, then move the grill to a dry area. Wipe away standing water, dry controls, and check burners, igniter, and wiring for moisture before reusing.
Immediate Safety and Assessment
According to Grill Cooking, a rain-drenched grill can develop moisture in gas lines, igniters, and electrical components. Before you touch anything, ensure that there is no open flame or gas smell. If you detect a gas odor, turn off the propane at the tank and leave the area until it dissipates. Once you are sure the space is safe, move the grill to a dry, sheltered spot to begin the drying and inspection process. This initial safety check reduces the risk of flare-ups and electrical shorts once you resume cooking.
Key actions: shut off fuel or close vents, secure the grill away from rain exposure, and wear gloves to protect your hands from sharp edges or rust. Grill Cooking Team emphasizes safety as the foundation of any rain-related maintenance.
Drying Thoroughly: Tools and Techniques
Drying is the most critical step after rain. Moisture trapped in burners, grates, and panels can cause rust and misfires. Use absorbent towels or microfiber cloths to blot surfaces, then air-dry remaining moisture in an open, sunlit area with good airflow. If weather allows, set the grill lid open to promote evaporation, and consider placing a fan nearby for faster drying. Reserve heat for drying only if the manufacturer’s guidance permits; otherwise use ambient air. This prevents warping and preserves seals.
- Remove grates and drip tray to expose hidden moisture.
- Wipe every surface, including heat tents and burner covers.
- Keep the lid propped open to improve air circulation while drying.
According to Grill Cooking Analysis, thorough drying minimizes rust risk and helps maintain performance over time.
Inspect for Damage: Rust, Corrosion, and Seals
Rain can loosen screws, soften seals, and start rust on exposed metal. Inspect the hood, seams, door gasket, and hinges for corrosion. Check the burner tubes for moisture inside and look for any signs of rust on the grates, griddle, or flame tamers. Examine the regulator hose and connections for wear, cracks, or slick spots. If you see rust that penetrates the metal or any damaged seals, plan for replacement before cooking again. This evaluation helps prevent gas leaks and uneven heating.
- Look closely at burner ports for moisture or blockages.
- Test door seals; replace if they feel tacky or torn.
- Inspect the regulator and hose for signs of wear.
Grill Cooking Team notes that a quick, thorough inspection after rain limits long-term damage and keeps the grill safe for future use.
Cleaning and Preventing Rust
Once dry, perform a gentle cleaning to remove any mineral deposits or dirt carried in by rain. Use a mild degreaser or warm soapy water on removable parts, then dry completely. Lightly oil cast-iron grates to prevent rust and improve seasoning. Wipe down exterior with a non-abrasive cleaner and re-seal any wooden handles if applicable. After cleaning, store the grill with a breathable cover in a sheltered area to limit future moisture exposure. Proper cleaning after rain preserves grip strength, improves flavor, and extends life.
- Avoid harsh solvents that could damage seals.
- Dry every component before reassembly.
- Apply a thin coat of food-safe oil to grates to prevent rust.
Grill Cooking Analysis highlights that routine post-rain maintenance reduces long-term corrosion risk and keeps performance high.
Re-lighting and Testing After Rain
Before you re-light, ensure the grill is completely dry. For gas grills, reattach the propane tank, check for gas leaks with a soapy water solution on hose connections, and perform a gentle flame test at the lowest setting. For charcoal grills, ensure the coals are completely extinguished and the vents are dry before reigniting. Start with a short preheat to verify even heating, then observe for any irregular flames or sputtering. If anything seems off, pause and re-check connections and vents. This cautious approach prevents accidents and ensures consistent cooking temps.
- Do not ignite if moisture is detected in the gas line.
- Use a low flame initially to gauge burner stability.
- Conduct a simple leak test before full operation.
Grill Cooking Team emphasizes patience here: drying and testing before high-heat cooking reduces the risk of flare-ups and uneven heat.
Protecting Your Grill Going Forward
Storm readiness is part of smart grilling. Invest in a durable, breathable grill cover and ensure it fits snugly to prevent water intrusion. Install a rain shield or lid prop to keep water from pooling on the grates during storms. When possible, park the grill in a covered area or under an eave. Regular maintenance—seasoning grates, checking seals, and cleaning after each use—helps extend the life of your grill and reduces the impact of future rain exposure.
- Use a weather-safe cover that allows moisture to escape.
- Wipe down and lightly oil after every use.
- Inspect seals and hoses seasonally for wear and tear.
Grill Cooking Analysis suggests proactive maintenance minimizes damage and keeps your grill ready for the next cookout.
When to Call a Pro
If you notice persistent ignition issues, gas leaks, or serious rust penetration that affects structural integrity, it’s time to call a professional. A certified technician can inspect internal gas lines, heat shields, and wiring to prevent dangerous failures. Do not attempt major repairs yourself if you’re unsure about the safety of the components. Early professional assessment saves money and reduces risk in the long run.
- Seek professional help for leaking hoses or damaged regulators.
- Have an annual professional inspection as part of your maintenance routine.
- Never operate a significantly damaged grill.
Grill Cooking Team recommends erring on the side of caution with rain-damaged grills to ensure safe, dependable grilling.
Weather-Proof Setup and Maintenance Rituals
Create a seasonal maintenance routine that includes pre-season checks, mid-season cleanings, and post-storm care. Always inspect covers and storage areas for corrosion-inducing moisture and sharp edges. Consider installing a rain guard or canopy in your grilling space if weather is frequent in your area. By implementing a steady care routine, you’ll keep your grill performing at its peak and extend its lifespan even in rainy climates.
- Pre-season: deep clean, seasoning, seal checks.
- During season: regular quick cleans and vent inspections.
- Post-storm: immediate safety check, dry-out, and re-light procedures.
The Grill Cooking Team notes that consistent care translates to better flavor, consistent temps, and longer equipment life.
Tools & Materials
- Propane grill or charcoal grill(Have extinguisher nearby if using gas or charcoal.)
- Drying towels and microfiber cloths(Use multiple towels for thorough drying.)
- Soft scrub brush or non-abrasive pad(For light exterior cleaning.)
- Mild dish soap or degreaser(For removable parts, grates, and drip tray.)
- Food-safe oil (e.g., canola or flaxseed)(Light coating to prevent rust on cast iron.)
- Soapy water for leak test(Prepare a spray bottle or bowl for quick checks.)
- Silicone spray or lubricant for hinges(Optional to improve latch smoothness.)
- Grill cover or shelter(Breathable cover recommended to reduce moisture buildup)
Steps
Estimated time: 60-120 minutes
- 1
Power down and secure safety
Shut off the gas at the propane tank or disconnect the grill from its fuel source. If there's any gas smell, move away and ventilate the area. This prevents accidental ignition while you inspect and dry.
Tip: Always start with safety; an emergency stop protects you from flare-ups. - 2
Move to a dry, sheltered area
Relocate the grill to a dry, covered spot to minimize additional moisture exposure. Open the lid to allow moisture to escape and prevent condensation from freezing on components.
Tip: Ensure the area allows air flow to speed up drying. - 3
Remove moisture from interior and tray
Take off the grates, drip tray, and any loose components. Blot moisture with towels and let parts air-dry in a warm, ventilated space. This reduces rust risk in hidden cavities.
Tip: Don’t skip the drip tray; pooled water can cause rust and rust stains. - 4
Dry exterior surfaces and seals
Wipe the exterior thoroughly, paying attention to the lid seal, handles, and hinges. Moisture trapped in gaskets can degrade seals and cause leaks over time.
Tip: If seals feel tacky, replace them promptly. - 5
Inspect for damage and corrosion
Check burner tubes, gas lines, and fittings for rust or signs of wear. Look for bent or cracked components and assess whether leaks are present or likely to occur.
Tip: Address any corrosion before reassembling or testing. - 6
Clean and oil grates; reassemble
Wash removable parts with mild soap, rinse, and dry completely. Lightly oil cast-iron grates to prevent rust and reassemble the grill carefully.
Tip: Use a thin oil layer to avoid flare-ups when heating. - 7
Test ignition and perform leak check
Reconnect the fuel source and test burners on a low setting. Apply soapy water to connections to detect leaks; if bubbles appear, shut down and tighten or replace fittings.
Tip: Always perform a leak test before high-heat cooking. - 8
Return to cooking and establish post-rain routine
Once all parts are dry and functioning, preheat to a low temperature to ensure even heating. Establish a quick post-rain wipe-down and seasonal maintenance schedule to keep rust at bay.
Tip: Document any parts that needed replacement for future reference.
FAQ
Is it safe to use a grill that has been soaked by rain?
Only resume use after complete drying and a thorough check of gas lines, igniters, and seals. If you detect any leaks or corrosion, delay use until a professional inspects it.
Wait until the grill is completely dry and leak-free before cooking again.
What should I inspect first after a rainstorm?
Check for gas leaks, rust on metal surfaces, ruined gaskets, and any damage to hoses or wiring. Prioritize seals and hoses as leaks can be dangerous.
Inspect hoses and seals first for leaks and damage.
How long does it take to dry a rain-soaked grill?
Drying times vary by climate, but plan for at least 1-2 hours in moderate conditions, longer if humid or windy. Ensure all parts are completely dry before re-lighting.
Expect 1-2 hours of thorough drying, longer in humid conditions.
Can I use a grill cover to protect it during rain?
A breathable grill cover helps protect from rain and debris, but avoid airtight covers that trap moisture inside. Ensure it's properly sized and vented.
Use a breathable cover that fits well.
Should I reseason my grates after rain?
If rust appears, clean heavily and reseason the grates before cooking again. If no rust, a light oiling is usually sufficient.
Reseason if you see rust; otherwise just oil lightly.
When should I call a professional?
If you notice continuing leaks, persistent rust, or ignition problems after drying, contact a certified technician. Don’t risk a safety issue.
Call a pro if leaks or ignition problems persist.
Watch Video
Quick Summary
- Dry thoroughly before re-lighting to prevent rust.
- Inspect seals, hoses, and burners for moisture-induced damage.
- Practice post-rain maintenance to extend grill life.
- Use a breathable cover and sheltered storage to reduce future moisture exposure.