How to Remove Propane Tank from Grill: A Safe Step-by-Step Guide
Learn how to safely remove a propane tank from your grill with a practical, step-by-step process, safety checks, and storage tips.

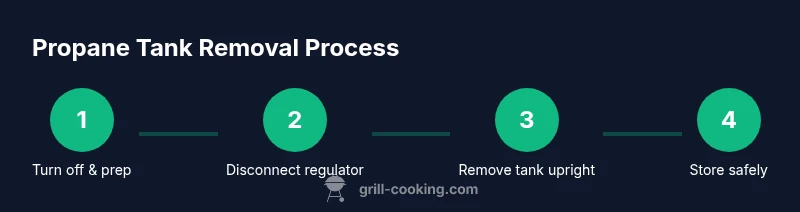
If you’re learning how to remove propane tank from grill, start by turning off the grill and closing the tank valve. Then disconnect the regulator from the tank, lift the tank clear of the grill, and store it upright in a well-ventilated area away from heat. This quick guide covers safety and proper handling.
How to remove propane tank from grill safely
According to Grill Cooking, how to remove propane tank from grill safely reduces fire risk and protects household safety when you follow the right sequence. When you know the right sequence, you can minimize leaks, injuries, and accidental ignition. In this section, you’ll learn the core principles, why each move matters, and how to prepare your space for a clean, safe tank removal. The goal is to leave your grill and propane system in a condition ready for safe storage or the next cookout. This section emphasizes why safe detachment matters and how to avoid rushing through steps that could cause leaks or damage.
For home cooks, understanding the basic safety framework helps you handle propane systems with confidence. The emphasis is on calm, deliberate action, clear communication if you’re grilling with others, and a routine that you can repeat for every tank swap. By following a consistent process, you reduce the risk of accidental ignition and improve overall grill maintenance. The guidance here aligns with general best practices for outdoor cooking equipment and is designed to be model-agnostic, so you can apply it whether you own a basic kettle grill or a larger gas grill setup.
Tools and safety gear you’ll need
Before you start, assemble the essential tools and safety gear. Key items include heat-resistant gloves, safety glasses, and a clean work surface. Keep a leak-detection solution or soapy water handy to verify connections after reassembly. If you notice any damage to the tank, hoses, or regulator, stop and seek professional help. These precautions, recommended by Grill Cooking, help prevent leaks and injuries at every step.
Having the right space matters: work outdoors in a well-ventilated area, away from open flames, and on a stable surface. Prepare a plan for what you’ll do with the tank once it’s detached (store, transport, or swap for a full tank). Keeping everything organized reduces the chance of spills or missteps during the removal process.
Understanding the process: what matters most
The removal process is about controlled de-pressurization, safe disconnection, and correct storage. Start by turning off gas at the valve and ensuring the grill is cool before you begin. Always work in a well-ventilated outdoor area. This section explains the underlying safety concepts—why we close valves, how to handle the regulator, and where the tank should be stored to minimize risk.
Key concepts include recognizing different valve and regulator configurations, the importance of keeping the tank upright, and the role of the regulator in preventing flow when disconnected. Understanding these basics helps you adapt to variations between grill models while maintaining safety. If you’re unsure about a connection, stop and consult the manual rather than forcing parts apart. In many cases, a simple misalignment is the root cause of leaks or strain on fittings.
Finally, consider environmental factors: wind direction, nearby combustible materials, and heat sources. Choosing the right moment to work—on a cool, dry day with good airflow—reduces the chance of accumulated gas lingering or igniting near the work area.
Common mistakes to avoid during removal
Common errors include leaving the valve open, forcing a stuck regulator, or attempting to remove the tank indoors or near heat sources. Never flame-test a connection and never store a hot tank. These missteps can cause leaks, fire, or tank damage. Use the step-by-step guide below to stay on track and reduce risk.
Other frequent mistakes involve not inspecting the tank for damage before use, choosing an unstable surface for removal, or failing to store the tank upright after detachment. Tank visibility matters: if you can see corrosion, dents, or a compromised valve, retirement or professional inspection is warranted. Don’t skip the post-removal inspection of hoses and fittings, even if everything seemed fine during detachment. If you notice leak signs at any point, stop and re-evaluate the setup rather than continuing.
For single-tan tasks, it’s tempting to rush through steps when hungry for a cookout. Slowing down improves safety and reduces the likelihood of accidental gas release. If you’re unsure about a specific fit or component, defer to the manual or consult a licensed technician. This cautious approach helps ensure a safe transition between tanks and grills.
Aftercare and storage tips
Once the tank is removed, inspect the grill’s hose and valve area for signs of wear, and wipe down any residue. Store the tank upright in a ventilated area away from direct sunlight or heat sources. Keep it away from living spaces and ensure the valve is closed when not in use. Proper storage reduces corrosion and preserves fuel integrity for future use. If you’ve performed a leak test, document the result and store any related testing materials away from heat and flame.
Aftercare also includes routine maintenance: check for hose cracks, tighten any loose clamps, and keep the regulator clean and free of debris. Regularly test the storage area for ventilation and accessibility. If you’re using a multi-tank setup, create a dedicated, clearly labeled storage area that keeps tanks upright and separated from other fuels. By maintaining a consistent aftercare routine, you extend the life of your propane system and improve overall grill safety.
Final checks before putting it away
Before finishing, perform a final walk-around to confirm there are no open valves, hoses, or fittings that show signs of wear. Verify that the storage area is free of ignition sources and that the tank is in an upright position. If you plan to reconnect the tank, recheck all connections with a soap-and-water test and only reattach the regulator when you are certain there are no leaks. Finally, store your manuals and safety equipment in a dedicated spot for quick access during future barbecues.
Tools & Materials
- Propane tank (upright, valve closed)(Ensure tank is safe to handle; keep cap on while not in use.)
- Safety gloves (heat-resistant)(Protect hands during lifting and disconnection.)
- Safety glasses(Protect eyes from leaks or splashes.)
- Leak-detection soap or spray bottle(Test for leaks if you reconnect; never flame-test.)
- Rag or absorbent towel(Wipe away any residue and provide grip.)
- Adjustable wrench or pliers(Only if regulator connection is stiff or difficult.)
- Outdoor ventilation space(Choose a well-ventilated, open area.)
- Owner’s manual or grill manufacturer guidelines(Helpful for model-specific steps.)
Steps
Estimated time: 20-30 minutes
- 1
Power down and close the valve
Ensure the grill is off and the propane tank valve is fully closed before any handling. This reduces the risk of gas escaping if a seal is imperfect. If you detect any hissing, stop and reassess the situation.
Tip: Always close the valve first; never disconnect while the valve is open. - 2
Disconnect the regulator from the tank
Gently loosen the regulator from the tank fitting by turning counterclockwise. Hold the tank steady to prevent leaks while you disconnect. Keep the regulator away from the valve opening and any flame source.
Tip: Loosen slowly to avoid creating a release or damage to the gasket. - 3
Ventilate and prepare your space
Move the grill and tank to a well-ventilated outdoor area. Place the tank upright on a stable, non-slip surface. Keep children and pets away and ensure there is no open flame nearby.
Tip: If indoors or in a garage, stop and relocate outside immediately. - 4
Lift and remove the tank from the grill
Grasp the top of the tank collar with gloves and lift straight up, keeping the tank vertical. Avoid tilting or rolling the tank to prevent leaks from the valve. Set the tank a few feet away from the grill on a flat surface.
Tip: Use proper lifting technique; bend at the knees to protect your back. - 5
Inspect the tank and hoses for damage
Check the tank body, valve, and hoses for dents, cracks, or corrosion. If you see damage, do not use the tank or reconnect it to the grill. Damaged components should be retired or inspected by a professional.
Tip: Do not reuse a visibly damaged tank; safety comes first. - 6
Store the tank upright in a ventilated area
Place the tank upright in a cool, shaded, well-ventilated location away from heat sources. Cap or keep the valve closed when not in use. If you plan to store long-term, consider a dedicated propane storage area outside.
Tip: Never store indoors; keep it in a designated outdoor storage spot. - 7
Final check and cleanup
Return tools to their storage, wipe surfaces, and confirm there are no leaks by re-checking all fittings after reassembly.
Tip: Always re-check after performing tasks; a quick soap test helps ensure safety. - 8
Document storage plan for next use
Note the date of removal, check tank expiry, and plan your next grill session. Keep manuals handy and maintain a routine that you can repeat for future tank changes.
Tip: Create a simple checklist you can follow each time you swap tanks.
FAQ
Is it safe to remove a propane tank while the grill is hot?
No. Wait until the grill and tank have cooled before you begin handling. Hot surfaces and pressurized gas increase risk.
No—wait until everything is cool before handling the propane tank.
Can I disconnect the regulator while the tank is connected?
Yes, after turning off the gas at the valve and ensuring there are no leaks. Do it slowly to avoid damage.
Yes, but make sure the gas is off and there are no leaks first.
What should I do if the valve won’t turn?
Do not force the valve. Check for debris or damage, and consult the grill’s manual or a professional.
If the valve won’t turn, stop and seek help; don’t force it.
Where should I store an empty tank?
Store upright in a ventilated outdoor area away from heat sources. Keep the valve closed and avoid indoor storage.
Store upright in a ventilated outdoor area; keep the valve closed.
How do I check for leaks after reconnecting?
Apply a soap solution to connections and look for bubbles. If you see leaks, tighten or replace fittings; never use a flame to test.
Check for leaks with soapy water after reattaching; avoid flames.
Can damaged tanks be repaired?
No. If the tank shows dents, corrosion, or damage, retire it and replace with a new tank.
If damaged, retire the tank and replace it; safety first.
Watch Video
Quick Summary
- Turn off gas and close valve before removal.
- Disconnect regulator slowly to avoid leaks.
- Remove tank upright in a ventilated area.
- Inspect for damage and store properly.
- Refer to the manual for model-specific steps.