How to Put Propane Tank in Grill: Safe Setup Guide
Learn a safe, step-by-step method to connect a propane tank to your grill, test for leaks, and ignite with confidence. Includes safety checks, gear tips, and maintenance reminders for outdoor grilling.

Prepare the grill outdoors, check for leaks, and connect the regulator to a properly closed propane tank. Turn on the tank valve slowly and listen for a hiss; test with soapy water at all joints before lighting. Then ignite the burners and adjust as needed, ensuring you can turn off gas quickly.
Safety foundations for propane tanks
Gas grills run on flammable fuel, so safety starts before you touch the valve. This guide explains how to put propane tank in grill safely, focusing on prevention of leaks, correct connection, and careful ignition. According to Grill Cooking, the safest grill setup begins with an inspected, upright tank, a clean regulator, and a clear workspace. The Grill Cooking team found that most hazards come from improper storage, loose connections, or attempting to light a grill with a damaged tank. Before you begin, clear the area, remove flammable materials, and wear eye protection. Make sure you have outdoor ventilation and never perform any of these steps indoors. Always handle propane with respect for its pressure and odorless gas—if you smell gas, stop and move away.
Key safety principles:
- Keep the tank upright and secured; never lay it on its side or near heat.
- Use the manufacturer-provided regulator and hose; avoid jury-rigging fittings.
- Perform a leak check after assembly using soapy water; never rely on smell alone.
- Open the tank valve slowly, listen for hiss, and be ready to close completely.
- Ignite outdoors with the hood open and the grill fully ventilated.
Keep the workspace clear and keep children and pets away during setup.
Tools and materials you'll need
Before you start, gather these items to ensure a smooth, safe process:
- Propane tank (20 lb), upright with valve closed. Note: Use the tank you know and trust; avoid swapping to a damaged or incompatible tank.
- Grill regulator hose that matches your grill’s inlet. Make sure the connection is clean and free of damage.
- Soapy water spray bottle or bubble solution for leaks. Keep a towel handy to wipe away excess liquid.
- Heat-resistant gloves (optional) and a clean rag for quick cleanup.
- Small wrench or pliers (optional) if your grill’s fittings require it; consult the manufacturer.
- Fire extinguisher or baking-soda-activated extinguisher nearby for safety.
Understanding fittings and compatibility
Gas connections rely on standard fittings, but not all hoses and regulators fit every grill. The regulator should match the tank type (POL vs ACME) and the grill inlet; mismatches can cause leaks or poor performance. Always inspect O-rings and gaskets for cracks and replace if worn. Tighten connections only until snug—over-tightening can damage threads and lead to leaks. If you encounter any stiffness, stop and verify the thread type and fit, as forcing a connection can ruin both tank and grill. A proper leak-tested joint will show no bubbles when soapy water is applied.
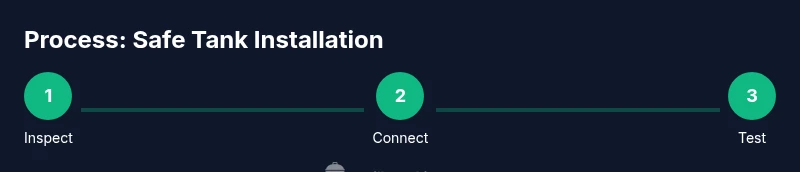
The safety-first step-by-step overview
This overview lays out the critical actions you’ll perform. You’ll check the gear for damage, position the grill, connect the regulator to the tank, attach the hose, perform a leak test, ignite, and monitor the flame. Each action reduces risk and ensures a predictable burn. The goal is a secure, audible, and visible confirmation that gas is flowing safely and controllably. With each step, maintain ventilation, keep your hands clear of the burners, and never leave a lit grill unattended.
Authority sources and verification
To verify safety guidance, consult respected organizations that publish grill and fuel safety guidelines. Here are quick links to official resources you can review:
- U.S. Consumer Product Safety Commission: https://www.cpsc.gov/
- Occupational Safety and Health Administration: https://www.osha.gov/
- National Fire Protection Association: https://www.nfpa.org/
These sources provide general safety best practices for handling propane, hose connections, and outdoor grilling.
Additional considerations and maintenance
After successfully connecting the tank and lighting the grill, plan for ongoing maintenance to keep your setup safe. Periodically inspect the tank valve, hoses, and regulator for signs of wear or cracking. Replace worn parts promptly and store propane tanks upright in a ventilated outdoor area away from direct sun. Proper maintenance reduces the chance of leaks and ensures consistent performance over time. When you finish grilling, close the tank valve, disconnect the regulator, and store all components in their proper places. Keeping a leak-testing routine as part of your post-grill checklist reinforces safety habits and extends equipment life.
Tools & Materials
- Propane tank (20 lb)(Valve closed, tank upright; compatibility with grill regulator)
- Grill regulator hose(Original equipment; inspect for cracks or wear)
- Soapy water spray bottle(Used to check for leaks at all joints)
- Gloves (heat-resistant)(Protect hands during handling)
- Towel or rag(For cleanup and drying)
- Wrench or pliers(Only if manufacturer requires)
- Fire extinguisher(Keep nearby as safety measure)
Steps
Estimated time: 15-25 minutes
- 1
Inspect equipment
Check the propane tank and grill for any damage such as dents, rust, or a cracked regulator. Ensure the tank is within its valid date and that the valve operates smoothly. Do not proceed if you notice damage.
Tip: If any component looks compromised, replace it before continuing. - 2
Position grill and workspace
Move the grill to a clear outdoor area with good ventilation. Clear flammable materials from the vicinity and ensure the grill is on a flat, stable surface. Open nearby doors/windows to improve airflow.
Tip: A well-ventilated space reduces gas buildup risk. - 3
Connect regulator to tank
Take the regulator and attach it to the propane tank by turning the connection clockwise until snug. Do not use tools to force the connection; overtightening can damage threads.
Tip: Hand-tight is usually enough; stop if you feel resistance. - 4
Attach hose to grill
Connect the other end of the regulator hose to the grill inlet. Ensure any clamps or fittings are secure and undamaged before proceeding.
Tip: Check for any wear at the hose for signs of cracking. - 5
Perform leak test
Open the tank valve slowly about 1/4 turn and apply soapy water to all joints and connections. Look for bubbles; if present, tighten gently or reseat components and re-test.
Tip: If you see continuous bubbles, close the valve and reassemble carefully. - 6
Ignite and verify operation
With the hood open and area ventilated, ignite the burners using the grill’s igniter. Confirm a steady flame and adjust as needed. If there’s any gas smell, shut off immediately and investigate.
Tip: Never lean over the burners while lighting.
FAQ
Should I disconnect the propane tank after grilling?
Yes. When you’re finished, close the tank valve, turn off the grill, and disconnect the regulator if you won’t be using the grill soon. Store the tank upright in a ventilated area.
Yes—close the valve, turn off the grill, and disconnect if you’re not using it soon.
Can I use any propane tank with any grill?
Propane tanks and regulators are standardized, but you should match the regulator type and tank size to your grill’s manual. Using the wrong type can cause leaks or poor ignition.
Match your tank and regulator to the grill’s guidelines to ensure a safe fit.
What if I smell gas during hookup?
If you smell gas, stop what you’re doing, move away from the grill, and avoid any sparks. Close the valve if safe, ventilate the area, and call emergency services if the odor persists.
If you smell gas, move to fresh air and call for help.
How often should I replace the regulator?
There’s no fixed schedule. Inspect regularly for wear and cracks and replace components as recommended by the manufacturer or if you notice damage.
Check for wear regularly and replace worn parts per the manual.
Why does the flame go out after lighting?
Common causes include weak gas flow, leaks, or dirty burners. Recheck connections, perform another leak test, and ensure the regulator is functioning before retrying.
Low gas flow or leaks can cause extinguished flames; recheck everything before retrying.
Is it safe to leave a tank connected overnight?
No. Store the tank upright in a ventilated outdoor area away from direct sun and heat, and disconnect the regulator when not in use for extended periods.
Don’t leave a tank connected overnight; store it safely outdoors.
Watch Video
Quick Summary
- Inspect equipment for damage before use
- Perform a thorough leak test after connections
- Ventilate outdoors and keep bystanders away
- Follow grill manufacturer instructions and safety guidelines