When to Replace Grill Burners: A Practical Guide
Learn how to identify worn grill burners, decide when replacement is needed, and follow a safe step-by-step process to upgrade your grill for even heat and safer cooking.

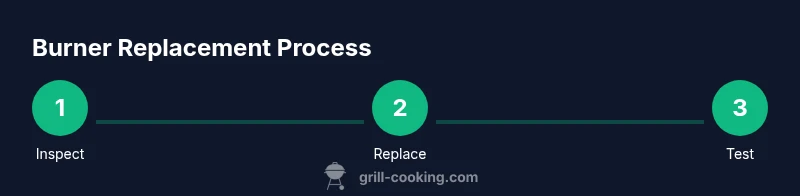
By the end of this guide you will know when to replace grill burners and how to do it safely. You’ll evaluate burner condition by looking for warped tubes, clogged ports, uneven flames, and persistent hot spots. You’ll also learn how to test heat distribution, decide between cleaning and replacement, and execute a step-by-step replacement if needed.
Signs Your Grill Burners Are Reaching End of Life
Even with regular cleaning, burners wear out. According to Grill Cooking, visible wear on burner tubes, rust around connection points, warped or bent tubes, or missing burner caps are red flags that heat distribution will falter. Pay attention to flame patterns: flames that hug the ports or drift to one side indicate misalignment or clogged ports. If you notice yellow or orange tips rather than clean blue flames, that’s a sign of incomplete combustion or contamination. Safety concerns include gas odors near connections or a hiss when you open the lid. If you detect any of these signs, plan for a replacement or professional inspection. Regular visual checks before grilling sessions help catch problems early and prevent uneven cooking and potential gas leaks.
How to Inspect Burners Without Disassembling Your Grill
You don’t always need tools to assess burner health. Start by removing the grill grates and, if accessible, the heat shields to gain a clearer view of the burner tubes. Use a bright flashlight to inspect for corrosion, warped ends, clogged ports, or loose mounting screws. A quick wobble test can reveal loose connections around the manifold. Grill Cooking analysis shows that inconsistent heat often traces to clogged ports or misaligned burners. If you see any corrosion, bent tubes, or fragile components, mark the unit for a closer inspection or replacement.
Cleaning vs Replacing: When Cleaning Isn’t Enough
Cleaning can restore performance temporarily, but it isn’t a fix-all. Use a soft brush to clear stubborn debris from burner ports and a mild degreaser to remove built-up grease. If after cleaning you still notice uneven flames, yellow tips, or persistence of hot spots, replacement is often the safer and more reliable option. Don’t attempt to clean a cracked or rusted burner; damaged tubes can fail under high heat. Regular maintenance, including wiping the burner surface after use and avoiding harsh chemical cleaners, helps extend life.
How to Choose the Right Replacement Burners
Replacement burners come in two main flavors: exact-match OEM parts and compatible universal options. Start by checking your grill model and the number of burners you have. Compare burner length, port size, mounting flange, and connector style to ensure a proper fit. Stainless steel burners resist corrosion better than aluminized options, but price and compatibility vary. If you’re unsure, bring the old burner to a reputable parts retailer or consult the manufacturer’s online guidance. As Grill Cooking notes, compatibility and proper alignment are the keys to even heat and safe operation.
Installation Considerations and Safety
Before touching any gas lines, extinguish flames, turn off the gas supply, and allow the grill to cool completely. Disconnect the propane cylinder or turn off the natural gas valve, then carefully remove the old burners. Inspect the manifold, gas lines, and gaskets for wear and replace any damaged parts. Reinstall new burners, ensuring ports align with the ports in the manifold and that screws or clips are snug but not overtightened. After assembly, perform a leak test by applying a soapy water solution to joints; look for bubbles indicating a leak. If you detect a leak, shut down the gas, re-check connections, and repeat the test.
Maintenance Plan to Extend Burner Life
Adopt a routine maintenance plan to keep burners performing at their best. After each use, brush away grease and wipe down the burner surface. Store grills with covers to protect from moisture and debris. Schedule a yearly visual check of burner tubes and connections, and replace any corroded parts promptly. Keeping track of replacement dates helps avoid unexpected failures during the grilling season. As always, consult the grill’s manual for model-specific guidance and safety precautions.
Quick Diagnostics After Replacement
After installing new burners, light the grill and observe the flame pattern across all burners. Flames should be steady, blue, and evenly distributed; a yellow or flickering flame may indicate incomplete combustion or misalignment. Run the grill on medium heat for several minutes, then perform another leak test. A quick post-replacement check saves time and reduces the risk of hazardous situations during cooking.
Tools & Materials
- Replacement burner(s) compatible with your grill model(Order exact model or universal option compatible with your grill; verify port size and mounting style.)
- Safety equipment: heat-resistant gloves and eye protection(Wear when handling hot components and during differential cooling.)
- Screwdrivers: Phillips and flat-head(Used to remove and secure burner mounting screws.)
- Adjustable wrench and needle-nose pliers(For loosening tight connections and fixtures.)
- Wire brush or pipe cleaner(Clean ports and remove debris from burner tubes.)
- Mild dish soap or degreaser and water(For cleaning components and leak testing with soapy solution.)
- Rags or towels(Cleanup and dry components after washing.)
- Soapy water leak-test solution(Bubble test to confirm joints are sealed after installation.)
- Gasket kit or replacement seals (optional)(Replace worn gaskets to prevent leaks.)
Steps
Estimated time: 45-60 minutes
- 1
Turn off gas and cool the grill
Ensure the grill is completely cool. Close the propane tank valve or shut off the natural gas supply, then disconnect the gas line if safe. This baseline safety step prevents accidental ignition during burner removal.
Tip: Double-check the valve is fully closed and test with a lighter near the main line only after you’ve disconnected to verify no gas is present. - 2
Remove grates and heat shields
Take out the cooking grates and any heat shields to expose the burners. This gives you clear access to mounting screws and the burner tubes. Keep track of screws and small parts so you can reassemble easily.
Tip: Take a quick photo of the burner orientation before removing anything to ensure correct reassembly. - 3
Disconnect old burners
Loosen and remove the mounting screws, disconnect the burner connectors from the gas manifold, and gently pull the burner out. Inspect the connectors for corrosion or damage and note how the burner sits in the housing.
Tip: Do not force burnt or stubborn burners; assess for hidden screws or clips that may require alternative tools. - 4
Install new burners
Position the new burners in the same orientation as the old ones. Reconnect gas lines, align the ports with the manifold, and secure with the mounting screws. Avoid overtightening to prevent warping or damage to threads.
Tip: Hand-tighten first, then snug with a screwdriver to the manufacturer's recommended torque if available. - 5
Reconnect gas and test for leaks
Reconnect the gas supply and apply a soapy water solution to all joints. If bubbles form, there’s a leak—shut off gas and tighten connections, then retest.
Tip: Keep a safe distance when applying test solution and never use an open flame during testing. - 6
Fire up and verify heat distribution
Light the grill and run on medium heat for several minutes to observe flame stability and distribution across all burners. Look for uniform blue flames and adjust as needed. If flames remain uneven, recheck burner alignment.
Tip: If a burner won’t light or emits a weak flame, recheck wiring and port alignment before concluding replacement was unsuccessful.
FAQ
When should I replace grill burners?
Replace burners if you notice warped tubes, clogged ports, uneven flame patterns, yellow-tipped flames, or persistent hot spots after cleaning. If there’s rust, corrosion, or a gas odor near connections, replace immediately.
Replace burners if you see warped parts, clogged ports, or persistent flame problems after cleaning; and always address any gas smells promptly.
Can I clean burners instead of replacing them?
Cleaning can restore performance temporarily, but it won’t fix warped tubes, warped ports, or significant corrosion. If problems persist after cleaning, replacement is the safer option.
Cleaning helps, but you should replace if issues stay after a thorough clean.
Are universal burners compatible with all grills?
Universal burners may fit some grills, but compatibility depends on port size, mounting hardware, and gas type. Always verify model compatibility before purchasing.
Check compatibility with your grill model before buying universal burners.
How do I test for gas leaks after replacement?
Apply a soapy water solution to all joints after reconnecting gas. If bubbles appear, tighten connections and retest. If bubbles persist, shut off gas and seek professional help.
Use the soap test to confirm joints are leak-free.
Will replacing burners affect my warranty?
Replacing burners can affect warranty terms; consult the manufacturer’s warranty policy for your grill model before performing any replacements.
Check warranty terms before replacing parts.
What should I do if I smell gas during or after replacement?
If you smell gas, evacuate the area and call emergency services. Do not re-enter until the area is declared safe by professionals.
Gas smells mean danger; exit and call for help immediately.
Watch Video
Quick Summary
- Know the signs that burners need replacement and act early
- Always shut off gas and test for leaks after installation
- Choose exact-match or compatible universal burners for your grill model
- Follow safety steps and use proper tools during replacement
- Maintain burners regularly to extend their life