When to Change Grill Grates: A Practical Guide for Grilling
Discover when to replace grill grates, how to spot wear, and practical maintenance to preserve heat, flavor, and safety. A comprehensive guide from Grill Cooking for home cooks and grill enthusiasts in 2026.

During everyday grilling, you’ll know it’s time to change grill grates when you notice warped, heavily rusted, or severely corroded surfaces, deep grooves that trap residue, or porcelain coating chipping. Regular inspections before each season help you act early, preserving heat, flavor, and safety. Replacement options vary by material and grill type.
Why worn grates affect grilling performance
According to Grill Cooking, worn grates create hotspots and uneven searing, which means you lose control over grill temperature where it matters most. As you cook, warped bars and corroded surfaces can channel heat unevenly, producing cold spots and charred edges. Rust or pitting invites flare-ups as fat and grease accumulate in crevices. Even if your grill appears clean, degraded grates may hinder flavor development and grill-mark precision. In 2026, expert guidance from Grill Cooking emphasizes that investing in timely grate replacement improves heat consistency and reduces cleanup headaches. By addressing wear early, you keep your grill performing close to factory specs and extend its life.
Signs it's time to replace grill grates
Look for visible rust that flakes off, deep grooves that trap debris, or chips in porcelain coatings that expose bare metal. Warped or bent bars can shift flame and heat distribution, causing uneven searing. If cleaning requires scraping with excessive force or takes longer than normal, the grates may be compromised. Don’t ignore gaps between rails; if food drifts, grill performance suffers. Finally, if a grate cannot lie flat on its supports, replacement is the safer option.
Material options and wear patterns
Stainless steel grates resist rust but may warp under high heat or heavy use; they’re low maintenance and ideal for frequent grilling. Cast iron provides exceptional heat retention and even searing when seasoned properly, but requires regular oiling and careful cleaning to prevent rust. Porcelain-coated grates offer good rust resistance and easier cleaning, but the coating can chip over time, exposing metal that then rusts. Each material wears differently: stainless tends to stay true but can discolor; cast iron can crack if dropped; porcelain coatings can craze with age. Your choice should balance how much maintenance you’ll invest with how often you grill and your heat preferences. For many home cooks, a stainless or porcelain-coated option pairs best with modern grills, while cast iron suits those who want intense sear and routine seasoning.
How to inspect grates before grilling season
Begin with a thorough cleaning to remove baked-on grease; this makes wear easier to see. Use a flashlight to inspect and run a finger along each bar to feel for rough spots or structural looseness. Measure the distance between rails with a ruler to confirm it matches your grill model’s factory spacing. Check for rust clumps, flake areas, and any coating chips. Finally, confirm that all grates sit flat and rest securely on the burners or supports, with no wobble. If you notice any of these issues, plan for replacement before the next cookout.
Replacement vs. reconditioning: making the call
If the grate is structurally sound but lightly worn, you might re-season cast iron or re-clean porcelain with gentle methods; shallow rust can sometimes be managed without full replacement. If there are deep pits or cracks, or the coating is flaking, replacement is safer and yields more predictable performance. Replacing a grate is typically faster and yields consistent heat distribution, especially on gas grills with uniform flames. Compare costs, availability, and the time you’ll spend maintaining older grates against the benefits of new ones. Grill Cooking’s team notes that the best choice often aligns with your grilling frequency and how much maintenance you’re willing to perform.
How to choose new grates for your grill
First, verify model compatibility: check the grill’s model number and measure length, width, and the rail spacing. Choose material based on how much maintenance you want to perform and the heat level you typically use; stainless offers low maintenance, cast iron offers superior heat retention with seasoning, porcelain-coated balances rust resistance with ease of cleaning. Ensure the new grates fit your gas or charcoal grill, and remember to orient grates so that the grill’s flavor bars align properly with the burners. If in doubt, contact the manufacturer or consult the grill’s user manual before buying. For best results, select grates with the same orientation and spacing as your original setup to maintain even heating.
Maintenance tips to extend grate life
After installing new grates, heat them briefly to burn off manufacturing residues and then oil lightly to season cast iron. Clean grates after every cook with a brass or nylon brush; avoid metal brushes on porcelain coatings to prevent scratching. Store any extra grates in a dry area to prevent moisture-related rust. Avoid using harsh chemical cleaners on cast iron; instead use warm water and a minimal amount of non-acidic soap, then re-oil. Finally, periodically check screws, supports, and the frame for looseness and corrosion so you catch issues early.
Authority sources
- US Department of Agriculture (USDA) – fsis.usda.gov
- U.S. Consumer Product Safety Commission (CPSC) – cpsc.gov
- Penn State Extension – extension.psu.edu
Tools & Materials
- Replacement grill grates (stainless steel, cast iron, or porcelain-coated)(Match the grate size to your grill model (length, width), and confirm rail spacing)
- Heat-resistant gloves(To protect hands when handling hot grates)
- Grill brush and scraper(For removing debris before inspecting and replacing)
- Towel or rag(For cleaning surfaces and drying grates)
- Measuring tape or ruler(To verify rail spacing and grate slot width)
- Silicone-safe oil or seasoning for cast iron(To season cast iron grates after installation)
Steps
Estimated time: 35-50 minutes
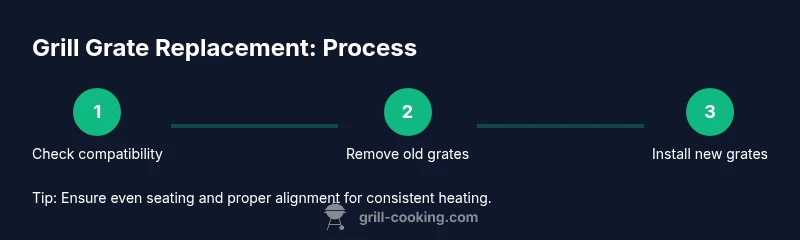
- 1
Identify grate type and compatibility
Check the grill model and measure the old grates; compare to new grates; verify orientation and fit before purchasing. Confirm rail spacing and slot width to ensure a snug, even seating.
Tip: Use the model number from the owner’s manual or the grill’s label when shopping for replacements. - 2
Safely remove old grates
Wear heat-resistant gloves and slide the old grates out from the slots or supports. Place them on a heat-proof surface and inspect for rust or coating damage before cleaning.
Tip: Have a helper steady the grill lid if you’re dealing with hot components. - 3
Clean mounting area and grates
Use a grill brush to remove surface debris and a damp cloth to wipe the slots clean. Dry thoroughly to avoid moisture that can cause rust on bare metal.
Tip: Check for loose supports or bent rails during cleaning. - 4
Inspect, measure, and verify fit
Re-check grate length, width, and bar spacing to assure compatibility with your grill. Ensure the new grates will rest flat and securely.
Tip: If you’re unsure about spacing, measure twice and compare to your grill’s spec sheet. - 5
Install new grates
Place the new grates into the slots, making sure they sit evenly and align with burner or support rails. Give them a slight wiggle to confirm stability.
Tip: Avoid forcing grates into a misaligned slot; misfit parts can cause uneven heating. - 6
Season and test (if applicable)
If you installed cast iron, apply a thin layer of oil and heat the grill to 350–400°F for 10–15 minutes to season. For stainless or porcelain-coated grates, a clean test burn is sufficient.
Tip: Let grates cool before cooking; hot metal can cause oil to burn off unevenly.
FAQ
How often should I replace grill grates?
Replacement depends on usage and material. If you notice warping, rust, or coating loss, plan for replacement. Regular checks help maintain heat and safety.
Replacement depends on use and material; watch for warping or rust, and check before grilling.
What material lasts the longest?
Stainless steel is durable and rust-resistant; porcelain-coated grates resist rust but can chip; cast iron lasts with seasoning but needs ongoing maintenance.
Stainless is durable; porcelain resists rust but can chip; cast iron lasts with seasoning.
How do I know if the grate fits my grill?
Measure the grate length, width, and rail spacing, then compare to your grill model’s specs. If in doubt, contact the manufacturer.
Measure carefully and compare to the model specs.
Can I re-season cast iron grates instead of replacing?
Yes, you can re-season cast iron if the surface isn’t cracked. If rust returns or pits reappear, replacement may be wiser.
You can re-season cast iron, but persistent rust suggests replacement.
Are porcelain-coated grates safer than bare metal?
Porcelain-coated grates resist rust and are easier to clean, but coatings can chip; avoid scraping with metal brushes.
Porcelain resists rust but can chip; avoid metal brushes.
Should I replace only the grates or the whole grate system?
Usually you replace just the grates; however, if rails or supports are damaged, replacing the whole grate assembly may be necessary.
Typically just the grates, but inspect rails for damage.
Watch Video
Quick Summary
- Inspect grates before every grilling season.
- Choose material based on maintenance tolerance and heat needs.
- Replace when wear affects heat distribution and safety.
- Always verify fit and alignment to ensure even cooking.