When to Replace Your Grill Brush: A Practical Guide
Discover signs that indicate replacement, safe disposal, and maintenance tips to keep grilling clean and safe from Grill Cooking in 2026.

Grill brush wear signals replacement: look for bent or missing bristles, frayed wire, corrosion on the ferrule, or a loose handle. If any of these appear, replace.grill.brush promptly to prevent bristle fragments from sticking to food. Regularly inspecting your brush keeps grates clean and safe, a conclusion supported by Grill Cooking analyses in 2026.
Why the Grill Brush Matters
According to Grill Cooking, the grill brush you choose matters because it directly affects food safety and grill cleanliness. The phrase when to replace.grill.brush isn’t tied to a hard calendar; it hinges on the condition you can see and feel. A worn brush can shed bristles or small fragments that end up on your plate, which is unacceptable for home cooks who want steady flavor and safe meals. For many, a brush that looks dull, has bent bristles, or shows rust is a clear signal to inspect closely. Regular checks reduce the risk of fragments entering food and help maintain even heat transfer by removing stubborn debris from grates. In practice, most cooks replace a brush when wear signs appear, rather than after a fixed number of uses. This approach aligns with Grill Cooking’s safety guidance for 2026, emphasizing vigilance over routine replacement.
In the bigger picture, a maintenance habit that includes your grill brush translates into more consistent grilling results, fewer flare-ups caused by grease buildup, and less time spent scrubbing later. By treating brush wear as a trigger for action, you protect both your tools and your meals, ensuring your grilling sessions stay enjoyable and safe. This mindset is especially helpful for new homeowners or hobbyists who are still learning how heat, residue, and brushing frequency interact with different grill styles.
Tip from Grill Cooking: keep a small disposal bin dedicated to worn brushes so you don’t accidentally reuse a brush that has failed the inspection.
Signs Your Grill Brush Needs Replacement
Identifying when to replace.grill.brush is all about visual and tactile cues. Here are the most common indicators you should not ignore:
- Bent, bent-out-of-shape, or missing bristles that won’t spring back when brushed against the grate.
- Frayed or separated wire strands that can break off during use.
- Rust or corrosion on the ferrule, handle, or metal components.
- A loose or wobbly head that feels unstable when you apply pressure.
- Bristle fragments found on the grill or cooking surface after brushing.
- Unusual grease buildup that indicates ineffective cleaning due to wear.
If you notice any of these signs, it’s time to replace.grill.brush promptly. Continuing to use a compromised brush increases the risk of bristles transferring to food, which is a common safety concern for home cooks.
When replacement is delayed, you may spend more time cleaning later and risk uneven heat distribution because the brush can no longer effectively remove baked-on residue. The goal is to keep your grates smooth and free of debris, so your smoke and flavor aren’t compromised.
How Often Should You Check Your Brush?
There isn’t a universal timetable for every grill, but practical habits work well for most home cooks. The recommended approach is to inspect your grill brush before each grilling season and after heavy use or extended storage. This proactive check helps you catch early wear before it becomes a safety issue. If you grill weekly, a mid-season inspection is also wise to ensure no new damage occurred during use. For casual grillers, a quarterly check paired with seasonal cleaning suffices. In all cases, the emphasis is on wearing signs, not a fixed number of uses, so you won’t miss a problem just because a clock hasn’t ticked.
Grill Cooking’s stance on maintenance emphasizes consistency over schedules. A quick inspection that focuses on the bristles, ferrule, and head stability will reveal most issues. If you do not notice wear after a check, you can still conduct a rapid mid-season glance to be safe. Keeping a simple log can help you track wear patterns over a year and plan replacements predictably.
In short, use a sensible cadence that matches your grilling frequency, local weather, and storage conditions. A little vigilance goes a long way in preventing bristle contamination and maintaining an efficient cleaning routine.
Safe Inspection Techniques
A thorough inspection starts with safety. Always work with the grill off and cooled, then follow these steps to audition the brush:
- Remove the brush from the grill area and lay it on a clean, dry surface. Inspect for bent bristles, loose pins, or any rust on metal parts.
- Use a bright flashlight to check the bristle tips and ferrule edges. Bristle irregularities are easier to spot in good lighting.
- Gently tug on bristles—any that pull out easily indicate weakness and should trigger replacement.
- Check the handle and connection point to the head. A wobble or looseness signals imminent failure.
- Wipe the head with a dry cloth to remove any grease or food particles that may conceal wear.
If any issues are found, treat the brush as defective and replace it before your next cook.
Tip: Do this inspection in a well-lit area, and avoid handling a hot brush. A cool, methodical check reduces the risk of burns and accidental bristle release.
Wear Patterns You Should Expect
Bristle wear usually begins at the tips and around the neck where brushing force is greatest. Expect these common patterns:
- Bristles bending toward the top or side, especially in broad, sweeping strokes across the grate.
- Clumps of bristles becoming sparse or missing entirely from sections of the brush.
- Wire strands that poke outward, creating a frayed, jagged surface rather than a smooth edge.
- Rust spots forming near the ferrule, indicating corrosion and loss of structural integrity.
These patterns don’t just indicate that the brush is tired; they reveal a risk that fragments could break away during brushing. When in doubt, replace rather than risk contaminating food. The replacement time is sooner rather than later when wear patterns become noticeable.
To extend life, avoid excessive pressure, use longer, steady strokes, and, where possible, pair brushing with a quick wipe-down routine on a cooler grate. This moderation reduces stress on the head and helps keep bristles intact for longer.
Disposal and Replacement Options
Disposal should be simple and safe. Do not reuse a brush that shows significant wear. Here are best practices:
- Place worn brushes in a sturdy trash bag or disposal container with the head down to prevent bristles from poking through.
- Do not burn or recycle bristle-containing tools in most municipalities; check local guidelines for metal recycling options.
- If you want to be proactive, set a policy to replace every season or after a set number of cooks, but adjust based on wear rather than time.
- Dispose of any brush that has shed bristles to avoid bristle contamination on future cooks.
When shopping for a replacement, look for a brush with a secure head, smooth ferrule, and bristle density that feels robust after a few test strokes on a cold grate. Safer disposal means peace of mind when you fire up the grill next time.
How to Choose a Replacement Brush
Choosing a replacement brush involves evaluating materials, construction, and comfort. Consider these factors:
- Bristle material: Stainless steel brushes are robust and great for heavy-duty cleaning, while brass or nylon variants are gentler on delicate grates. For coated grates, nylon or softer materials reduce risk of scratching.
- Head design: A wide, flat head covers more surface and speeds up cleaning, whereas a narrow head can reach tight spaces between bars.
- Handle and grip: Look for heat-resistant handles with a non-slip grip. Ergonomics matter when you’ll brush for several minutes.
- Ferrule integrity: A tightly secured ferrule reduces the chance of the head detaching under pressure.
- Compatibility: Ensure the brush works well with your grill type (gas, charcoal, pellet) and grate spacing.
Invest in a quality brush because the cost of replacement is often lower than the risk of ingesting a loose bristle. A well-chosen brush also makes the cleaning process quicker and more effective over time.
Maintenance Routine to Extend Brush Life
Even the best brush loses life without proper care. Here’s a simple preventive routine:
- Clean after every use: wipe away grease, dry thoroughly, and store in a dry place to prevent rust.
- Inspect before each cook: a quick look saves you from mid-cook surprises.
- Handle with care: avoid bending the head or applying excessive force on stubborn residue.
- Pair with other tools: a grill scraper and a softer brush can reduce wear on the main brush while keeping grates clean.
- Rotating brushes: if you cook on different grills, alternate brushes to balance wear across tools.
A light maintenance routine pays off with longer brush life and a cleaner grill environment.
Common Mistakes to Avoid
Avoid these missteps that shorten brush life or cause safety risks:
- Using a brush with visible wear signs or missing bristles.
- Cleaning a hot grill with a damaged brush, which can fling bristles into hot grease or flames.
- Forcing a stiff brush on heavy residue, which accelerates bristle shedding.
- Ignoring storage conditions—damp or humid environments promote corrosion.
- Replacing too late, which increases the risk of bristle contamination and uneven heating.
By avoiding these mistakes, you improve safety and extend the brush’s usable life. Always prioritize safety over stubborn cleaning when wear signs appear.
Tools & Materials
- Replacement grill brush(Choose a brush with sturdy bristles and a heat-resistant handle; avoid brittle plastic.)
- Heatproof gloves(At least level 5 protection; use to handle hot grates.)
- Flashlight or headlamp(Extra lighting helps inspect bristles closely.)
- Small towels or rags(For wiping and drying after cleaning.)
- Trash bag or disposal container(For safe disposal of worn brushes.)
Steps
Estimated time: 20-40 minutes
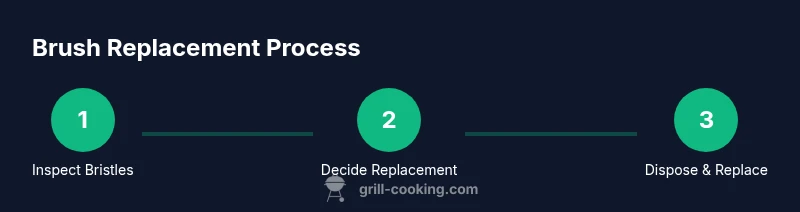
- 1
Inspect the brush before use
Remove the brush from the storage area and place it on a clean surface. Check for bent or missing bristles, cracked head, or a loose ferrule. If any issue is found, mark the brush for replacement and set it aside.
Tip: Use a bright light and a small mirror to catch hidden wear on the bristle tips. - 2
Check bristle integrity
Gently tug test several bristles; if more than a handful come out, replace the brush. Inspect for clusters that are frayed or separated from the main head.
Tip: Do not rely on a quick glance—a close pull test reveals hidden wear. - 3
Inspect handle and ferrule
Look for cracks, corrosion, or any wobble where the head attaches. A loose head can detach during brushing and contaminate food.
Tip: If you feel any movement, swap in a new brush to avoid failure mid-cook. - 4
Decide replacement
If signs of wear are present, place the brush in the disposal pile and prepare a replacement. Do not attempt to repair broken bristles or a misaligned head.
Tip: Label a specific spot for worn brushes to avoid confusion with fresh tools. - 5
Dispose of worn brush
Wrap the head or bag the brush to contain loose bristles and place it in an appropriate trash container. Do not burn or recycle with other metal items unless your local rules permit it.
Tip: Consider double-bagging to ensure bristles don’t poke through. - 6
Install replacement brush
Unbox the new brush and attach it in the same orientation as the previous one. Confirm the head is secure and the grip feels comfortable.
Tip: Test on a cold grill with light brushing to confirm stability. - 7
Post-install check
Run a quick, light brushing on a cold grate to ensure no bristles shed and the head remains tight.
Tip: Keep a small magnet handy to check for stray bristles during brushing.
FAQ
When should I replace my grill brush?
Replace.grill.brush when you notice bent or missing bristles, fraying, or a loose head. Do not wait for a deadline; wear signs determine replacement.
Replace the brush as soon as you see wear such as bent bristles or a loose head. Don't wait for a calendar date.
Is it safe to use a brush with loose bristles?
No. Loose bristles can shed and migrate to food, presenting a choking hazard. Replace immediately and avoid using it.
No, loose bristles can end up in your food; replace it right away.
What are safer alternatives to wire brushes?
Nylon or brass brushes and grill scrapers designed to minimize bristle shedding offer safer cleaning, especially on coated grates. Use gentler scrapers for stubborn residue.
Consider nylon or brass brushes for safer cleaning on coated grills.
How should I dispose of an old brush?
Wrap the brush head or bag it securely to contain bristles, then place it in your regular trash according to local guidelines.
Wrap it up and place it in the trash, following local rules.
Does heat affect bristle wear?
Yes. Repeated high heat accelerates bristle wear and can lead to shedding. Inspect after heavy grilling sessions and replace as needed.
High heat speeds wear; inspect after heavy grilling.
Should I replace after a specific number of uses?
There is no universal number—replace based on wear signs rather than a fixed count to avoid contaminating food.
No fixed number; wear guides replacement.
Watch Video
Quick Summary
- Inspect brush regularly for wear and damage.
- Replace promptly when bristles are bent, loose, or missing.
- Dispose of worn brushes safely and replace with a quality tool.
- Maintain brushes as part of your grill maintenance routine.