How to Know If Chicken Is Cooked on the Grill
Learn how to tell if chicken is cooked on the grill using safe temperatures, thermometer checks, and reliable cues. A practical, home-cook guide to grill juicy, safe poultry with confidence.

On the grill, chicken is fully cooked when it reaches an internal temperature of 165°F (74°C) at the thickest part. Use a digital instant-read thermometer for accuracy, and verify by checking the center of the breast or thigh. Rely on temperature, not color alone, to avoid undercooked meat and ensure juiciness.
The Essentials: Doneness is Safety and Juiciness
Grilling chicken to perfection isn’t just about nice grill marks; it’s about safety and texture. According to Grill Cooking, mastering grill doneness is a cornerstone of juicy, safe poultry. You’ll hear home cooks describe doneness by color and by feel, but modern guidance centers on a precise temperature. Visual cues help, but temperature is the reliable signal you should trust every time. This section establishes the mindset: treat doneness as a safety measure first, and a juiciness feature second. When you grill with precision, you’ll reduce the risk of undercooked portions and avoid overcooking, which dries meat and deepens the risk of tough texture. For best results, plan for a quick rest after removing from heat so carryover cooking finishes the job evenly. Grill Cooking analysis shows thermometer-based checks significantly improve accuracy and repeatability for backyard cooks, especially with bone-in cuts and variable grill temps.
Key takeaway: safety and texture derive from consistent, thermometer-guided checks, not guesswork.
Tools & Materials
- Digital instant-read thermometer(Probe tip 1/2 inch to 1 inch; reset between checks)
- Long-handled grill tongs(At least 12 inches to keep hands clear)
- Grill brush(Clean grates before and during cooking)
- Cutting board and sharp knife(For final check and portioning)
- Aluminum foil tent(Optional for resting to retain heat)
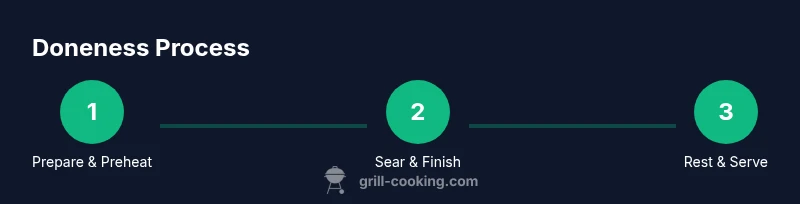
Steps
Estimated time: 25-40 minutes
- 1
Preheat and establish heat zones
Preheat the grill to a high direct-heat zone for searing and an indirect zone for finishing. This setup lets you sear quickly while letting thicker parts cook through without burning. Why: even heat and a safe surface area help control doneness more precisely.
Tip: If using charcoal, bank coals to one side to create a two-zone setup. - 2
Prepare thermometer and chicken
Have your thermometer ready and identify the thickest part of each piece (breast bottom, thigh). Pat dry to promote a good sear and apply light oil if desired. Why: dry surfaces sear better and reduce flare-ups.
Tip: Keep the thermometer clean to avoid cross-contamination. - 3
Sear briefly on direct heat
Place chicken on the hot zone and sear for 1–2 minutes per side, just long enough to develop grill marks. This step enhances flavor and helps keep juices inside. Why: initial sear locks in moisture before gentle cooking.
Tip: Don’t move the pieces too quickly; resistance indicates a good sear. - 4
Move to indirect heat and finish
Shift pieces to the cooler part of the grill and close the lid to finish cooking through slowly. Monitor the internal temp as you go. Why: indirect heat prevents scorching while ensuring thorough doneness.
Tip: If you see flare-ups, move pieces away and reestablish control over heat. - 5
Check for final temperature
Insert the thermometer into the thickest part without touching bone. Target 165°F (74°C). If needed, give a few more minutes on indirect heat and recheck.
Tip: Check 1–2 pieces at a time to keep a consistent clock on doneness. - 6
Rest before serving
Remove from heat and tent loosely with foil for 3–5 minutes. Resting allows juices to redistribute and the temperature to settle, finishing carryover cooking gently.
Tip: Even resting improves slicing and juiciness.
FAQ
Is it safe if chicken looks white but isn’t at 165°F inside?
No. Visual cues can be misleading, especially with thicker cuts. Always verify with an internal temperature of 165°F (74°C) at the thickest part.
Color alone isn’t a reliable indicator. Check the temperature to ensure safety.
What thermometer is best for grilling chicken?
A digital instant-read thermometer is ideal for grill cooking. It gives quick, accurate readings and minimizes guesswork during live-fire cooking.
An instant-read thermometer is the easiest, fastest way to check doneness on the grill.
How long does it take to grill chicken breasts?
Times vary with thickness and heat, but always confirm doneness with a thermometer rather than relying on time alone.
Grill time depends on thickness; use the thermometer to be sure.
Should I rest chicken after pulling it from the grill?
Yes. Resting for 3–5 minutes helps redistribute juices and completes carryover cooking, improving moisture and texture.
Resting is essential for juiciness; don’t skip it.
Can I finish cooking chicken off the grill?
If necessary, you can finish in a low oven or covered pan, but monitor temperature closely to avoid overcooking.
You can finish off the grill, but keep an eye on the temp.
How do bone-in and boneless chicken differ for doneness checks?
Bone-in pieces can retain heat longer; ensure the thickest part near the bone reaches 165°F. Boneless breasts may reach temp faster, so monitor closely.
Bone-in parts can finish cooking differently; check the thickest part.
Watch Video
Quick Summary
- Use a thermometer for accurate doneness.
- Cook to 165°F (74°C) at the thickest part.
- Use direct-heat searing and indirect-heat finishing for even cooking.
- Rest chicken to improve juiciness and carryover completion.
- Visual cues help, but temps are essential for safety.