Should Grill Lid Be Open or Closed: A Practical Guide
Learn when to open or close the grill lid with practical tips for charcoal and gas grills. This Grill Cooking guide covers searing, indirect heat, smoke, and safety.

Open vs closed lid on a grill changes heat flow, searing, and flavor. Open lid favors direct flame contact for quick sears and flare-ups; closed lid traps heat for even cooking and smoky flavor. Use open for fast, high-heat searing; close for roasting, indirect cooking, and consistent temps. Adjust per recipe, equipment, and desired outcome.
The science behind lid position
Heat in a grill behaves like a moving orchestra. The flames supply radiant heat, the air inside the lid-closed chamber circulates by convection, and the metal grate conducts heat to the food. When the lid is up, convection is weaker because warm air escapes quickly; radiant heat still bathes the meat, but heat distribution is less uniform, and flare-ups are more likely if fat drippings meet the flames. The opposite is true when the lid is closed: the enclosed space fosters convection and smoke circulation, which can raise the ambient temperature around the food and saturate it with smoky flavor. This combination of heat transfer modes is why lid position matters for different foods.
In practical terms, a closed lid protects temperature stability. It is especially useful for thicker cuts, bone-in meats, or roasts that require more time to reach the target internal temperature. Open-lid cooking is often preferred for items that cook quickly or need a crisp exterior without becoming overly infused with smoke. According to Grill Cooking, lid position is a fundamental control point for heat circulation and moisture retention. The Grill Cooking team found that when you close the lid, you reduce heat swings and improve evenness, particularly on larger cuts. Grill Cooking analysis shows that maintaining a steady environment inside the grill can also reduce the need for frequent flipping and turning, which preserves juices.
Before you decide lid-open or lid-closed, consider your grill type. Charcoal grills create more dramatic temperature fluctuations, but they also produce more smoke when the lid is closed. Gas grills maintain a steadier baseline temperature, making lid position a precise tuning knob rather than a dramatic lever. The key is to map your grill’s heating zones and practice with different foods to learn how lid position affects outcomes.
When to keep the lid open
There are several situations where an open lid makes sense. When you want a vigorous sear, exposing the meat to direct flames yields a fast browning and crust. For thin cuts like burgers, hot dogs, or small steaks, keeping the lid open reduces the risk of overcooking the interior while allowing the surface to form a crisp crust. Open-lid cooking also helps control flare-ups. If fat from the meat starts to glow and flare, the lid can trap smoke and heat, but lifting the lid briefly allows the flare to decrease in intensity.
Also consider the type of heat source. On a gas grill, an open lid makes it easier to manage direct heat and watch the surface for scorching. On a charcoal grill, air flow matters; with the lid up, the coals burn more vigorously, which can be desirable for a short, hot sear. However, for delicate items like fish fillets or marinated vegetables, an open lid can let the surface dry out quickly; in that case, keep the lid partially open or move to indirect heat after a quick sear.
To maximize flavor with the lid open, time your flips carefully and use a thermometer to monitor interior temperature. While the lid is up, avoid large lid movements that disrupt the surface. If you’re new to grilling, start with open-lid searing for a few minutes per side on the thickest pieces you’re cooking, then check internal temp and adjust.
When to keep the lid closed
For thicker cuts, bone-in meats, or roasts, closing the lid offers two big advantages: more consistent heat around the food and increased exposure to smoke flavor. A closed lid locks in warmth from the hot zone and ensures that the interior reaches the target temperature without overcooking the exterior. It also reduces moisture evaporation, which helps keep juiciness intact in larger cuts.
Closed-lid cooking is ideal for indirect heat cooking. If you have a two-zone setup, place the food away from the direct flame and close the lid to create a slow roast. This approach is especially useful for bone-in ribeye, pork loin, chicken thighs with skin, or a whole fish. The lid traps smoky flavors produced by the fire, giving a deeper aroma without over-charring the exterior.
When you begin closed-lid cooking, bring the grill to the right ambient temperature first, then move the food onto the indirect zone. Use a thermometer to monitor internal temperature, and trust the crust to form during the sear using a brief open-lid stage before the final finish. For many foods, finishing with the lid closed ensures uniform doneness across vessels and avoids cold or undercooked spots.
How to manage heat with lid position
The key to mastering lid position is a practical workflow. Start by preheating: close the lid and bring the grill to your target temperature so that air inside the chamber becomes stable. Then decide whether you’ll sear or roast first, and use the lid accordingly. If you’re aiming for a fast sear, open the lid during the initial contact and let the surface brown. For a steadier finish, move to indirect heat or roast and close the lid to trap heat.
On a charcoal grill, controlling airflow is crucial. Adjust the vents before and during cooking to tune the temperature; the lid acts as the seal to keep the desired HVAC-like environment. On a gas grill, you have more precise control via burners, but the lid still matters: closing it after searing helps preserve heat and smoke. The idea is to minimize fluctuations, which means practicing with different foods and calibrating your approach. Always monitor temperature with a reliable thermometer and avoid opening the lid too often, which creates heat swings and longer cook times.
Common grilling scenarios and lid settings
- Steaks (thick cut): Sear over direct heat with the lid open to get a crust, then move to indirect heat with the lid closed to finish.
- Burgers: Start with direct heat and lid open; flip once, then close the lid for a quick rest and even doneness.
- Chicken thighs: Use indirect heat and a closed lid; finish with a brief, high-heat burst with lid open to crisp the skin.
- Pork chops: Sear on direct heat, then close the lid to finish with indirect heat to the target temperature.
- Fish fillets: Cook with the lid closed to trap moisture and prevent surface drying; monitor closely to avoid overcooking.
- Vegetables and skewers: Begin with a brief sear on direct heat with lid open, then move to indirect heat and close the lid to finish.
- Ribs and larger cuts: Favor closed-lid roasting for tenderness and smoke exposure; resist lifting the lid frequently to keep temps steady.
Common mistakes and how to avoid them
- Opening the lid too often: Each lid lift costs heat and extends cooking time. Plan moves and checks; batch flips when possible.
- Searing with the lid closed for too long: If you seal the lid too early, the crust may suffer and the interior can overcook.
- Skipping a thermometer: Time alone is unreliable; rely on a probe to reach the safe internal temperature.
- Ignoring flare-ups: Have a spray bottle handy and move to indirect heat if flare-ups threaten charring or uneven cooking.
- Not resting meat: Resting keeps juices inside; skip it and you’ll lose tenderness.
Practical takeaway from Grill Cooking
When in doubt, begin with a plan to sear or roast, then adapt lid position to the meat’s thickness and desired finish. The Grill Cooking Team recommends keeping the lid closed for most roasting tasks and using lid-open searing only when needed for a crust or flare management. With practice, you’ll understand how lid position influences heat, moisture, and smoke to elevate your grilling outcomes.
Tools & Materials
- Grill with lid(Ensure lid fits securely and vents are clean)
- Long-handled tongs(Grip meat firmly without piercing; good for flipping)
- Instant-read thermometer(Probe into the thickest part, away from bone)
- Heat-resistant gloves(Protect hands while handling hot lids and grates)
- Grill brush and oil(Season grates and prevent sticking)
Steps
Estimated time: Estimated total time: 25-40 minutes
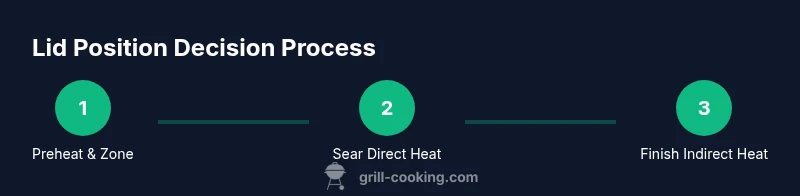
- 1
Preheat and set heat zones
Close the lid and bring the grill to your target temperature so heat stabilizes. If using charcoal, arrange fuel to create direct and indirect zones; on a gas grill, preheat burners to high then set to indirect as needed.
Tip: Preheating reduces cold spots and helps achieve a clean sear. - 2
Sear on direct heat with lid open
Place the food over direct heat and allow a crust to form. Use quick, confident flips and monitor surface for scorching. Keep the lid up to avoid trapping heat during this short stage.
Tip: Use tongs rather than forks to preserve juices and crust. - 3
Move to indirect heat and close the lid
Transfer the food to the indirect zone and close the lid to trap heat and smoke. This begins the longer finish, letting the interior reach the target temperature without over-charring the exterior.
Tip: If you’re uncertain about doneness, check with a thermometer during the rest period. - 4
Check internal temperature and adjust
Insert a thermometer into the thickest part to verify doneness. If needed, reseat on the direct zone for a quick finish, or extend on indirect heat with the lid closed.
Tip: Aim for the recommended safe internal temperature for the meat type. - 5
Rest the meat
Remove from heat and rest on a clean plate for several minutes to reabsorb juices. Tent loosely with foil if needed—don’t slice immediately.
Tip: Resting improves juiciness and slicing ease. - 6
Clean and maintain the grill
While the grill is warm, brush the grates and lightly oil to prevent sticking. Clean and inspect vents or burners to keep heat consistent for future cooks.
Tip: A well-maintained grill performs more predictably over time.
FAQ
Should I open the lid when searing a thick steak?
For a thick steak, start with the lid open to achieve a crust, then close the lid to finish cooking via indirect heat. Monitor with a thermometer to reach the target internal temperature.
Open the lid to sear for a crust, then close to finish cooking with indirect heat and a thermometer for doneness.
Does closing the lid trap smoky flavor?
Yes. Closing the lid traps heat and smoke, intensifying flavor and helping thicker cuts cook evenly.
Closing the lid traps heat and smoke for deeper flavor and even doneness.
When is lid position most important?
Lid position matters most when cooking thicker cuts, roasts, or foods needing even doneness. For quick-cooking items, lid position is less critical but can still influence crispness and smoke.
Lid position matters most for thick cuts; for quick cooks, it’s less critical but still affects texture and smoke.
Can I grill vegetables with the lid closed?
Vegetables can benefit from a closed lid to trap heat and evenly cook, especially thicker slices or skewers. Lighter veggies may be finished with the lid open for more direct exposure.
Close the lid to cook thicker vegetables evenly, or leave it open for a crisper finish on lighter veggies.
What’s the difference between direct-heat and indirect-heat grilling?
Direct heat cooks quickly with high surface contact; indirect heat uses the ambient grill temperature to finish cooking more slowly. Lid position helps switch zones from direct to indirect without losing heat.
Direct heat is quick searing; indirect heat finishes cooked through with the lid controlling temperature.
Is there a risk of drying out meat if I always keep the lid closed?
Closing the lid is not inherently drying; it depends on temperature and time. Use a thermometer and avoid overcooking. Rest the meat after cooking to retain moisture.
Lid closure isn’t always drying; monitor temps and rest meat to keep it juicy.
Watch Video
Quick Summary
- Start with a hot, controlled plan for searing vs roasting.
- Close the lid for indirect cooking to stabilize heat and flavor.
- Open the lid for quick sears and flare-up management as needed.
- Use a reliable thermometer and rest meat for juiciness.