How to Know When Your Grill Is Ready
Learn how to know when grill is ready with clear preheat timing, temperature targets, and visual cues for gas and charcoal. Build confidence, avoid flare-ups, and perfect your sear with practical steps from Grill Cooking.

With this guide, you'll learn how to know when grill is ready, whether it's gas or charcoal. You'll learn preheat times, thermometer cues, surface heat indicators, and safe readiness checks before you sear. The key requirements are a calibrated thermometer, a stable heat, clean grates, and a moment to observe smoke, aroma, and grill lid behavior before cooking.
Preheating Essentials
Preheating is more than warming metal; it's building a stable, radiant surface that yields a good sear and even cooking. In Grill Cooking's experience, preheating correctly reduces hot spots and crust formation times. For gas grills, turn all burners to high and close the lid. Let it heat for about 8-12 minutes, then reduce to medium-high to reach your target grate temperature. Charcoal grills require a different approach: fill a chimney starter, light until coals glow and are coated in ash, then spread for direct and indirect zones. The preheating phase also cleans the grates; a quick brush while hot helps remove residue that could impede contact. Patterns of smoke change as heat stabilizes; a thin, steady wisp is common, and you should see even heating across the grate as indicative of readiness. As you wait, stay aware of safety—keep handles dry and maintain a clear area around the grill.
Visual Indicators and Thermometer Cues
Seeing is believing, but in grilling, what you see must align with what you measure. A properly preheated grill will emit a stable glow and a steady plume of light smoke. Use an instant-read thermometer to confirm grate temperatures and, if available, a built-in grill thermometer to verify the surface heat. For gas grills, target a grate temperature that allows quick sears without scorching. Charcoal grills benefit from a two-zone approach: a hot direct-heat zone for searing and a cooler indirect zone for finishing. If you notice dramatic temperature swings, pause, close the lid, and let the grill rebalance before cooking. Grill Cooking analysis suggests that consistent heat delivery is linked to better crust formation and even doneness. Remember to adjust vents or burners gradually to preserve heat.
Temperature Targets by Grill Type
Different grills have different paths to readiness. For most gas grills, a hot sear zone begins around 425–475°F (218–246°C), while the indirect zone remains in the 350–400°F (177–204°C) range for finishing. Charcoal grills typically reach a high searing zone near 450–550°F (232–288°C) with cooler areas around 300–350°F (149–177°C). Always know your grill’s maximums and consult its manual if you’re unsure. The aim is a stable, repeatable temperature window where crust forms quickly and inside cooks evenly. If your grill runs hot, adjust heat early rather than chasing temperature mid-cook. The Grill Cooking team recommends establishing these ranges as baseline targets and adjusting only in small increments.
Monitoring Methods and Tools
Rely on a combination of tools to confirm readiness. An instant-read thermometer is essential for checking grate or ambient temps. A dedicated grill thermometer helps you monitor day-to-day heat fluctuations, while a timer keeps you honest about preheat duration. For charcoal grills, keep a chimney starter handy and watch the coals reach a consistent glow with a light ash coating. A quick surface check—grates clean and evenly heated—helps ensure you won’t sting the crust off your next steak. If you’re using a two-zone setup, mark your hot zone and keep a safe path for moving food between zones.
Safety and Maintenance Habits
Safety is non-negotiable when preheating and testing readiness. Always wear heat-resistant gloves when handling hot grates or adjusting vents. Keep a spray bottle of water handy for minor flare-ups, but never aim at flames directly; instead, reduce heat or move food away from the flame. Maintain a tidy area around the grill, and never leave a grill unattended while hot. Clean grates while hot to promote better heat transfer and prevent sticking. Regular maintenance—checking gas lines for leaks and inspecting silicone hoses—keeps readiness consistent and reduces unexpected shutoffs.
Common Readiness Mistakes and Quick Fixes
Common mistakes include opening the lid too often, not allowing enough preheat time, and relying solely on appearance rather than temperature. If you notice cold spots, give the grill another 5–7 minutes, re-test temperatures, and adjust vents gradually. If flames surge when you start cooking, move food to a cooler area and re-balance heat. Lastly, always confirm the grill has cooled safely before cleaning or covering.
Quick Readiness Checklist
- Preheat time completed (gas: 8–12 minutes; charcoal: wait until coals glow and ash over)
- Grate temperature stable within target range for 1–2 minutes
- Thermometer readings aligned with your planned sear zone
- No visible hot spots; heat is evenly distributed
- Grates cleaned and ready for contact
Tools & Materials
- Digital meat thermometer (instant-read)(Probe should handle up to 500°F; read time under 5 seconds)
- Grill or oven thermometer (built-in or infrared)(Place for ambient grate temperature gauge)
- Timer(Track preheat and hold times; use a loud alarm)
- Grill brush(Clean grates while hot for residue removal)
- Heat-resistant gloves(Protect hands during preheat and adjustments)
- Long-handled tongs(For safe handling of grate items)
- Chimney starter (for charcoal)(Optional but speeds charcoal readiness)
- Spray bottle (water)(For minor flare-ups or moisture control)
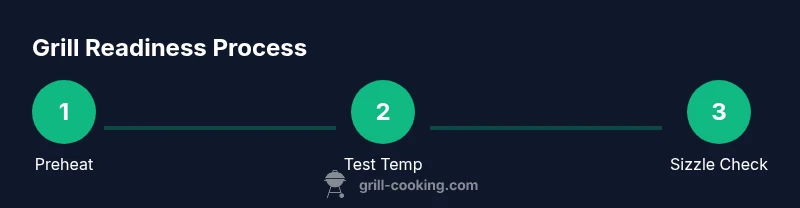
Steps
Estimated time: 15-25 minutes
- 1
Prep the grilling area
Clear the area around the grill, brush the grates clean, and assemble essential tools within reach. This reduces heat loss when you start and prevents accidental contact with hot surfaces. Have your thermometer and timer ready so you can monitor readiness without fumbling.
Tip: Cleaning while hot makes residue easier to remove; use a brief brush sweep to prep for heat. - 2
Choose your preheat method
For gas grills, set all burners to high with the lid closed and preheat for 8–12 minutes. For charcoal, light the chimney starter until coals glow and are coated with a thin ash, then spread into direct and indirect zones. Keep the lid closed where possible to trap heat.
Tip: Gas grills respond faster with the lid closed; charcoal benefits from an even distribution of coal heat. - 3
Monitor grate temperature
Use an instant-read thermometer to verify the grate temperature and ensure it stabilizes within your target range. If using a three-zone setup, verify both hot and cool zones are ready. Recheck after any door openings or vents adjustment.
Tip: Aim for a hold window of 1–2 minutes at the target temperature to confirm stability. - 4
Validate with a test sizzle
After preheat, test the surface by placing a small piece of oil or a light food item on the grate. A vigorous sizzle indicates readiness; a faint sizzle suggests heat needs more time. Avoid placing large cuts too early to prevent uneven crust formation.
Tip: Avoid crowding the grate; searing performs best with space for air and heat to circulate. - 5
Set up heat zones
Establish a direct heat zone for searing and an indirect zone for finishing. Move foods as needed to different zones to maintain even cooking and prevent flare-ups. This approach keeps proteins juicy and crusty where desired.
Tip: Use a two-zone setup to manage flare-ups and achieve consistent doneness. - 6
Final readiness go-no-go
Do a final read of grate temperature, observe smoke color, and confirm no sudden shifts in heat. If all indicators align, you’re ready to start cooking. If not, reheat for a few more minutes and re-test.
Tip: If you’re unsure, wait 2–5 minutes and recheck; consistency beats rushing the process.
FAQ
How long should I preheat a gas grill?
Most gas grills need about 8–12 minutes of preheating on high with the lid closed. Use a thermometer to confirm the target grate temperature and hold for a minute or two before cooking.
Gas grills typically require 8 to 12 minutes of preheating with the lid closed. Confirm the target temperature with a thermometer before cooking.
How do I know when charcoal is ready?
Charcoal is ready when the briquettes glow and are covered with a light gray ash. Spread for direct and indirect zones and wait for stable heat before cooking.
Charcoal is ready when it glows and has a light gray ash. Set up your heat zones and wait for stable heat.
Is it safe to check grill readiness with the hand test?
The hand test is not recommended for safety. Rely on thermometer readings and visual cues to determine readiness. If you must, keep your hand high above the grate and do not touch it.
Avoid placing your hand near the heat; use a thermometer and visual cues to judge readiness.
Should I leave the lid open or closed during preheating?
For gas grills, keep the lid closed to trap heat and reach your target faster. For charcoal, keep the lid on after ignition to maintain consistent heat distribution.
Close the lid for gas to trap heat; for charcoal keep the lid on after lighting to stabilize heat.
How does temperature affect different foods?
High heat is ideal for searing certain cuts to form a crust, while indirect heat is better for finishing thicker foods without burning. Always align the zone with the food’s thickness and desired doneness.
Use direct heat for searing and indirect heat for finishing; adjust based on food thickness.
What should I do if flare-ups occur?
Move food to a cooler zone, close the lid, and reduce airflow gradually. Keep a spray bottle for minor flare-ups and never fan flames with a high-powered blast.
If flare-ups happen, move food away, close the lid, and reduce heat; keep a spray bottle handy.
Watch Video
Quick Summary
- Preheat properly before searing.
- Use a thermometer for accuracy.
- Establish direct and indirect heat zones.
- Close vents gradually to manage heat.
- Prioritize safety and rest meat after cooking.