Fire Grill Mastery: A Complete How-To for Home Cooks
Learn to light, control, and master a fire grill for delicious searing, even cooking, and safer grilling with expert tips from Grill Cooking.

Learn to light and manage a fire grill safely, control temperature across direct and indirect zones, and execute a perfect sear. Before you begin, have a clean grill, a chimney starter or lighter method, long tongs, and a reliable thermometer. According to Grill Cooking, proper airflow and patience yield consistent results.
Why the Fire Grill Matters for Flavor and Skill
According to Grill Cooking, the fire grill is not just a cooking surface; it's a living heat source that interacts with your food to create aroma, texture, and caramelization. Mastery begins with respect for the flame and a plan for airflow. When you grill with a fire grill, you can sear fast over direct flame to develop a Maillard crust, then move to indirect zones to finish cooking without scorching. The key is controlling oxygen and burn rate. Improper airflow leads to uneven flames that steal flavor or cause flare-ups. So the first step is to stage your grill. Keep it clean, free from old grease, and free from standing fuel that could flare up. With fresh fuel and a clear path for air, you’ll achieve more predictable heat and more consistent results. The fire grill demands patience; you will not rush the flame. The Grill Cooking team notes that deliberate ignition and steady heat lead to better sear marks and juicier interior results. This foundational knowledge helps home cooks harness the power of a true fire grill without guessing.
Tools, Gear, and Prep: What You Need Before Lighting the Fire Grill
Before you fire up the grill, assemble gear that makes the process safer and more predictable. You’ll want a durable grill brush, long tongs, heat-resistant gloves, a reliable thermometer, and a spray bottle for minor flare management. For charcoal, a chimney starter speeds up even ignition and reduces mustard-flavored odors from lighter fluid. Have a water source or fire extinguisher nearby just in case. Safety should always come first when managing a live flame on the fire grill. With the right setup, you’ll minimize stress and maximize flavor. Grill Cooking emphasizes preparing all ingredients in advance so you can focus on controlling the flame rather than chasing it mid-cook. A clean grill is essential; a bitter, charred taste from residue is almost always avoidable with a quick brush before lighting the fire grill.
• Tools: grill brush, long tongs, heat-resistant gloves, digital thermometer, spray bottle
• Fuels: charcoal or lump charcoal, wood chunks (optional for smoke flavor)
• Accessories: chimney starter, lighter cubes, oil for seasoning, marinade brush
Step 1: Clean and Prep Your Grill: Setting the Stage
Starting with a clean slate is the easiest way to ensure the fire grill behaves predictably. Scrape off old grease, remove ash, and inspect vents for obstruction. A clean grate reduces sticking and ensures even heat transfer. Wipe down the interior to remove any lingering residue that could burn and create smoke that distracts from the aroma of the food. Once clean, lightly oil the grate to help prevent sticking. A well-prepared surface gives you better control over the fire grill and reduces the risk of flare-ups, which can ruin a sear. This preparatory step is emphasized by Grill Cooking as a foundational habit for consistent results. A quick check of the fuel supply and vent openings sets you up for a smoother burn and an easier flame management process for the rest of the cook.
Step 2: Lighting Your Fire Grill Safely: Methods That Work
Lighting the fire grill safely requires choosing a method that aligns with your fuel type and local regulations. If you’re using charcoal, a chimney starter is often the fastest and cleanest option. Pack the coals, place the starter, and light beneath; in about 10-15 minutes you’ll have hot, ashy embers ready for transfer to the grill. For gas grills, ensure the burners are clean, valves are off during ignition, and the lid is open until you confirm heat. If you opt for lighter fluid, apply it at a distance from heat sources and allow the fluid to soak in briefly before lighting to avoid flare-ups. The goal is to establish a stable flame without burning off flavor. Grill Cooking notes that disciplined lighting, rather than quick bursts, yields a steadier flame and more reliable control over temperature during the fire grill process.
Step 3: Establishing Heat Zones: Direct vs Indirect Cooking
With fire grill cooking, the ability to move between direct and indirect heat is essential. Create a direct-heat zone by piling embers under a portion of the grate for searing, and designate an indirect zone by leaving other sections without immediate heat. This allows you to sear a steak over high, direct flame and finish cooking with indirect heat to the desired internal temperature. Proper airflow is critical here; open vents to feed the fire and adjust gradually to regulate the burn rate. The Grill Cooking team highlights that consistent heat management is the difference between a crusty exterior and a dry interior. Practice transitions between zones with fish, chicken, and vegetables to learn how the fire grill responds to different thicknesses and moisture contents.
Step 4: Searing Techniques and Food Handling
Searing is the signature move on a fire grill, delivering flavor through the Maillard reaction. Preheat the direct zone to a high temperature and pat the meat dry to promote browning. Place the item on the grate and avoid moving it too soon; allow a crust to form before flipping. Use long tongs to minimize heat exposure to your hands and maintain control. After searing, consider moving the food to indirect heat to finish cooking gently. Resting the meat after removal helps juices redistribute for a juicier bite. The fire grill’s heat will intensify crust formation, so monitor carefully to prevent charring. Grill Cooking’s guidance emphasizes steady hands and deliberate timing for best results on the fire grill.
Step 5: Finishing, Resting, and Cleaning Up
Finishing touches on the fire grill involve checking internal temperatures with a thermometer and letting meat rest for a few minutes before slicing. Resting allows juices to redistribute, which improves texture and flavor. Clean up while the grill is warm but not hot; brush grates to remove stuck-on bits and empty ash if you used charcoal. Store tools, wipe down surfaces, and ensure vents are closed to prevent drafts. Regular maintenance of the fire grill, including periodic grate cleaning and vent inspection, helps maintain performance and safety. The Grill Cooking team recommends documenting what worked well for future cooks and refining your approach with each session.
Authority Sources and Safety Best Practices
Reliable grilling safety rests on established guidelines from credible sources. Here are a few authorities to consult when refining your fire grill technique:
- United States Department of Agriculture (USDA) food safety resources
- Centers for Disease Control and Prevention (CDC) food safety guidelines
- University extension programs that cover practical grilling and kitchen safety
These sources provide general guidance on safe handling, cooking temperatures, and best practices for outdoor grilling. Always follow local regulations and use common sense when managing an open flame on the fire grill.
Maintenance and Long-Term Care of Your Fire Grill
Good maintenance keeps the fire grill performing at its best. After cooking, burn off any remaining residue by running the grill hot for a few minutes with the lids closed. Clean the grates with a wire brush, then wipe away loose ash from the tray or bottom pan. Inspect the vents and lids for corrosion or wear and replace worn parts when necessary. Periodically season the grates with a light coat of oil to preserve nonstick properties and prevent rust. A well-maintained fire grill is safer, more efficient, and more enjoyable to use, reducing the chance of flare-ups and uneven heating during future cooks.
Tools & Materials
- Charcoal or lump charcoal(Choose a quality standard or natural lump charcoal for even burning)
- Chimney starter(Optional but speeds up ignition; use newspaper or fire starters)
- Lighter or matches(Long-reach options preferred to keep hands safe)
- Long-handled tongs(At least 15 inches for safe handling)
- Heat-resistant gloves(High-heat protection for handling grills and vents)
- Digital meat thermometer(Ensure accurate internal temps)
- Oil for seasoning(Oil the grate lightly before grilling)
- Spray bottle with water(Light mist to manage small flare-ups)
- Grill brush(Clean grates before and after cook)
- Timer or phone(Keep track of resting and searing times)
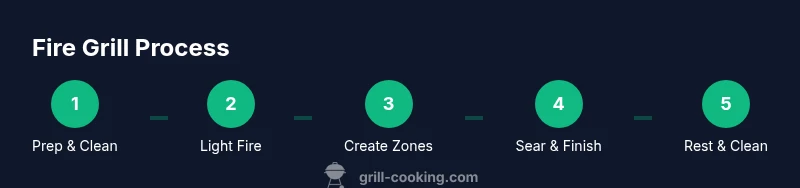
Steps
Estimated time: 45-75 minutes
- 1
Inspect and prep the grill
Carefully inspect the grill for cleanliness and obstructions in vents. Brush the grate and wipe down the interior. Lightly oil the grate to prevent sticking and set up the zone layout for direct and indirect cooking. This step reduces flare-ups and ensures even heat distribution for the fire grill.
Tip: A clean surface yields more predictable temps and better sear results on the fire grill. - 2
Light the fire grill safely
Choose a lighting method appropriate for your fuel. If using charcoal, employ a chimney starter to heat coals without lighter-fluid smell. For gas grills, ensure burners are off, lid open, and ignite safely. Allow flames to calm and embers to glow before cooking.
Tip: Never hurry the flame; a steady heat is easier to control on the fire grill. - 3
Create direct and indirect zones
Move hot embers to establish a direct high-heat area and leave space for indirect cooking. The direct zone is for searing; the indirect zone finishes cooking gently. Observe vent positions to regulate airflow and burn rate.
Tip: Use a long tool to arrange wood chunks or adjust vents without getting too close to the flame. - 4
Sear and manage the cook
Place food on the direct zone to sear, leaving it undisturbed until a crust forms. Transfer to the indirect zone if it needs to finish cooking without burning. Use a thermometer to monitor internal temperature for safety and texture.
Tip: Pat meat dry before searing and avoid overcrowding to maintain heat. - 5
Rest, finish, and clean
Let meat rest after cooking to redistribute juices. Clean the grates while the grill is warm, then store tools properly. Close vents to extinguish the fire and prevent deterioration of components.
Tip: Rest times depend on thickness; typical rest is 5-10 minutes for steaks.
FAQ
What is the best way to light a fire grill?
Choose a method that suits your fuel. For charcoal, a chimney starter provides quick, even ignition; for gas, ensure burners are clean and open the lid during ignition. Always prioritize safety and ventilation to avoid flare-ups.
Use a chimney starter for charcoal or open the gas burners and lid for gas grills. Safety first, and avoid flare-ups.
How do I maintain even heat on a fire grill?
Establish direct and indirect zones, adjust vents to regulate airflow, and avoid overcrowding the grate. Keeping the lid closed during indirect cooking helps retain heat and moisture.
Set zones, control airflow, and avoid crowding. Close the lid during indirect cooking to keep heat steady.
Is charcoal or gas better for flavor on a fire grill?
Charcoal and wood add smoky flavors that many grill enthusiasts prefer, while gas offers convenience and precise control. The choice depends on time, flavor preference, and safety considerations.
Charcoal gives smoky flavor; gas is convenient and controllable. Pick based on time and taste.
How long should I rest a grilled steak on the fire grill?
Rest steaks for about 5-10 minutes after removing from direct heat. Resting improves juiciness by allowing juices to redistribute.
Rest steaks a few minutes after cooking to keep them juicy.
What are common safety mistakes with a fire grill?
Avoid leaving the grill unattended, keep flammable objects away, and ensure proper venting. Have a water spray bottle handy for small flare-ups and know how to shut off the fuel quickly if needed.
Don’t leave it unattended and keep a spray bottle nearby for flare-ups.
How do I clean a fire grill after cooking?
While the grill is warm, scrub the grates with a brush, wipe interior surfaces, and remove ash or drippings. Regular maintenance improves flavor and prolongs grill life.
Clean the grates while warm and keep up with maintenance.
Watch Video
Quick Summary
- Preheat and prep the fire grill for a clean start.
- Use direct and indirect zones to balance searing and finishing.
- Control airflow with vents to maintain steady heat.
- Rest meat after cooking for juicier results.
- Regularly maintain and clean the grill for safer, more reliable performance.