How to Grill Without an Oven: A Complete Outdoor Cooking Guide
Learn how to grill without an oven with a step-by-step plan, heat zones, gear tips, and safety guidance to master outdoor cooking for meats, veggies, and seafood.

In this guide, you’ll learn how to grill without an oven: set up a reliable charcoal or gas grill, choose direct and indirect heat zones, prepare ingredients, manage temperatures, and finish with flavorful, safe results. You’ll also get step-by-step instructions, essential tools, and safety tips to master outdoor cooking for any skill level.
Why grilling without an oven matters
Grilling without an oven opens a world of flavor and control that’s especially appealing to home cooks and grill enthusiasts. When you rely on a dedicated grill, you can influence smoke, sear, caramelization, and juiciness in ways that an indoor oven can’t easily replicate. The Grill Cooking team often emphasizes that outdoor cooking starts with a solid plan, a clean grill, and respect for heat. Grill Cooking Analysis, 2026, highlights how heat management and proper airflow influence crust formation and moisture retention. By treating the grill like a kitchen station—setting zones, timing rests, and coordinating multi-item cookouts—you gain precision and confidence. The result is a well-rounded menu: steaks with a crisp exterior, vegetables that char beautifully, and fish that stays tender inside. With the right mindset, equipment, and practice, you can produce restaurant-quality results right from your backyard.
Heat sources and heat zones you can rely on
Grilling without an oven begins with selecting a reliable heat source and designing zones that fit the food. A charcoal grill delivers rich smoke and high-heat searing; a gas grill offers consistent temperature control and quick adjustments. The key is to create at least two zones: a hot direct-heat zone for searing and a cooler indirect-heat zone for finishing and gentle cooking. This approach mirrors oven behavior: a hot surface to sear, followed by controlled cooking to the desired internal temperature. Proper airflow matters: open vents for oxygen during searing, slightly close vents when damping heat for delicate items. This setup gives you versatility across proteins, seafood, and vegetables, matching different cooking times and textures. The Grill Cooking team recommends practicing a two-zone layout before feeding a crowd, so you can quickly move items between zones as needed.
Gear and setup for consistent grilling
Consistency on the grill comes from dependable gear and a deliberate setup. Start with a sturdy pair of long-tanged tongs, a reliable instant-read thermometer, and heat-resistant gloves. A grill brush and a light coat of high-smoke-point oil on the grates help prevent sticking and promote even browning. For precision, keep an accurate thermometer with a probe for larger cuts, and consider a cast-iron skillet or grill pan for items that benefit from a controlled surface. Store a spray bottle for flare-ups and a digital timer to track resting periods. A clean grill not only reduces off-flavors but improves heat transfer; Grill Cooking analysis shows that routine maintenance pays off in less guesswork and more consistent crusts.
Ingredient prep and marinades for grill-only cooking
Preparing ingredients properly ensures predictable results when you’re cooking without an oven. Pat proteins dry to promote browning, and apply a light oil before seasoning to help the crust form. Dry rubs, marinades, and brines each offer different advantages: rubs create flavorful crusts, marinades add moisture and aroma, and brines boost juiciness for lean cuts. Allow marinating times appropriate to the cut, and avoid over-marination that can overwhelm the cook. Pre-slice vegetables and season them evenly so they finish with uniform color and texture. Since heat on the grill can concentrate flavors, balance sweet, acidic, and smoky notes to achieve a well-rounded plate. Grill Cooking’s approach emphasizes planning your spice profile a few hours ahead to maximize flavor without overwhelming the grill.
Direct heat vs indirect heat: mapping your cooking plan
Understanding direct and indirect heat is essential when you’re cooking without an oven. Direct heat is best for quick sears, crust development, and flavor locking on steaks, chops, and vegetables that benefit from fast caramelization. Indirect heat shines for larger or tougher items that require longer cooking times or gentle heat to avoid burning: bone-in poultry, larger roasts, and delicate fish. The trick is to start with direct heat to create color and flavor, then move pieces to indirect heat to finish cooking through without scorching. For items that finish with a crisp exterior, you can briefly return to direct heat for a final crust. Keeping track of interior temperatures with a thermometer helps you avoid undercooked or overcooked outcomes. Grill Cooking analysis suggests planning each item’s path before you begin so you aren’t chasing heat mid-cook.
Step-by-step grilling plan for popular foods
A practical, repeatable plan works well for meats, seafood, and vegetables. For steak, start with a hot direct-heat sear to form a crust, then move to indirect heat to reach the target internal temperature; rest before slicing to retain juices. For chicken thighs, begin with indirect heat to avoid dry, overcooked edges, and finish with a brief sear for color. Salmon fillets benefit from a gentle indirect finish after a short sear to preserve moisture. For vegetables like asparagus, peppers, and corn, use direct heat for blistering and char, then remove from heat while still slightly warm to preserve texture. Use a thermometer to confirm doneness and a timer for resting periods, ensuring quality across proteins and produce.
Safety, sanitation, and cleanup for outdoor grilling
Outdoor cooking demands attentive safety practices. Wear heat-resistant gloves when handling grates and hot tools, keep a dedicated fire-safe area, and manage flare-ups with a spray bottle or a controlled retreat to indirect heat. After cooking, scrub the grates with a grill brush while they’re warm enough to loosen residue, then oil lightly to prevent rust. Clean tools and surfaces promptly to prevent cross-contamination, especially when handling raw proteins. Proper sanitation involves washing hands, utensils, and cutting boards, plus separating raw and cooked items. A well-maintained grill performs better and lasts longer, delivering consistent results across the season.
Troubleshooting common grill-based cooking challenges
Even seasoned grillers encounter snags when cooking without an oven. Common issues include uneven heat distribution, overly charred exteriors with undercooked interiors, and vegetables that taste under-seasoned. Address heat by verifying zone setup and vent adjustments, and ensure items aren’t crowded on the grate, which can trap heat. If foods stick, lift rather than pry to avoid tearing, and apply a light oil-spray to the surface. For dryness, consider basting with a simple glaze or finishing with a quick rest to redistribute juices. The most reliable fix is practice and careful temperature monitoring; this approach reduces guesswork and improves consistency over time.
Real-world tips for consistency and growth in outdoor grilling
Consistency grows from a repeatable routine. Preheat thoroughly, establish your heat zones, and use a thermometer to guide decisions rather than timing alone. Maintain a clean grill for even heat transfer, and adjust based on the cut’s thickness and fat content. Keep a plan for different foods and always rest meats before slicing. Grill Cooking’s guidance emphasizes practice, patience, and careful attention to heat control as the core path to better outdoor cooking outcomes.
Tools & Materials
- grill (charcoal or gas)(Stable platform; suitable for two-zone setup (direct and indirect heat))
- long-tong spatula and tongs(Secure grip for flipping and moving food without burns)
- instant-read thermometer(Essential for accuracy with meat and fish)
- heat-resistant gloves(Protect hands during high-heat maneuvers)
- grill brush(Clean grates before and after cooking)
- oil with high smoke point(Lightly oil grates to prevent sticking (e.g., canola or avocado oil))
- spray bottle or basting brush(Control flare-ups and add moisture)
- cast-iron skillet or grill pan(Use for items that benefit from even contact and controlled searing)
- aluminum foil(Wrap delicate items for indirect cooking or rest)
Steps
Estimated time: 60-90 minutes
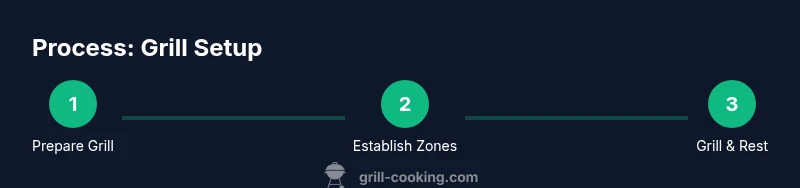
- 1
Prep the grill and tools
Clear the grill area, clean the grates, and assemble your essential tools within reach. Preheat the grill to establish a reliable baseline temperature for the initial sear. This step reduces sticking and ensures predictable browning.
Tip: Heat the grates first before applying oil to reduce sticking and improve crust formation. - 2
Establish heat zones
Set up two zones: a hot direct-heat zone for searing and a cooler indirect-heat zone for finishing. If using charcoal, bank the coals on one side; for gas, preheat to high on one side and lower on the other. This division mimics an oven’s hot and moderate regions.
Tip: Keep the indirect zone ready; moving items quickly between zones prevents overcooking. - 3
Prepare ingredients
Pat foods dry, oil lightly, and season evenly. Trim excess fat as needed and cut larger items into uniform shapes for even cooking. Pre-season ahead of time to maximize flavor without delaying the cook.
Tip: Marinate or rub ahead of time but avoid heavy sauces that scorch on direct heat. - 4
Sear with direct heat
Place items on the direct-heat zone to develop a crust. Do not move too soon; allow a crust to form, then flip once.
Tip: Use a proper distance from heat to avoid flare-ups; a brief sear triggers flavorful crust formation. - 5
Finish with indirect heat
Transfer items to the indirect zone to finish cooking through without burning. Use a thermometer to monitor internal temperature and remove from heat at target ranges.
Tip: Small items may finish quickly; check early to prevent overcooking. - 6
Rest and serve
Let meats rest off the heat to redistribute juices. Slice against the grain for tenderness and present with fresh accompaniments.
Tip: Rest times depend on size; longer rests improve juiciness for larger cuts.
FAQ
Can you cook anything on a grill without an oven?
Yes, most proteins, vegetables, and seafood can be grilled without an oven. While some delicate items may require careful timing, a well-planned two-zone setup and temperature monitoring make many dishes feasible.
Yes, you can grill a wide range of foods without an oven; a two-zone setup helps you manage heat and avoid burning delicate items.
What heat level should I use for grilling without an oven?
Start with a hot sear on direct heat to develop crust, then finish on indirect heat to reach the interior target. Adjust flames and vents to control temperature as you cook.
Begin with high heat to sear, then move to indirect heat to finish cooking to the right doneness.
How do I prevent flare-ups while grilling?
Trim excess fat, keep a safe distance from the flames, and have a spray bottle to dampen flare-ups. If flames persist, move the food to indirect heat while the fire subsides.
Trim fat, watch flames, and use a spray bottle to dampen flare-ups; move items to indirect heat if needed.
Indirect heat vs direct heat: when should I use each?
Direct heat is ideal for searing and quick-cooking items; indirect heat is better for larger or tougher cuts that need longer cooking time without burning.
Use direct heat for searing and quick-cook items, indirect heat for longer, gentler cooking.
How long should I grill different proteins?
Grill times depend on thickness and fat content; rely on an internal temperature target rather than fixed minutes, and use resting periods to improve juiciness.
Times vary; check internal temps and rest the meat for best results.
What thermometer should I use for grilling?
An instant-read thermometer with a probe helps you monitor internal temperatures accurately and adjust heat in real time.
Use an instant-read thermometer to check doneness accurately.
Watch Video
Quick Summary
- Preheat thoroughly to ensure a strong crust.
- Use two heat zones for flexible cooking.
- Rest meat after cooking to preserve juiciness.
- Monitor internal temperature with a thermometer.
- Maintain grill cleanliness for consistent results.