Grill Without a Grill: Indoor Grilling Guide for Home Cooks
Learn practical, step-by-step techniques to grill without a traditional grill using tools like a cast-iron pan, broiler, and oven. Safety, flavor hacks, and a quick-start plan for searing and smoky results at home.

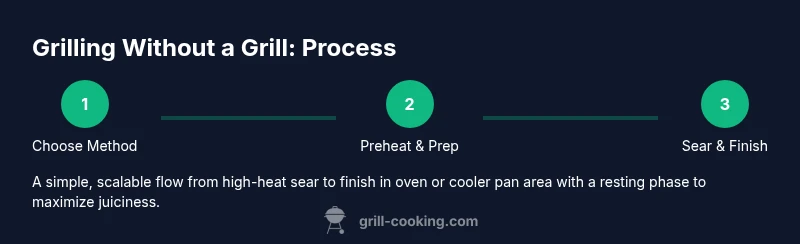
Learn how to grill without a grill by using common kitchen tools. This guide covers practical methods (grill pan, oven broiler, and chimney starter for smoky flavor), essential safety tips, and a quick tool checklist to get sear and char right on your stove or in your oven. Plan for about 20–40 minutes total, depending on method.
Why grill without a grill matters
Grill without a grill is not a compromise—it’s a flexible approach that keeps you cooking outdoorsy flavors even when you can’t fire up a traditional barbecue. For home cooks, it opens up seared textures, smoky notes, and caramelized surfaces using tools most people already own. According to Grill Cooking, you can replicate both direct and indirect heat with a cast-iron grill pan on the stovetop, radiant heat from an oven broiler, or a compact chimney starter used safely outdoors for smoke flavor. The goal is to control heat, moisture, and airflow so proteins develop crusts while staying juicy inside. When you embrace these methods, you’ll reduce weather dependency and still clock in tasty weeknight meals that feel like a backyard cookout.
In practice, the key is understanding heat zones and timing. A hot pan creates grill marks quickly, while finishing with moderate heat prevents overcooking. If you choose the broiler, keep the rack position near the top for strong radiant heat and close monitoring to avoid charring. With an oven-based approach, you can simulate indirect heat by staging the cooking surface and using small amounts of wood chips in a foil packet, if ventilation permits. The bottom line: you don’t need a traditional grill to achieve a satisfying sear and depth of flavor; you just need the right approach and discipline at the heat source.
Core methods for grilling without a grill
Grilling without a grill boils down to a few reliable methods, each suited to different kitchens and protein types. The most versatile is a cast-iron grill pan on the stovetop. Heat it aggressively and lay the protein down to sear, then move to a cooler area of the pan to finish. For more delicate items or larger cuts, the oven broiler is your best friend: position the rack so the heat comes from above, and flip as needed to develop a uniform crust. A chimney starter offers a smoky finish when used outdoors, letting you dump hot charcoal beneath a sturdy heat-safe grate; this is ideal for shorter sessions, like quickly searing sausages or chops before finishing briefly in the oven. Finally, countertop electric grills and panini presses provide a controlled, compact alternative that still delivers grill marks. The trick is to maintain a hot, dry surface and avoid overcrowding the pan. Keep a close eye on moisture levels; patting proteins dry helps achieve better browning and reduces steam, which can dull crust formation.
Safety first: handling high heat indoors
Indoor grilling demands attention to ventilation and heat management. Always turn on a range hood or open a window to improve airflow and reduce smoke buildup. Use heat-resistant utensils and oven mitts, and never leave a hot pan unattended. Choose cookware with high heat tolerance—cast iron and steel handle higher temps without warping, while nonstick pans may degrade under intense searing. Keep a fire extinguisher or a small baking-soda backup handy, and know how to respond if smoke detectors trigger. If you’re using wood chips for a smoky edge, place them in a small foil packet with some perforations and only bake under a broiler or in the oven if your setup allows safe venting. Safety first means planning around your home’s layout, having a thermometer to monitor doneness, and avoiding overcrowding that can trap heat and steam.
Flavor tricks and achieving sear without a grill
Flavor depth comes from proper heat, moisture control, and time management. Start with a dry surface by patting meat dry, then season generously for a robust crust. Preheat your pan until it’s shimmering, then sear in a single layer to form a crust within 1–2 minutes per side, depending on thickness. For a smoky edge, add a small amount of wood chips in a foil packet under the broiler or in a dedicated smoker box if your setup supports it, always with ventilation. Finish with a brief rest period; this allows juices to redistribute and prevents a dry bite. If you’re using the oven, a two-stage process—high heat for searing, followed by gentler heat to finish—delivers reliable results. Experiment with different oils and marinades that tolerate high heat, such as high-oleic olive oil or avocado oil, to resist smoke and keep surfaces glossy rather than scorched.
Tools and setup: turning your kitchen into a makeshift grill
The right tools transform an ordinary kitchen into a capable searing station. A heavy, 10–12 inch cast-iron grill pan delivers durable sears and distinct grill marks. Long-handled tongs and a sturdy spatula help you maneuver proteins without burns. A broiler-safe sheet pan or rack provides a stable surface to finish cooking and catch drippings for easier clean-up. A reliable meat thermometer ensures you hit safe and desired doneness, while a heat-resistant glove protects your hands during high-heat turns. Don’t forget oil spray for quick lubrication and to minimize sticking. If you’re unsure about smoke levels, consider using a vented area or an outdoor space for the chimney starter technique. With these tools, your kitchen becomes a versatile testing ground for grill-like flavors.
Common mistakes and how to avoid them
Overcrowding the pan creates steam that prevents browning, so cook in batches if needed. Not preheating hot enough results in dull crusts; give your pan time to achieve a true sizzle. Using too much oil can cause flare-ups or greasy crusts, so apply a light, even coating. If smoke becomes excessive indoors, pause, ventilate, and reassess heat settings. Some foods develop better crust on contact—don’t flip too early. Finally, rely on a thermometer rather than visual cues alone; color can be deceptive, especially with chicken and fish. By keeping these pitfalls in mind, you’ll achieve crust, texture, and flavor comparable to an outdoor grill with less mess and more control.
Quick-start plan for weeknight grilling without a grill
Start by selecting a protein that sears well in a pan, such as chicken thighs, steaks, or robust vegetables like bell peppers and zucchini. Preheat your grill pan until it sizzles, pat the protein dry, and season generously. Sear on each side to develop a crust, then move to a cooler part of the pan or finish in the oven with a brief blast of high heat to reach your target doneness. Rest briefly before serving to lock in juices. Finish with a glaze or butter baste for extra moisture and sheen. This approach balances speed and flavor, letting you deliver near-outdoor results in under 40 minutes.
Maintenance and cleanup: keeping your indoor grill setup ready
Allow cookware to cool gradually before washing to avoid warping. Scrape excess residue while warm to make cleanup easier, and use hot water and a small amount of dish soap on cast iron after drying thoroughly to prevent rust. Apply a light coat of oil to cast iron after drying to maintain seasoning. Store tools in a dry place to avoid rust and corrosion. Regularly inspect the broiler rack and pan for warping or warping, replacing components as needed to maintain performance. A clean, well-maintained setup ensures reliable searing and reduces the risk of flavor carryover between cooks.
A quick note on flavor authenticity
While indoor methods can replicate many aspects of outdoor grilling, some nuances—like true wood-smoked aroma and the exact heat curve of an open flame—will differ. Embrace the strengths of indoor techniques: precise temperature control, consistent crust development, and minimal cleanup. With practice, you’ll develop your own signature sear and crust that captures the essence of outdoor grilling while staying indoors.
Tools & Materials
- Cast-iron grill pan (10–12 inch)(Even ridges for classic grill marks; preheat thoroughly)
- Long-handled tongs(Stability when flipping hot meat)
- Broiler-safe sheet pan or rack(Drip collection and finish in oven)
- Meat thermometer(Verify doneness without guessing)
- Oil spray or high-heat oil(Lightly coat to prevent sticking)
- Heat-resistant oven mitts/gloves(Protect hands during high-heat handling)
- Ventilation: range hood or window(Control smoke levels during cooking)
- Wood chips (optional) for smoky edge(Use only with proper setup and ventilation)
- Aluminum foil (for pouches)(Create a controlled smoke pocket if needed)
- Vent-safe location or outdoor space (for chimney starter)(Use outdoors; not in confined indoor areas)
Steps
Estimated time: 20-40 minutes
- 1
Preheat your chosen method
Preheat the grill pan on high heat for 3–5 minutes until it shows a fine shimmer. If you’re using the broiler, set the rack to the top position and allow the oven to preheat fully. This ensures a hot surface that creates a proper crust on contact.
Tip: A hot surface is essential for that signature sear; don’t rush the preheat. - 2
Prepare and pat dry your main ingredient
Pat the protein dry with paper towels to remove surface moisture. Lightly oil and season well; salt helps draw moisture to the surface, which aids browning. Letting proteins sit for 10–15 minutes after seasoning can improve crust formation.
Tip: Drying is key—moisture hinders browning and crust formation. - 3
Sear the protein firmly on direct heat
Place the protein in a single layer and avoid moving it for 1–2 minutes to form an initial crust. Flip only once to ensure even searing on both sides. Maintain high heat to keep the surface sizzling.
Tip: Don't crowd the pan; crowding reduces temperature and causes steaming. - 4
Finish with indirect heat or oven heat
If using the pan, move the piece to a cooler portion of the pan to finish cooking through. Alternatively, transfer to a preheated oven or switch to the broiler for a short window until the desired doneness is reached. Use a thermometer to confirm safety and avoid overcooking.
Tip: Finish with a short rest to distribute juices. - 5
Rest and serve
Let meat rest for 5–10 minutes after cooking to redistribute juices, enhancing tenderness. Slice against the grain when applicable and serve with a finishing glaze or butter for extra moisture and flavor. Resting is often overlooked but critical for juiciness.
Tip: Resting is as important as cooking for texture. - 6
Clean and maintain your gear
While still warm, wipe down the pan to remove stuck-on bits; wash with warm water and a mild soap or scrub with a stiff brush if needed. Dry immediately and reapply a thin oil layer to maintain seasoning on cast iron. Store in a dry place to prevent rust.
Tip: Regular cleaning maintains nonstick properties and crust formation.
FAQ
Can I grill indoors without any special equipment?
Yes. You can use a cast-iron grill pan on the stove, the oven broiler for direct heat, or a countertop grill. Each method cooks differently, so start with a simple protein to learn heat control and timing.
Yes. You can indoors use a grill pan, the oven broiler, or a countertop grill. Each method has its own timing, so start simple and practice.
Is it safe to use wood chips indoors?
Wood chips can add smoky flavor, but they create more smoke. Use only with proper ventilation and avoid generating large amounts of smoke in enclosed spaces.
Wood chips can add smoky flavor, but they produce more smoke. Ventilate well and avoid excessive smoke indoors.
How can I prevent food from sticking to a pan?
Preheat the pan thoroughly, pat proteins dry, and use a light oil just before placing food. Avoid overcrowding and flip only when a crust forms.
Preheat well, dry the food, oil lightly, and avoid crowding for easier release.
What is the best way to know when meat is done without a grill?
Use a meat thermometer to check internal temperature according to safe doneness guidelines and adjust heat as needed. Rely on temperature rather than color alone.
Check with a meat thermometer and follow safe doneness guidelines; doneness varies by protein.
Can I replicate outdoor grill marks without a grill?
Yes. A hot ridged grill pan creates distinct grill marks similar to outdoor grills, especially when you start with a hot surface and proper searing technique.
Yes. A hot ridged pan gives nice grill marks indoors.
What foods work best for indoor grilling without a grill?
Tougher cuts like chicken thighs, steaks, pork chops, and sturdy vegetables hold up well to high-heat searing and finish cooking reliably in the oven.
Good options include chicken thighs, steak, pork chops, and sturdy vegetables.
Watch Video
Quick Summary
- Grill without a grill by leveraging pan searing, broiling, and oven finishing.
- Ventilation and heat control are essential to indoor success.
- Resting meat post-cooking yields juicier, tastier results.
- Cast-iron pans deliver reliable crust and flavor when heated properly.
- Safety and cleanup should accompany every cooking session.