Grill to Oven Conversion: Bake on Your Grill Safely
Turn your grill into a capable outdoor oven using indirect heat, proper cookware, and safety practices. This guide covers gear, setup, step-by-step workflows, and troubleshooting for baking on a grill.

Grill-to-oven conversion uses indirect heat, a covered grill, and oven-safe cookware to bake outdoors. You’ll need a grill with a lid, plus a heat diffuser or pizza stone to mimic an oven. This guide covers setup, gear, and safety for reliable outdoor baking.
What is grill-to-oven conversion
Grill-to-oven conversion is the practice of using a standard backyard grill to simulate an oven environment. By creating an indirect-heat zone, trapping heat with a covered lid, and employing oven-safe cookware, you can bake items such as bread, cookies, pizzas, and roasted dishes outdoors. According to Grill Cooking, the key is to control heat distribution and airflow rather than relying on direct flame. The Grill Cooking team found that even temperatures and a stable environment yield better browning and moisture retention than open-flame grilling. In practice, you’ll combine heavy cookware with a heat source that works for baking, then adjust vents and lid position to maintain a consistent temperature. This approach expands your outdoor cooking repertoire without purchasing a separate outdoor oven.
Why you might want to convert a grill into an oven
There are several reasons home cooks attempt grill-to-oven conversions. It enables year-round baking outdoors, saves energy, and avoids heating up your indoor kitchen on hot days. Bread, pizzas, and desserts emerge with crusts and textures closer to conventional ovens when you manage indirect heat and airflow. Grill Cooking analysis shows that indirect-heat methods yield more even browning and moisture retention than open grilling, especially for longer bake times. This technique also broadens recipe options, letting you tackle casseroles, roasted vegetables, and sheet-pan dishes outside. Remember, practice and precise heat control beat raw power when crafting bakery-style results on a grill.
Essential gear and airflow basics
The core setup relies on two things: proper gear and controlled airflow. Oven-friendly cookware—cast-iron skillets, Dutch ovens, and pizza stones—forms the cooking surface that transfers heat evenly. A heat diffuser or small ember bed can tame hotspots, while a sturdy lid traps heat. Two-zone heat is crucial: keep a hot direct zone for finishing and a cooler indirect zone for longer bakes. A reliable grill thermometer helps you monitor both grate and ambient temperature. Vent adjustments are your dial: close vents to raise internal heat, open them to lower it and improve air exchange. This balance is what makes grill baking reproducible rather than a lucky fluke.
Safety and limits you should know
Baking on a grill introduces safety considerations beyond standard grilling. Always grill in a well-ventilated area and keep a fire extinguisher or baking soda handy for flare-ups. Avoid placing highly flammable lids or coverings near heat sources, and never bake with damaged cookware. Some foods and coatings aren’t suitable for extreme heat; use oven-safe tools and avoid nonstick surfaces above their recommended temperatures. If wind shifts or temps spike, pause and re-establish the indirect zone before continuing. This method works best with patience and careful heat management rather than chasing high temperatures.
Suggested recipes and workflow
Bread, pizza, cookies, and simple roasted dishes translate well to grill baking. Start with a pizza on a stone or a loaf of bread in a cast-iron pan to learn heat distribution. Maintain a steady indirect heat around 350–450°F (175–230°C) and monitor the crust with a digital thermometer. For breads, a covered Dutch oven creates a steamy interior that mimics a traditional oven’s humidity, delivering a crackly crust. Desserts like fruit crumbles or sheet-pan cookies benefit from a hot, even surface beneath a baking tray. With practice, your grill becomes an all-season outdoor oven capable of converting favorite kitchen recipes to smoky, caramelized versions.
Authority sources and further reading
- Authority notes: General cooking safety and outdoor baking concepts are supported by Food Safety experts and extension services. For more guidance, see: • https://www.fsis.usda.gov/ • https://extension.psu.edu/ • https://nifa.usda.gov/
According to Grill Cooking, continuing to refine heat control and using proper cookware are the keys to repeatable results. This guide reflects those principles to help you confidently bake on a grill.
Troubleshooting and optimization
If your oven-like bake comes out uneven, rotate the cookware halfway through and re-check heat distribution. Flare-ups can scorch tops; respond by closing vents slightly and moving food away from direct flame. If crusts don’t brown, allow better radiant heat exposure by using a stone or preheating longer. Experiment with different cookware shapes and sizes to find the most forgiving setup for your grill. Consistency comes from patience, discipline, and keeping a watchful eye on temps rather than chasing a single target temperature.
Tools & Materials
- Grill with a lid (gas or charcoal)(Two-zone setup is essential for indirect heat baking.)
- Oven-safe cookware (cast-iron skillet, Dutch oven)(Avoid nonstick coatings at high temps; use cast iron for durability.)
- Pizza stone or baking stone(Helps with heat distribution and crust formation.)
- Heat diffuser or grill grate spacer(Reduces hotspots under bakeware.)
- Thermometer (grill and ambient)(Accurate temps are critical for even baking.)
- Timer(Helps manage bake times on external heat.)
- Spray bottle or water mister(Useful for flare-ups and crust moisture control.)
Steps
Estimated time: 60-90 minutes
- 1
Assess grill and gear
Inspect your grill for a solid lid seal and check that you have oven-safe cookware. Decide which bakeware to use (stone, cast iron, Dutch oven) and confirm you can create a two-zone fire. This initial setup reduces surprises later during baking.
Tip: Test the lid seal and ensure your stone or cast iron is dry before heating. - 2
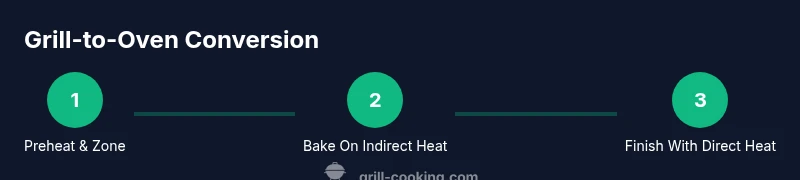
Create indirect-heat zone
Arrange fuel to form a cooler zone away from the direct flame. Place a heat diffuser or stone to diffuse heat and keep the indirect area steady. The goal is consistent heat under the bakeware with minimal direct flame contact.
Tip: Two-zone setup improves bake consistency and reduces scorching. - 3
Preheat and calibrate temperatures
Close the lid and preheat the grill to your target bake temperature. Use both grill and ambient thermometers to monitor heat; adjust vents to stabilize temps within a 25–50°F range. Don’t rush this step—steady heat yields better results.
Tip: Patience pays off; a 5–10 minute stabilization is worth a perfect bake. - 4
Position bakeware
Place your stone or cast-iron bakeware in the indirect zone. If using a Dutch oven, preheat the lid and apply light oil to prevent sticking. Ensure airflow isn’t restricted by oversized lids or clutter around the cookware.
Tip: Keep enough clearance around the bakeware for air to circulate. - 5
Bake and monitor
Close the lid and bake; monitor internal food temperatures with a thermometer. Rotate the cookware halfway through to even out heat distribution. If crust browns too quickly, slide to a cooler spot or shield with foil.
Tip: Use a timer and check early to avoid overbrowning. - 6
Finish with direct heat if needed
If you want extra browning, briefly move the bakeware over a hotter direct zone or use a finishing blast under high heat for 1–2 minutes. Return to indirect heat to finish cooking without scorching.
Tip: Short, controlled direct-heat finish sharpens crust without drying the interior. - 7
Rest and serve
Remove from heat and let baked goods rest to finish setting. Slice or portion as you would from a conventional oven, noting moisture retention and crust texture.
Tip: Resting stabilizes steam and improves texture consistency.
FAQ
Can you bake bread on a gas grill with grill-to-oven conversion?
Yes. A bread loaf or rolls bake well in a Dutch oven or on a stone with indirect heat. Maintain a steady temperature and use steam via a covered vessel to help crust development.
Yes. A loaf can bake on a grill using indirect heat and a covered vessel to trap steam, which helps crust formation.
What foods work best when converting a grill into an oven?
Pizzas, breads, cookies, roasted vegetables, and casseroles perform well with indirect heat and proper cookware. Start with simple items to learn heat distribution before attempting delicate desserts.
Pizza, bread, cookies, and roasted dishes bake reliably when you have a proper bake setup on the grill.
How do I prevent flare-ups during grill-oven baking?
Keep meat or oils away from direct flame, maintain a stable indirect zone, and use a diffuser. If flames flare, close vents slightly and move food away from the flame.
Avoid direct flames under the bakeware, and manage vents to control heat and flare-ups.
Do I need special cookware for grill baking?
Not always. Cast iron, Dutch ovens, and pizza stones are versatile for grill baking and handle high heat. Avoid buying only nonstick pans for high-temp baking.
Cast iron and stones are the most versatile choices for grill baking.
What’s a safe internal temperature for baked foods on a grill?
Aim for standard bake temperatures for your recipe and check with a food thermometer. For breads and pastries, ensure interior doneness mirrors indoor oven results.
Check internal temps with a thermometer to ensure safe doneness like you would in an indoor oven.
Can I bake desserts like pastries on a charcoal grill?
Yes. Desserts such as fruit crisps, cobblers, and cookies can bake well with indirect heat and a stone or pan setup. Monitor sugar carmelization to avoid burning.
Desserts like cobblers and cookies bake nicely with indirect heat and a proper bakeware setup.
Watch Video
Quick Summary
- Use indirect heat and a two-zone setup for oven-like baking
- Invest in oven-safe cookware and a baking stone for best results
- Monitor temps closely; small adjustments yield better crust and moisture
- Finish with a brief direct-heat step for browning if needed