How to Check Grill Temperature on AC: Grilling Guide
Learn how to check grill temperature on AC setups with practical steps, thermometers, calibration, and safe practices. This Grill Cooking guide covers probe placement, equipment, and common mistakes for precise, delicious results.

You’ll learn a practical method to verify grill temperature on AC-influenced setups using a digital probe thermometer, a grate thermometer, and calibration checks. The guide covers safe probe placement, heat-zone goals for common foods, and how to confirm accuracy across charcoal, gas, or hybrid grills. Start by identifying your heat source and preparing calibrated measurement tools for precise readings.
Why Accurate Temperature Reading Matters for AC-Influenced Grilling
According to Grill Cooking, accurate temperature reading is the backbone of consistent grilling, especially when airflow and heat can shift in AC-influenced setups. If you’re wondering how to check grill temperature of ac, you’re in the right place. Understanding the temperature inside your grill lets you sear properly, avoid undercooked centers, and manage fat rendering. This awareness translates to more reliable results across foods—from a perfect crust on a ribeye to juicy chicken thighs. The approach you take with readings affects everything from cook time to safety, so calibrating and validating your thermometer readings should become a standard step in every cook session. With the right tools and habits, you’ll move beyond guesswork and cook with confidence, whether you’re using charcoal, gas, or a hybrid system.
Tools and Sensors You Need on Hand
Selecting dependable tools is the first step. A digital instant-read thermometer is essential for fast, accurate checks mid-cook, while a long-stem probe thermometer helps monitor internal temps without opening the lid. A grate thermometer provides a live sense of surface heat, though it’s not a replacement for internal readings. If you rely on built-in grill gauges, expect some drift without regular calibration. Grill Cooking Analysis, 2026 suggests that consistent results come from triangulating data between multiple devices and the grill’s heat zones. Keep spare batteries, clean probes, and a damp cloth handy to wipe off residues that can affect readings. Also include heat-resistant gloves for safety and a small towel to handle hot components. Finally, ensure your workspace is well-ventilated if you’re working near a heat source that’s tied to airflow controls.
How to Place Probes for Accurate Readings on AC-Influenced Grills
Probe placement matters almost as much as the thermometer itself. Place the main probe in the thickest part of the meat, avoiding bones and fatty pockets that heat unevenly. For high-heat searing zones, use a second probe on the surface to gauge grate temperature without conflicting with the internal read. If you’re testing ambient heat from an air-cooled flow, keep probes away from direct flame paths to avoid hot spots that skew results. For breads or vegetables, situate the probe near center mass rather than the outer edge to reflect true internal temperature. Remember to preheat the grill with the probes in place so readings stabilize as heat builds. A quick note: never touch a hot probe with bare hands; use tongs or heat-safe gloves. The goal is repeatable measurements you can trust session after session. The Grill Cooking team emphasizes consistency across cooking styles; reproducible temps matter more than any single high reading.
Calibrating and Verifying Readings
Calibration ensures your thermometer reads accurately. Start with a ice-water bath for 32°F (0°C) readings and a boiling water test for 212°F (100°C) at sea level. If readings are off, follow your thermometer’s calibration instructions, typically by adjusting a calibration nut or using a software menu. After calibration, re-check in water, then compare with the grill’s surface and interior temperatures to confirm consistency. If your readings still drift, replace or service the device. Regular calibration is a habit for reliable grilling, not a one-off check. For AC-assisted environments, allow extra time for readings to stabilize as airflow changes settle into steady-state heat distribution. Grill Cooking Analysis, 2026 notes that consistency in readings correlates with consistency in outcomes across meals.
Temperature Targets for Common Foods
Knowing target temperatures helps you translate readings into safe, delicious results. For beef, many enthusiasts aim for 130-135°F (54-57°C) for medium-rare, while 135-145°F (57-63°C) covers medium to medium-well depending on thickness. Poultry should reach at least 165°F (74°C) to ensure safety. Pork is best around 145-160°F (63-71°C) with a rest period that carries carryover heat. Fish is typically done around 145°F (63°C). Remember to consider resting time; carryover can raise temps by 5-10°F (3-6°C) after removal from heat. These targets assume calibrated devices and typical grill setups; adjust for thickness and personal preference. When you have solid readings, you’ll avoid undercooking or overcooking while preserving juiciness. Keeping a simple reference chart nearby can help you make quick calls mid-cook.
Common Mistakes and How to Fix Them
Avoid relying on a single gauge or a fast glance at the dial. Always verify with a separate thermometer when possible. Don’t prop the grill lid for long periods while checking temperatures; frequent openings can cause temp swings that mislead readings. Ensure probes aren’t touching grates or fat drippings, which can heat up readings incorrectly. Finally, remember to clean probes after use; residue can throw off conductivity. Regular maintenance and careful placement reduce drift, helping you achieve the exact temps you want.
Tools & Materials
- Digital instant-read thermometer(Range 0-600°F; fast readings; replace batteries as needed)
- Long-stem probe thermometer(12-18 inch probe for direct-heat grills; heat resistant handle)
- Grill grate thermometer(Optional for live grate temperature, not a substitute for internal temps)
- Heat-resistant gloves(Caution: protect hands when handling hot components)
- Clean cloth or alcohol wipes(For sanitizing probes between uses)
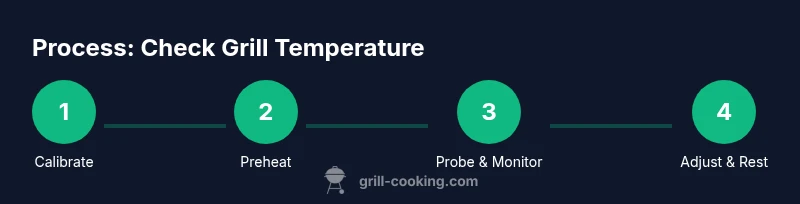
Steps
Estimated time: 15-25 minutes
- 1
Prepare and calibrate your thermometers
Unpack all thermometers and check that batteries are fresh. Calibrate using ice-water and boiling-water methods per device instructions to ensure accuracy before lighting the grill. This step prevents drift that can mislead the rest of the process.
Tip: Calibrate at the cooking site; measurement accuracy on site matters more than lab precision. - 2
Preheat and establish heat zones
Preheat the grill with vents set for your target zone. Establish a direct-heat zone for searing and an indirect-heat zone for finishing. Allow temperatures to stabilize for 5-10 minutes depending on your grill type.
Tip: Use the grate thermometer if available to confirm surface heat before placing food. - 3
Insert probes correctly
Insert the main probe into the thickest part of the meat, avoiding bone or fat pockets. Place a second probe on the grate surface to monitor ambient heat if your setup benefits from it. Keep probes away from direct flames to prevent scorching.
Tip: Secure probes with clamps to prevent movement during cooking. - 4
Monitor, adjust, and verify
Read temperatures at regular intervals—every 2-5 minutes during critical phases. Adjust vents, fuel, or grate height to maintain target zones. When approaching final temps, test with the internal thermometer to confirm doneness.
Tip: When readings hover near targets, give the food a rest to reduce carryover heat. - 5
Rest and record results
Remove from heat at the target temp, then rest as recommended for the food type. Note the final internal temp and any drift between devices for future reference. Recording helps you repeat success.
Tip: Keep a simple log of foods and temps to refine your technique over time.
FAQ
What’s the best thermometer for checking grill temperature?
A digital instant-read thermometer paired with a long-stem probe provides quick, accurate readings. A grate thermometer helps monitor surface heat but should not replace internal temperature checks.
Use a digital instant-read plus a long probe for accuracy; grate thermometers help with surface heat but internal temp is what matters.
Why do my grill readings differ from the built-in gauge?
Built-in gauges often drift over time and with heat cycles. Calibrating external thermometers and cross-checking with an independent device reduces guesswork.
Grill gauges drift; calibrate with an external thermometer and cross-check readings.
Can I calibrate thermometers at home?
Yes. Use ice-water for 32°F and boiling-water for 212°F (at sea level). Follow your device's instructions for any device-specific offset steps.
Yes. Ice and boiling water calibrations are standard; follow your device instructions for offsets.
How do I know when the food is done?
Check the internal temperature with a reliable thermometer and compare to safe target temps for the food type. Rest times will improve texture and evenness.
Check internal temperature and rest as recommended for best texture and safety.
Is it safe to use probes on high-heat zones?
Yes, with heat-resistant probes and clamps. Keep the probe away from direct flame paths to avoid scorching and inaccurate readings.
Yes, use heat-resistant probes and avoid direct flames on the probe.
How often should I re-check temps during cooking?
Check temperatures every few minutes during critical phases and after major flips or tenths of cooking time.
Check temps every few minutes during key moments to stay on target.
Watch Video
Quick Summary
- Use multiple thermometers for cross-checks.
- Calibrate before every session to avoid drift.
- Establish direct and indirect heat zones for versatility.
- Rest food to finish carryover cooking and enhance juiciness.