How to Check Grill Temperature Without a Thermometer
Learn thermometer-free techniques to estimate grill heat using the hand test, flame cues, smoke behavior, and timing. Build confidence with direct and indirect heat control for perfect grilling.

By the end, you’ll estimate grill temperature without a thermometer using the hand-test, flame behavior, smoke cues, and timing. You’ll need a safe grilling area, basic tools, and familiarity with your grill (gas or charcoal). This quick, actionable outline shows the approach you’ll implement in detail below.
The Why Temperature Control Matters on the Grill
Temperature control is the backbone of consistent, flavorful grilling. When you maintain steady heat, you get uniform doneness, better browning, and improved juiciness. Too-high heat can char outside while leaving the inside underdone; too-low heat dries out meat and prolongs cooking time. By learning thermometer-free cues, you gain practical, rapid feedback during live grilling sessions. According to Grill Cooking, temperature intuition is strengthened through observation, practice, and careful attention to the grill’s behavior under load. This is especially helpful when you don’t have a reliable thermometer handy or when you’re working with a new grill or fuel source. Embrace a mindset of systematic observation: watch the flames, listen to the sizzle, feel the heat with your hands from a safe distance, and time your actions accordingly. This approach keeps you in control even when precision instruments are unavailable.
The Core Tools You Already Have
You don’t need fancy gear to estimate heat without a thermometer, but you should prepare a few reliable tools and safety gear. A sturdy set of long-handled tongs lets you move food without leaning over a blazing grate. Heat-resistant grill gloves protect your hands when flipping or adjusting food. A timer or smart device helps you track cooking intervals and resting periods. A clean grate and a quick brush before you begin ensure that residues don’t flare up unexpectedly. Finally, keep a spray bottle of water handy to dampen small flare-ups without dousing your food. With these basics, you can implement non-thermometer cues confidently and safely.
Hand-Test: The Core Technique for Surface Heat
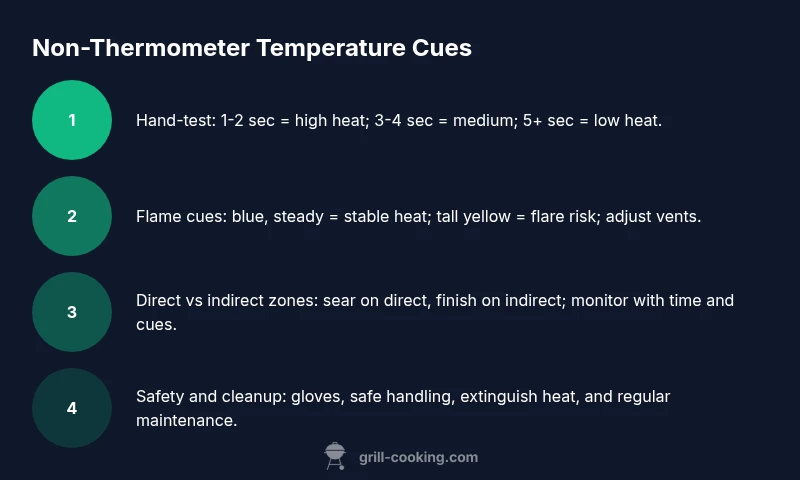
The hand-test is your primary thermometer-free cue. With the heat at a safe grilling distance, hover the back of your gloved hand about 1–2 inches (2.5–5 cm) above the grate for a few seconds. If you can only hold it there for 1–2 seconds, the heat is high; 3–4 seconds indicates medium; 5–6 seconds suggests low. This test gives you a relative sense of surface heat, helping you decide whether to sear directly or shift to indirect cooking. Practice will improve accuracy, but always start with a cautious distance and remove your hand if you feel rising heat. Remember that different grills and fuel sources require adjustments—the same move on a gas grill may feel different on a charcoal unit.
Reading Flame Behavior, Smoke, and Sizzle Cues
Flame size and color are informative signals. Steady, small blue flames imply a stable surface temp suitable for searing or finishing, while tall, dancing yellow flames usually indicate an oxygen-rich burn that can cause flare-ups. Thick white or gray smoke can indicate different fuel conditions and airflow; persistent, billowy smoke often signals a rich burn that may require vent adjustments. Listen for a clean sizzle when food touches the grate; a loud hiss can mean intense heat or moisture release. Over time, separating these cues into direct-heat and indirect-heat zones helps you manage dishes in real time without a thermometer.
Gas vs Charcoal: How Heat Feels Different
Gas grills tend to offer more controllable, consistent heat in a narrow band, whereas charcoal grills introduce more variability with air flow and coal arrangement. On gas, you can rely more on dial position and lid venting to stabilize temperature. On charcoal, controlling heat is a balance of vent openings, pile thickness, and lid time. Knowing these differences helps you map your cues to the grill type: for gas, rely on flame behavior and vent settings; for charcoal, pay attention to the coal bed and how quickly flames respond when you adjust vents.
Practical Scenarios: Steaks, Chicken, and Veggies
Different foods respond to heat differently, so adapting cues to the dish is essential. For steaks, a quick sear over direct heat followed by a move to indirect heat helps build a crust while finishing within the desired doneness. Chicken benefits from steady indirect heat and careful monitoring to avoid pink undercooked centers; use longer cook times with more turns rather than relying on a single hot blast. For vegetables, high heat quickly caramelizes sugars, so start with direct heat to blister surfaces and finish with indirect heat to protect tenderness. Use your timer and hand-test as a baseline, then adjust based on the food’s thickness and moisture content. Throughout, keep your grill clean and free of food debris to prevent uneven heating.
Safety, Cleanup, and When to Rely on Backup
Always prioritize safety. Wear heat-resistant gloves, keep children and pets away from the grill, and never lean directly over flames. If you’re ever unsure about doneness, consider using a thermometer as a backup for final confirmation, especially for poultry. After cooking, close vents and extinguish the fire thoroughly before cleaning. Regular maintenance—clean grates, empty ash, and check for gas leaks—extends grill life and improves heat reliability. The practices outlined here are designed to build your confidence with thermometer-free methods while keeping you safe and in control during every cook.
Tools & Materials
- Long-handled tongs(For safe food handling without leaning over the heat)
- Heat-resistant grill gloves(Protect hands when near hot grates and flare-ups)
- Timer or smartphone timer(Track cooking intervals and resting periods)
- Grill brush(Pre-cook clean to reduce flare-ups)
- Spray bottle of water(Control small flare-ups without dousing food)
- Kitchen towels or heat-safe cloth(Handle equipment safely and wipe hands between steps)
Steps
Estimated time: 20-30 minutes
- 1
Prepare workspace and safety gear
Clear the area around the grill, remove flammable items, and confirm you have heat-safe gloves and tongs within reach. Check that the grill is stable on a level surface and that children or pets are kept at a safe distance. This initial setup reduces risk and ensures you can focus on the cues you’ll monitor during cooking.
Tip: Always wear gloves when near the grate; heat can transfer quickly. - 2
Preheat the grill and establish zones
Light the grill and let it come to a steady state. If using charcoal, arrange a direct-heat zone for searing and an indirect-heat area for finishing. On a gas grill, set burners to create a similar split and close the lid to stabilize heat.
Tip: Aim for a consistent surface heat; avoid large heat swings while you practice cues. - 3
Perform the hand-test to estimate surface heat
With a gloved hand, hover 1–2 inches above the grate for a few seconds to assess heat. Short hold times indicate high heat; longer holds suggest medium to low heat. Use this as your primary non-thermometer cue to decide whether to sear, move to indirect heat, or adjust airflow.
Tip: Start with small, cautious holds and adjust as you gain confidence. - 4
Read flame and smoke cues
Observe flame height, color, and the intensity of smoke. Blue, steady flames imply a stable fire; tall, dancing flames and heavy smoke may signal flare-ups or overly aggressive oxygen flow that you should moderate by adjusting vents.
Tip: If flare-ups occur, briefly close vents or move food to a cooler zone to regain control. - 5
Create and manage direct vs indirect zones
Position food on the appropriate zone based on the cue and food type. Maintain a balance so the exterior browns without burning while the interior cooks through. Use lid time and vent adjustments to stabilize heat rather than chasing a single momentary hot spot.
Tip: Move foods between zones as they progress rather than continuous high heat. - 6
Time your checks and flips by food type
Steaks often benefit from a quick sear on direct heat followed by finishing on indirect heat. Chicken should be cooked through with steady heat and multiple turns to avoid scorching. Vegetables cook quickly; coordinate their placement to finish alongside meat without drying out.
Tip: Rely on color and texture cues rather than trying to time to an exact minute. - 7
Confirm doneness with cues and resting
Assess doneness by surface color, crust, and internal juices visible at the cut edge. Let meat rest to allow carryover heat to finish cooking gently. If you feel uncertain, use a thermometer as a backup for the final check—this keeps your process safe while you build confidence.
Tip: Resting time is part of the cooking process; don’t skip it. - 8
Clean up and maintain heat reliability
After cooking, close vents to extinguish remaining heat and clean the grates. Regular maintenance improves heat distribution and reduces the chance of uneven cooking in future sessions.
Tip: A clean grill responds more predictably to cues and vent changes.
FAQ
How accurate are thermometer-free methods compared to using a probe thermometer?
Thermometer-free cues provide good practical estimates and improve with practice, but they’re not as precise as using a probe thermometer for final doneness.
Thermometer-free methods give reliable estimates with practice, but use a thermometer for exact doneness when safety matters.
Can I use these methods for all foods?
These cues work best for foods that cook quickly or need searing. Slower, thick cuts may require extended indirect heating and closer attention to visual cues.
These cues cover most quick-cooking items; larger cuts may need extra attention and zone management.
Should I always rely on a thermometer for final doneness?
For poultry and foods with safety concerns, confirm doneness with a thermometer when possible. For other items, use cues plus resting time for a safe estimate.
When in doubt, check with a thermometer for safety, especially with poultry.
What cues indicate a good sear versus overcooking?
A good sear shows a deep brown crust with a slight spring to the touch. If the crust chars quickly and juices spurt too aggressively, reduce heat and move to indirect heat.
Look for a crisp, brown crust without excessive charring; adjust heat if you see aggressive moisture release.
How do I adapt these methods to charcoal grills?
With charcoal, create distinct direct and indirect zones by arranging the coals and using the lid. Vent adjustments help regulate heat, and hand-test cues still apply.
Charcoal needs careful zone setup and vent control; use your hand-test alongside flame cues.
Watch Video
Quick Summary
- Practice the hand-test consistently.
- Know your grill type and its heat zones.
- Rely on multiple cues for accuracy.
- Prioritize safety when cooking with high heat.