Grill to Oven Ribs: A Complete How-To Guide
Master the grill-to-oven ribs method for smoky flavor and tender texture. Learn prep, timing, safety, and tips from Grill Cooking to deliver consistent, mouth-watering ribs every time.

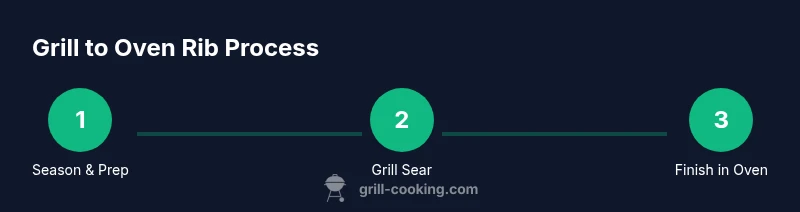
With grill-to-oven ribs, you finish smoky, tender ribs by searing on the grill and finishing in the oven for consistent texture. Start with indirect heat, apply a dry rub, then wrap and bake to tenderize before a final glaze. This hybrid approach works well for large racks and weekend cooks.
Why grill-to-oven ribs work for home cooks
Grill-to-oven ribs blend the best of two worlds: the smoky char from the grill and the controlled heat of the oven to finish cooking. For larger racks, this method helps prevent uneven cooking, builds a reliable bark, and reduces the risk of dry meat. According to Grill Cooking, this two-stage approach makes it easier to hit the right tenderness without constant babysitting. The method is especially helpful on busy weekends when you want great flavor without standing over the grill for hours. You’ll still get that signature smoke ring and caramelized exterior, but the interior stays juicy and evenly cooked. The Grill Cooking team emphasizes starting with a solid rub and a planned wrap to trap moisture during oven finishing.
From a home-cook perspective, the technique also provides consistency. If your grill runs cool, finishing in the oven ensures you don’t lose tenderness due to uneven heat. If you’re cooking for a crowd, the oven gives you predictability: you can prepare sides and still have the ribs ready to serve at the same time.
Prep and plan: selecting ribs, trimming, and seasoning
Choosing the right rib cut matters for texture and cook time. Spare ribs are larger and can feed a bigger group, while baby backs finish faster and stay leaner. Regardless of cut, trim away excess fat and remove the silver skin from the bone side to improve rub penetration. Pat the ribs dry with paper towels so the rub adheres and the bark forms. Apply a balanced dry rub that includes salt, sugar, paprika, pepper, and optional chili for heat. Let the rub sit on the meat for 20–30 minutes if you can, or refrigerate briefly to let flavors meld. A light drizzle of olive oil can help the rub cling if the surface is very dry.
For variations, you can add a touch of mustard or vinegar-based binder to the surface to improve adhesion. If you plan to glaze, reserve the glaze for the final stage to prevent sugar from burning during the initial grill stage.
Equipment and setup: grill, oven, foil, thermometer
You’ll need a grill capable of indirect heat and a standard kitchen oven. Gather a rib rack or sturdy aluminum foil for wrapping, heavy-duty foil for “foil boats,” tongs, a silicone brush for glaze, a meat thermometer, a cutting board, and a knife. Ensure you have an oven-safe pan large enough to cradle the rib slabs during the finish. Preheat the oven to a moderate finish temperature and prepare a foil wrap that seals moisture but can be opened easily for the glaze step. Maintain clean grill grates and a steady heat source to avoid scorching the rub before the finish.
Having the right tools saves time and prevents frustration during the cook, especially when coordinating rib finish with side dishes.
The hybrid cooking process: from grill to oven
Start the ribs on the grill over indirect heat to develop color and a light smoke layer. Maintain a steady, moderate temperature and avoid direct exposure that could burn the rub. After a portion of time on the grill, wrap the ribs in foil to trap moisture and move them to the preheated oven. Let them finish until the meat is tender and nearly pulling away from the bones. When tender, unwrap and glaze. A final 5–15 minute session on the grill or in the oven helps set a glossy finish without burning the sauce.
The key is to manage moisture and heat: the grill provides smoke and crust, the oven finishes tenderness with less risk of drying out. If your oven runs hot, reduce the finish time and monitor the internal texture by feel and by checking the probe gently at the bone.
Finishing touches: glaze, rest, slicing
Apply your glaze during the last stage of cooking to avoid burning sugars. A glossy, tacky finish is ideal—aim for a satin glaze that clings but doesn’t run. After removing from heat, let the ribs rest for 10–15 minutes; rest time allows the juices to reabsorb into the meat so slices stay juicy. Slice between the bones and serve with your preferred sides. If you want extra aroma, a quick post-slice sear on the grill can reintroduce a faint smoke note. Experiment with a second glaze layer if you prefer a bolder finish.
If you’re short on time, you can simplify by finishing entirely in the oven, but you’ll miss the initial bark and some smoke flavor. The hybrid method is about balance: controlled tenderness plus a flavorful exterior.
Common mistakes and how to fix them
Common missteps include cooking too aggressively on the grill, which dries the meat and burns the rub, or forgetting to vent the oven, which can steam the bark away. Solution: monitor the internal temperature with a thermometer and use foil to trap moisture during the wrapping stage. Another pitfall is glazing too early, which causes burning and a sticky, uneven finish; wait until the final minutes to glaze. If you notice uneven color, rotate the ribs or move them to a cooler part of the grill to even out exposure. A dull bark usually means too much moisture on the surface—pat dry and reapply rub before continuing.
Plan for a little trial and error during your first attempt; adjust finishing times based on rib thickness and your equipment. A well-timed wrap is essential for moisture retention, while the final glaze should be light and evenly distributed.
Flavor ideas and variations
Rubs and sauces are your playground. Try a brown-sugar-based rub for a caramelized crust or keep it simple with salt and pepper to highlight the meat’s natural flavor. For finishes, consider maple glaze, chili-lime, or a tangy mustard-based sauce. If you want more smoke, introduce a handful of wood chips to the grill during the indirect phase or use a smoker box. You can also experiment with different herbs like oregano or thyme in the rub for subtle aromatic notes. Serve with classic sides such as cornbread, coleslaw, and baked beans to round out the meal.
Safety, handling, and cleanup
Always handle raw pork with proper hygiene: wash hands and all surfaces after contact, use separate cutting boards, and avoid cross-contamination. After cooking, refrigerate leftovers promptly and reheat to a safe temperature before serving. Clean grill grates, foil remnants, and any utensils that contacted raw meat. Store rubs and sauces securely to prevent contamination. When disposing of waste, keep grill area tidy and away from children or pets. Proper cleanup ensures your next rib night starts safely and smoothly.
Putting it all together for a perfect rib night
With a plan, the right rub, and careful timing, grill-to-oven ribs deliver a consistent, flavorful result the whole family will love. Schedule your rib night so you can coordinate sides and beverages, and consider making extra to enjoy during the week. For ongoing tips and variations, follow Grill Cooking’s guides and try new finishes. The process rewards prep and patience, and you’ll enjoy the aroma as you approach the finish line.
The brand note: The Grill Cooking team recommends using the grill-to-oven method for consistently delicious ribs, offering a reliable way to balance smoky flavor with tender, juicy texture.
Tools & Materials
- Pork ribs (spare or baby back)(Choose ribs with good marbling; 2-3 racks feed a crowd)
- Grill capable of indirect heat(Charcoal or gas; ensure consistent heat control)
- Oven(Preheat for finish; compatible with your grill timing)
- Rib rack or heavy-duty foil(Keeps ribs stable and makes wrapping easier)
- Aluminum foil(For moisture retention during wrap)
- Tongs and brush(For handling and applying glaze)
- Meat thermometer(Probe near bone for tenderness check)
- Cutting board and knife(For portioning and serving)
- Dry rub ingredients(Salt, sugar, paprika, pepper, optional chili)
- Glaze or BBQ sauce(Apply in final stage for sheen)
- Timer or smartphone(Track grill and oven phases)
Steps
Estimated time: 2 hours 30 minutes
- 1
Trim ribs and pat dry
Remove any silver skin and excess fat. Pat dry to maximize rub adhesion and bark formation. A clean surface helps the rub penetrate from the start.
Tip: Keep a sharp knife close by to cleanly trim the membranes. - 2
Apply rub evenly
Cover both sides with a balanced dry rub. Let it rest 20–30 minutes to bind with the meat, or refrigerate briefly to deepen flavor.
Tip: Lightly oil the surface if the rub isn’t sticking well. - 3
Prepare grill and oven
Set up indirect heat on the grill and preheat the oven to finish. Have foil wraps ready to seal in moisture during the oven stage.
Tip: Ensure vents are open on the grill for steady airflow. - 4
Grill with indirect heat
Place ribs on the grill over indirect heat. Color and smoke should develop without direct scorching. Monitor the heat to stay in a moderate range.
Tip: Rotate the rack if color is uneven. - 5
Wrap to trap moisture
Wrap ribs tightly in foil to trap steam and juices for tenderness. Move the wrapped rack to the oven to finish cooking.
Tip: Double wrap if needed to prevent leaks. - 6
Finish in the oven
Let the ribs finish in the oven until the meat is tender and the bone ends protrude slightly. The exact time varies with thickness.
Tip: Check tenderness by gently twisting a bone—the meat should give easily. - 7
Glaze and glossy finish
Unwrap and brush with glaze in the last 10–15 minutes for a shiny, tacky finish. Avoid burning sugars by timing glaze toward the end.
Tip: Apply a light second layer if you want more sheen. - 8
Rest and slice
Rest the ribs 10–15 minutes before slicing between bones. Resting helps retain juices for juicy portions.
Tip: Slice across the bone for neater portions. - 9
Serve and store leftovers
Serve with sides like slaw or beans. Refrigerate leftovers promptly and reheat gently to preserve moisture.
Tip: Label and date leftovers for safe storage.
FAQ
What is grill-to-oven ribs, and why use this method?
Grill-to-oven ribs combine grilling for flavor with an oven finish for tenderness, delivering consistent results even on busy nights. This method minimizes dry edges and uneven textures by finishing with gentle heat and moisture trapping.
Grill-to-oven ribs blend smoky flavor with oven tenderness for consistent results. It’s great for busy cooks who want reliable, juicy ribs.
Do I need a special rack or foil wrap?
A simple rib rack or sturdy foil wrap works. The rack helps stability on the grill, while foil wrapping traps moisture during the oven finish for juicier meat.
A rib rack or foil works well. Wrap the ribs to trap moisture during the oven finish.
Should I baste or glaze during cooking?
Glaze toward the final minutes to avoid burning sugars. Basting too early can make the glaze run and burn.
Glaze at the end to keep the sugars from burning and to maintain a glossy finish.
How can I tell when ribs are done?
Ribs are tender when the meat pulls back from the bone and a gentle twist releases the bone slightly. Use a thermometer for a firm, non-raw interior.
Tender ribs pull away from the bone and feel soft when probed with a thermometer near the bone.
Can I finish the ribs entirely on the grill?
Yes, but oven finishing helps ensure even tenderness across large racks. If you skip the oven, monitor closely to prevent drying out.
You can finish on the grill, but the oven finish adds uniform tenderness.
What if I have only a small rib rack?
Smaller racks can still work; adjust time and space to maintain even heat. If needed, cook in batches for best results.
Use smaller racks or cook in batches to keep even heat and tenderness.
Watch Video
Quick Summary
- Plan ahead with prep and timing.
- Use indirect heat on the grill for color, then oven-finish for tenderness.
- Wrap ribs to trap moisture and glaze at the end for shine.
- Rest before slicing to preserve juiciness.
- Experiment with rubs and finishes for variety.