Fish Grill Mastery: Juicy, Flavorful Grilled Fish
Learn how to grill fish with confidence—from selecting the best species to finishing with bright citrus and herbs. This guide covers two-zone grilling, safe handling, and troubleshooting for juicy, flaky results.

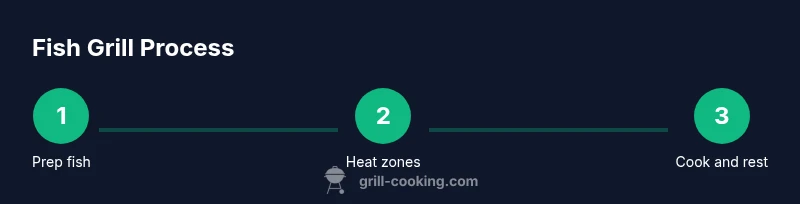
You will learn to select the right fish, prep and marinade, set up two-zone heat on your grill, and cook fish to moist, flaky perfection. This quick guide covers fish choices, seasoning, grilling techniques, safety tips, and quick troubleshooting so you can grill fish confidently on any grill with practical times and temperatures to adapt at home.
Why fish grilling shines on the grill
Grilling fish on the open flame delivers a unique balance of smoky aroma, crisp edges, and juicy flesh that you simply won't get from pan-seared fish. The fish grill experience emphasizes two things: moisture retention and skin or crust development, depending on the cut. When you grill, you can apply direct high heat for searing and then transition to indirect heat to finish without drying out. For home cooks, mastering basic techniques translates to consistently flaky, flavorful results across species and thickness. From salmon fillets to delicate tilapia, the grill environment helps transform mild flavors into bold, approachable meals that pair with bright herbs and citrus. In the two-zone setup, best practices come down to timing, temperature control, and patience. Grill Cooking analysis shows that home cooks who plan heat zones and rest their fish report fewer overcooks and more even textures across meals. The approach works on charcoal and gas grills alike and scales for weekend cooks and weeknight dinners alike.
Tools & Materials
- Sharp fillet knife(For clean portions and skin-on prep)
- Cutting board(Separate area to prep fish)
- Paper towels(Dry surface thoroughly)
- Tongs(Turn and move fish gently)
- Digital instant-read thermometer(Check internal temp)
- Oil spray or brush(Oil grates and fish lightly)
- Neutral oil (canola or grapeseed)(For brushing and grates)
- Two-zone grill setup (charcoal with two zones or gas with two zones)(Direct heat for sear; indirect heat to finish)
- Grill-safe fish spatula(Support delicate fillets)
- Optional: fish basket(Helpful for delicate fillets)
- Aluminum foil or parchment(Assists with delicate pieces)
Steps
Estimated time: 45-60 minutes
- 1
Prepare fish and thaw if needed
If fish is frozen, thaw fully in the fridge or under cold running water before cooking. Pat dry thoroughly to remove surface moisture. If skin-on, score the skin lightly to prevent curling and help crisping. This step reduces steam and ensures even contact with the grill.
Tip: Thorough drying is key; moisture turns to steam and creates sticking. - 2
Season or marinate
Apply a light coating of oil and season both sides with salt and pepper or your preferred rub. If marinating, keep it short (10–30 minutes) and avoid overly acidic mixtures that can begin to cook the flesh.
Tip: Avoid heavy marinades for delicate fish; keep flavors bright and coastal. - 3
Preheat grill and create two zones
Preheat your grill to create a hot direct zone and a cooler indirect zone. For charcoal, bank coals on one side; for gas, set burners to high on one side and low on the other. This setup gives you control to sear quickly and finish without drying out.
Tip: Two-zone grilling prevents overcooking and helps maintain juiciness. - 4
Oil grates and fish, then place skin-side down
Lightly oil the grates to reduce sticking. Oil the fish’s surface lightly as well. Place skin-side down on the hot zone if skin-on, using a wide spatula to maintain contact. Don’t move the fish immediately after placing.
Tip: A good initial sear helps release the crust for easy flipping. - 5
Sear, then flip and move to indirect heat
Let the crust form before flipping. After flipping, move the fillet to the indirect zone to finish cooking. Keep the skin-side down until you’re almost done with the other side for best texture.
Tip: Use a gentle flip and a wide spatula to prevent breaking the flesh. - 6
Finish cooking through indirect heat
Continue cooking with the lid closed if possible to trap heat. Check doneness with a fork or thermometer. Avoid overcooking by taking the fish off just as it flakes.
Tip: If you don’t have a thermometer, rely on visual cues: opaque flesh and easy flaking. - 7
Check doneness and rest
Remove the fish from heat when it’s just shy of done; carryover heat will finish cooking. Let rest 2–4 minutes before serving to redistribute juices. Resting prevents a dry mouthfeel and improves texture.
Tip: Resting is as important as cooking. - 8
Serve with a bright finishing touch
Finish with lemon juice, chopped herbs, or a simple herb butter. Serve with greens, a crisp salad, or grains to balance the meal. The goal is clean, fresh flavors that don’t overpower the fish.
Tip: A citrus finish elevates the fish without masking its flavor. - 9
Clean up and maintain grill
Once cooled, scrub grates to remove residue and wipe down surfaces. Store leftovers promptly in a shallow container to keep quality and safety. Regular cleaning extends grill life and improves flavor in future cooks.
Tip: Clean while slightly warm for easier scraping. - 10
Review and adjust for next time
Reflect on what worked well and what didn’t; adjust seasoning, heat management, or resting times for next session. Use the two-zone approach consistently to build muscle memory and perfect results over time.
Tip: Take notes so you can dial in timing and technique.
FAQ
What is the best fish for grilling on a home grill?
Salmon and halibut are forgiving options for beginners due to their higher fat content and sturdy flesh. Firm whitefish like cod or sea bass also work well.
Salmon and halibut are great for beginners because they stay moist on the grill; other firm whitefish can also work well.
Should I grill with the skin on or off?
Skin-on fillets protect the meat and crisp nicely when finished correctly. Skin-off is fine for delicate fish, but you may lose the protective barrier.
Skin-on helps protect the flesh and gives you a crispy finish; skinless works too, but you’ll need to be gentler with flipping.
How can I prevent fish from sticking to the grates?
Pat the fish dry, oil the meat and grates, and wait for the crust to form before flipping. Use a wide fish spatula to support the fillet during turning.
Dry the surface, oil the grill and the fish, and let a crust form before turning.
What heat level should I use for grilling fish?
Use a hot direct zone to sear, followed by a cooler indirect zone to finish cooking. This two-zone approach helps avoid overcooking.
Start with a hot sear, then move to cooler heat to finish cooking evenly.
Can I grill frozen fish?
Grilling from frozen is not ideal because it can lead to uneven cooking. Thaw completely for best results.
It’s better to thaw first so the fish cooks evenly.
How do I know when the fish is done?
Look for opaque flesh that flakes easily with a fork. If you’re using a thermometer, target around 145°F (63°C) for safety and texture.
The fish should be opaque and flake easily; a thermometer helps confirm doneness.
Watch Video
Quick Summary
- Choose firm, well-muscled fillets for best results.
- Use two-zone grilling for even cooking and prevention of overcooking.
- Dry and oil fish to prevent sticking and promote crisp crust.
- Check doneness by texture; rely on a thermometer when possible.
- Rest briefly before serving to redistribute juices.