Can You Grill Brisket? The Ultimate Home-Grilling Guide
Master grilling brisket on a home grill with indirect heat, proper temps, and resting techniques. Learn selection, seasoning, smoke, wrapping, and serving for tender, smoky results.

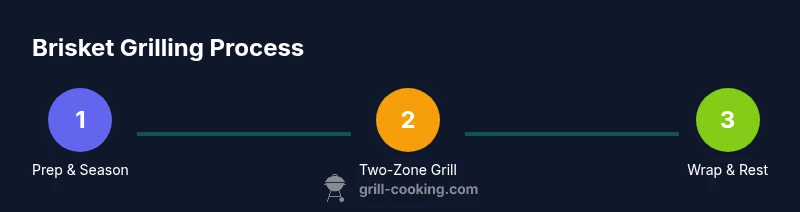
Yes—you can grill brisket on a home grill using indirect heat and a patient, low-and-slow approach. This method relies on a two-zone setup, steady temps, a good rub, and proper resting to develop bark and tenderness. You’ll need a 5–8 lb brisket, a reliable thermometer, and time for a long cook.
Can you grill brisket on a home grill? The question many home cooks ask is can you grill brisket on a standard home grill, and the answer is yes. When done with indirect heat, patience, and careful temperature control, a brisket grilled on a home setup can rival restaurant results. According to Grill Cooking, brisket benefits from a two-zone setup that keeps the direct heat away while allowing smoke and heat to circulate, creating a robust bark and tender interior. This overview explains the why and the how, so you can approach your first brisket with confidence. We cover selecting the right cut, seasoning, grilling strategy, and resting practices that keep the meat juicy and flavorful for serving with friends and family.
Selecting Brisket and Prep Brisket selection sets the foundation for tenderness and bark. A true packer brisket of 5–8 pounds with balanced marbling tends to cook more evenly and stay juicier. Look for a size that fits your grill’s two-zone setup and plan for a long cook. If possible, choose a brisket with a visible fat cap to protect the meat during heat. Pat the surface dry and review the fat layer; trim down to about 1/4 inch if the cap is thick. This helps render fat gradually, prevents overly greasy bark, and ensures even exposure to smoke. Grill Cooking notes that marbling matters for tenderness, so prioritize intramuscular fat when selecting your cut. Labeling the cut as “flat and point” or “packer” can guide your trimming decisions and yield.
Seasoning, rubs, and marination A brisket’s flavor comes from salt, pepper, and supporting spices. A simple, classic rub uses kosher salt, coarse black pepper, and a low-sugar spice mix to build bark without burning. If you enjoy a bolder profile, add paprika, garlic powder, onion powder, and a touch of cumin. Avoid soaking or marinating for long periods, which can draw moisture out of the meat; instead, apply a dry rub 1–2 hours before cooking or just before it goes on the grill. The goal is to hydrate the surface only enough to promote bark without hindering crust formation. For moisture retention, a light spritz of water or apple juice during the cook can help, but use it sparingly so it doesn’t wash away flavor. Gravitate toward a balanced rub known to work well with beef cuts, and consider a finishing glaze only after the meat has rested to preserve the crust.
Grilling strategy: indirect heat and temperature control Brisket shines with indirect heat—heat surrounding the meat, not blasting directly into it. Most home grill fans rely on a two-zone setup: a hot side for searing opportunities (optional) and a cool side for long, steady cooking. The key is maintaining a stable, low-to-medium temperature on the cooking zone. Wood chunks or chips can add smoke flavor—hickory or oak are common beef choices. Hydration matters too; placing a water pan under the grate can moderate heat and improve moisture retention. Use a reliable thermometer to monitor internal temps and manage doneness, aiming for tenderness rather than chasing a specific external color. For many cooks, patience and consistency beat aggressive heat and short cooks every time, a point Grill Cooking emphasizes for reliable results.
Monitoring doneness and resting Brisket is done when the internal temperature reaches a point where collagen converts to gelatin, yielding a tender bite. Use a probe thermometer to check the thickest part of the flat, avoiding bone areas. Many cooks target probe tenderness around the 195–203°F range, but the simplest test is to twist the meat gently with tongs and feel for slight give. Once you reach the desired doneness, remove the brisket from heat and wrap it in foil or butcher paper to rest for at least 20–30 minutes; rest periods allow juices to redistribute, resulting in juicier slices. After resting, unwrap, slice against the grain, and serve with your preferred sauces or sides. Resting time is an essential step; skipping it yields tougher meat.
Grill setup by fuel type: charcoal, gas, or pellet Grilling brisket shines on any fuel, but each has nuances. Charcoal fans often build a two-zone fire and manage smoke with wood chunks, using the grill’s vents to regulate airflow. Gas-grill cooks can achieve two zones with separate burner settings and a water pan for moisture; pellets simplify smoke control with programmable temps. Regardless of fuel, plan your setup to sustain a long, low cook and park your brisket away from direct heat. If you choose wood, select hardwoods that complement beef flavor and avoid overly fruity woods that clash with meat fat. Always practice safe grilling with heat-resistant gloves and proper ventilation to prevent flare-ups.
Common mistakes and troubleshooting Even experienced grillers fall into common traps. Wrapping too early can soften the bark; leaving the meat openly on the grill for too long can dry it out; and chasing exact temps without allowing time for the bark to set can ruin texture. If the brisket stalls (little noticeable rise in internal temperature), avoid the urge to rush; maintain it, and consider wrapping sooner to push through the stall. Windy conditions can disrupt heat; shield the grill or relocate if necessary. A well-placed water pan helps stabilize temperature and adds humidity, supporting a juicier result. If your bark isn’t formed, allow more surface dryness before applying rub and keep flames away from the surface.
Flavor boosters and serving ideas Elevate your brisket with a light glaze after resting or offer a bold, peppery rub as a finishing crust. Sides matter as much as the main: consider classic barbecue beans, grilled corn, coleslaw, and pickles for contrast. For a push of umami, serve with a subtle chimichurri or a tangy barbecue sauce on the side. Thin slices across the grain make for more tender mouthfuls, while thicker slices hold more bark in each bite. The goal is balance: a smoky, tender brisket with a crusty bark and complementary sides that suit your crowd.
Tools & Materials
- Brisket (5–8 lb packer)(Choose even marbling; plan for two-zone cook.)
- Meat thermometer (probe)(Digital, with alert capability.)
- Two-zone grill setup(Designate direct and indirect heat areas.)
- Heavy-duty aluminum foil(Wrap if using the Texas Crutch.)
- Wood chunks or chips (optional)( Hickory or oak pairs well with beef.)
- Beef rub (salt, pepper, spices)(Keep it balanced; avoid high sugar that burns.)
- Spritz bottle (water or apple juice)(Light moisture during cook helps bark if used sparingly.)
- Heat-resistant gloves(Choose at least 14 inch length.)
Steps
Estimated time: 9-12 hours
- 1
Choose the brisket
Select a 5–8 lb packer brisket with even marbling. A sturdy size fits a two-zone grill and provides even cooking. Inspect for a clean fat cap and avoid overly dry or pale meat. This choice affects tenderness and bark from the start.
Tip: Look for good intramuscular fat; it enhances juiciness during long cooks. - 2
Trim fat cap and square the meat
Trim excess fat to about 1/4 inch if the cap is thick; leaving too much fat can cause uneven rendering. Shape the brisket to roughly uniform thickness to promote even cooking. Pat dry before applying rub.
Tip: A consistent surface area ensures even bark formation. - 3
Apply rub and optional marinade
Coat the meat evenly with salt, pepper, and spices. For deeper flavor, apply rub 1–2 hours before cooking or right before it hits the grill. If marinating, keep it brief to avoid drawing out surface moisture.
Tip: Salt is essential; it forms the crust and helps retain juices. - 4
Set up grill with indirect heat
Prepare a two-zone grill: a hot zone for potential searing and a cooler zone for the long cook. Add a water pan to stabilize the chamber and help maintain humidity. If using wood, add chunks early for visible smoke.
Tip: Keep vents adjusted to maintain calm, steady heat. - 5
Place brisket on the grill
Position the brisket fat-side up on the indirect side. This setup allows fat to render down through the meat and adds moisture while avoiding direct heat burn on the crust.
Tip: Insert the probe into the thickest part of the flat to monitor progress. - 6
Monitor temperature and maintain moisture
Maintain steady indirect heat and periodically spritz or spray sparingly if you desire extra bark. Recheck the internal temperature with your thermometer. Do not rush through the process; long cooks benefit from consistency.
Tip: Avoid opening the grill too often to prevent heat loss. - 7
Wrap if needed and continue cooking
When the brisket hits stall or desired tenderness stalls, consider wrapping in foil or butcher paper to push through the stall and preserve moisture. This is the Texas Crutch technique commonly used by pitmasters.
Tip: Wrapping helps retain juices but may soften bark; plan accordingly. - 8
Rest, slice, and serve
Let the brisket rest for 20–30 minutes after cooking to allow juices to redistribute. Slice against the grain for tenderness, then serve with your preferred sides or sauces. Resting is essential for juicy, flavorful slices.
Tip: Slice just before serving to maintain texture and temperature.
FAQ
Can you grill brisket without a smoker?
Yes. A brisket can be grilled on a home grill using indirect heat and two-zone setup. A smoker is not required, though it can simplify long, steady cooking and impart more smoke flavor. The key is steady heat and patience.
Yes, you can grill brisket on a home grill using indirect heat; a smoker is optional but not required.
What is the target grill temperature for brisket?
Aim for a stable, low-to-medium heat on the cooking zone. Exact numbers vary by grill, but the focus should be on consistency and gentle heat rather than chasing a specific degree.
Aim for steady, gentle heat on the cooking zone for even cooking.
Should I wrap the brisket during cooking?
Wrapping is optional. Wrapping can push through the stall and retain moisture, but it may soften the bark. If you want a crusty bark, wrap late or not at all and monitor tenderness.
Wrapping is optional; it helps with moisture but can soften the bark.
How long does brisket take per pound on a grill?
Brisket timing depends on grill temperature and meat size. Plan for long, slow cooking with plenty of time, rather than chasing exact times. Use the thermometer to guide when the meat is tender.
Expect a long cook; monitor doneness with a thermometer rather than chasing exact time per pound.
How long should brisket rest before slicing?
Rest the brisket for 20–30 minutes after removing it from heat. Resting redistributes juices, resulting in juicier, more flavorful slices.
Rest for about 20 to 30 minutes to keep the meat juicy.
What are common signs of doneness for brisket?
Tenderness is key. Probe the meat; it should be tender and give with a slight movement. If the peak is before 195–203°F, continue cooking until it passes the tenderness test.
Check tenderness with a probe; it should be tender and give under pressure.
Watch Video
Quick Summary
- Plan for time and temperature, not shortcuts
- Use indirect heat for even cooking and bark
- Rest properly to lock in juices
- Probe-driven doneness beats guesswork
- Wrap strategically for tenderness without losing bark