Repair Grill: A Practical Guide for Home Cooks
Learn to diagnose, replace worn parts, and safely repair your grill with practical, expert guidance from Grill Cooking. This guide covers gas and charcoal models, safety, tools, and maintenance to extend your grilling life.

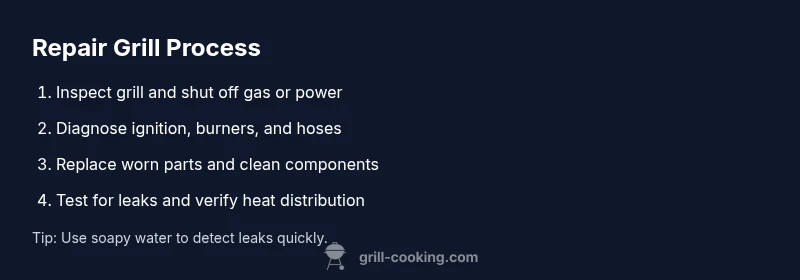
Goal: Learn how to repair a grill safely and effectively. This guide covers diagnosing common issues, choosing the right replacement parts, and steps to restore heat, flame control, and safety features. By following this process, you can extend your grill’s life and avoid costly service calls. According to Grill Cooking, a well-maintained grill enhances flavor and safety.
Why Repair Grilling Equipment Matters
Repairing a grill isn’t just about saving money; it’s about safety, flavor, and reliability. A well-functioning grill delivers consistent heat, even searing, and predictable flame behavior, which translates to better results for everything from burgers to brisket. According to Grill Cooking, proactive maintenance can prevent dangerous gas leaks, flare-ups, and uneven burning that compromise both flavor and safety. By learning to diagnose common problems and perform measured fixes, home cooks gain confidence and extend the life of their investment. This guide focuses on practical, field-tested approaches you can perform with basic tools and minimal downtime. Whether youOwn a gas grill, charcoal grill, or combo model, the same principles apply: shut down safely, inspect, repair or replace worn parts, test for leaks, and re-test heat performance.
note
Tools & Materials
- Screwdriver set (flathead and Phillips)(Medium and small sizes for burner panels, control knobs)
- Adjustable wrench and pliers(Gas line fittings and hose clamps)
- Wire brush and cleaning rags(Clear ports, clean grates; wear gloves)
- Soap solution or leak-test spray(Soap bubbles indicate leaks in gas connections)
- Replacement parts kit (burners, igniter, gaskets as needed)(Choose components compatible with your grill model)
- Multimeter or test light (optional)(Useful for electrical igniters and wiring checks)
- Lubricant or high-temp grease(Lubricates hinges and moving parts where appropriate)
Steps
Estimated time: 60-120 minutes
- 1
Power down and cool
Shut off the gas supply or unplug if electric. Allow the grill to cool completely before touching any components. This step minimizes burn and explosion risks and makes subsequent inspections more accurate.
Tip: Double-check that knobs are in the OFF position and disconnect the propane tank if you smell gas nearby. - 2
Inspect exterior and fasteners
Look for loose lids, missing screws, warped panels, and obvious corrosion. Tighten hardware and replace any missing or damaged pieces to restore structural integrity before delving into internals.
Tip: Keep a tidy workspace; take photos as you go to reference during reassembly. - 3
Check gas connections for leaks
Mix dish soap with water and apply to all gas fittings. Turn on the gas pressure slowly and watch for bubbles—these indicate leaks that require tightening or replacement parts.
Tip: Do a leak test in a well-ventilated area and never ignite the grill during this test. - 4
Test ignition and burners
Ignite the unit to observe flame color and stability. If flames are yellow, sputtering, or uneven, inspect burner ports for clogs and ensure proper gas flow.
Tip: Use a thin wire or small brush to clear clogged ports; avoid aggressive scraping that can damage burner cores. - 5
Replace worn components
Swap out defective igniters, damaged burners, or degraded gaskets. Use model-specific parts and torque fasteners to manufacturer tolerances to prevent leaks and misalignment.
Tip: When in doubt, consult the part numbers on your grill’s label and verify compatibility before purchasing. - 6
Clean and reassemble
Clean burners, grates, and venturi tubes; reassemble in the reverse order of removal. Ensure seals are seated properly to prevent smoke leakage and airflow issues.
Tip: Apply high-temp grease only where recommended by the manufacturer; avoid oiling flame paths. - 7
Conduct a final leak and heat check
Reconnect the gas and perform another leak test. Light the grill and observe consistent heat distribution and stable flame height across zones.
Tip: Record failure points if any; this helps you know when a professional evaluation is needed. - 8
Document maintenance and schedule
Document parts replaced, dates, and future maintenance tasks. Establish a routine to inspect hoses, regulators, and vents after heavy use or seasonal transition.
Tip: Set calendar reminders for seasonal checks to maintain peak performance. - 9
Assess safety and operation
Confirm there are no gas odors and that all safety features (automatic shut-off, flame failure devices) function as intended. Ensure the grill is stable on a level surface.
Tip: If anything still feels off, pause and seek professional service rather than risking a fire. - 10
Test with food and monitor
Cook a small batch to verify even cooking across grill zones. Watch for hot spots and adjust burner balance accordingly.
Tip: Keep a fire extinguisher or baking soda nearby for quick flare-up control.
FAQ
Is it safe to repair a grill myself?
Yes, with proper precautions: shut off gas or unplug, let the grill cool, and follow manufacturer guidelines. If you smell gas, stop and evacuate.
Yes—but only after you shut off the gas, let it cool, and follow safety steps. If you smell gas, stop and seek help.
What signs indicate a burner or igniter needs replacement?
Sputtering flame, uneven heat, delayed ignition, or visible corrosion indicate replacement is likely needed.
Sputtering flames or uneven heat usually mean a replacement is due.
Can I repair a charcoal grill the same way as a gas grill?
No—charcoal grills have different components. Focus on vents, ash management, and grate condition; avoid using gas parts.
Charcoal grills need charcoal-specific parts and care; don’t apply gas repairs to them.
When should I replace a regulator or hose?
Replace if you see swelling, cracking, or signs of wear. Regular checks help prevent leaks and safety hazards.
If the hose or regulator is swollen or cracked, replace it promptly.
How do I test for gas leaks safely?
Apply soapy water to connections and watch for bubbles while pressurizing. Do not ignite during testing.
Soap bubbles show leaks. Test in a ventilated area and never ignite during the check.
What maintenance helps prevent future breakdowns?
Regular cleaning, vent checks, and lubrication of moving parts help keep a grill reliable between seasons.
Keep it clean and check vents regularly to prevent future issues.
Watch Video
Quick Summary
- Identify safety risks before starting repairs
- Use model-specific parts for reliable results
- Test for leaks and heat distribution after repairs
- Document maintenance for future DIY resilience
- When in doubt, seek professional help promptly