How to Adjust Grill Burners: A Practical Guide
Learn how to adjust grill burners for precise heat, even cooking, and safer grilling. This step-by-step HOWTO covers burner inspection, cleaning, flame testing, and maintenance with tips for avoiding common mistakes.

By the end of this guide you will know how to adjust grill burners for consistent heat and even cooking. You’ll learn to inspect burner alignment, clean ports, calibrate flame height, and test with a thermometer. Before you begin, gather the owner's manual, a small screwdriver, a wire brush, and heat-safe gloves. According to Grill Cooking, precise burner adjustment enhances performance and safety.
Why Burner Adjustment Matters
Properly adjusted grill burners are the foundation of predictable heat and even cooking. When ports are clogged or flame heights are unbalanced, you’ll experience hot spots, longer preheat times, and more flare-ups. Consistent flames help sear, caramelize sugars, and render fats evenly, improving both texture and flavor. From a safety perspective, well-tuned burners reduce fuel waste and minimize the risk of gas buildup or gas leaks caused by improper venting. Grill Cooking analysis shows that regular burner calibration correlates with better fuel efficiency and more uniform grilling results across a season. Understanding how to adjust grill burners empowers you to troubleshoot common issues before they turn into bigger problems.
Safety First: Prep, Shutdown, and Handling Gas Lines
Safety is non-negotiable when working with gas grills. Always start with the grill cool and the gas off. If you smell gas or hear hissing, evacuate and contact your gas supplier. Disconnect the propane tank if you have any doubts about valve seals, and never twist or loosen gas fittings you don’t recognize. Work in a well-ventilated area, keep a fire extinguisher nearby, and wear eye protection while inspecting burner ports. A little preparation now prevents dangerous leaks and unexpected flare-ups later.
Understanding Burner Anatomy and Flame Signs
Most gas grills feature a set of burners connected to valve controls. Each burner should produce a steady blue flame with a clear, non-flaring edge when the knobs are set to a low or medium setting. A yellow or orange flame can indicate incomplete combustion, clogged ports, or misaligned air intake. If you notice inconsistent flame color between burners, you may have port obstructions or misaligned burner caps. While some models offer adjustable air shutters or cap orientations, always refer to your owner’s manual before making modifications. Visual flame assessment is a quick, practical way to gauge whether your adjustments are moving in the right direction.
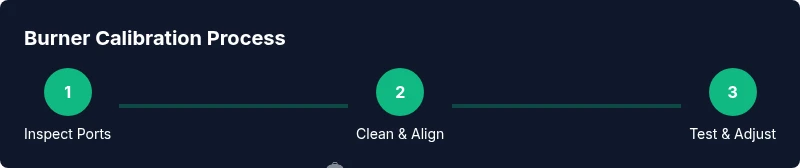
Step-by-Step Calibration Overview
A successful calibration combines cleaning, inspection, and careful minor adjustments to flame height and burner alignment. Start by removing grates and any heat shields to gain full access to the burners. Clean ports with a soft brush, inspect for signs of corrosion or warping, and verify that burner caps sit evenly. After cleaning, reattach components and test the flame at low and high settings, noting any imbalances. If your grill supports air shutter adjustments, follow the manual’s guidance to fine-tune airflow. Finally, recheck with a thermometer to confirm even heat across zones and adjust as needed.
Maintenance, Cleaning, and Long-Term Care
Regular maintenance extends burner life and keeps heat consistent. Schedule a quarterly check during grilling season, or after deep-cleaning the grill. Keep ports free of grease and debris, lubricate moving parts with manufacturer-approved lubricants if needed, and store the grill in a dry place to prevent corrosion. Record any changes you make so you can revert to a known good configuration if needed. Regular testing with a grill thermometer helps you stay ahead of uneven heat before it becomes a problem.
Tools & Materials
- Grill owner's manual(Model-specific instructions and safety warnings)
- Screwdriver set (phillips and flat head)(For any screws on burner caps or control panels)
- Wire brush(Clean burner ports and grates)
- Needle-nose pliers(Helpful for stubborn components or clamps)
- Heat-safe gloves(Protect hands during inspection and reassembly)
- Non-contact infrared thermometer or grill thermometer(Use to verify surface temps across zones)
- Soapy water solution(Optional for a quick leak check after reassembly)
Steps
Estimated time: 20-40 minutes
- 1
Remove grates and access panels
Cool the grill completely, then lift off the grates and any heat shields to expose burners. If your model has a rotisserie or side shelves, move them aside for full access. This step ensures you can view all ports and burner caps clearly.
Tip: Take a photo of the original setup to reference during reassembly. - 2
Clean burner ports and inspect
Using the wire brush, gently clean any grease, ash, or debris from the burner ports. Check for corrosion, warped caps, or loose fittings. A clogged port is a common cause of uneven flame or poor performance.
Tip: Avoid using metal tools that can scratch the ports; a soft brush is safer. - 3
Check flame color and pattern at low heat
With knobs set to low, ignite the burners and observe each flame. A healthy flame should be blue with a tight column. If flames lift or flicker, there may be air supply or alignment issues that require adjustment.
Tip: Record any burner that shows a yellow tip for targeted attention. - 4
Adjust air intake or cap alignment (if applicable)
Some grills offer adjustable air shutters or cap alignment. If your model provides these, use the manual to slowly adjust until the flame stabilizes to blue. Do not force fittings that don’t move easily.
Tip: Adjust in small increments and test between tweaks to avoid over-leaning the flame. - 5
Test across multiple heat settings
Reassemble relevant parts, then test at low, medium, and high. Ensure even flame height and distribution across all burners. Note any zones that underperform or overheat.
Tip: Keep a thermometer handy to quantify heat across zones. - 6
Finalize and document the calibration
Mark the settings that produce the best even heat and record any manual adjustments. Reattach all parts securely, and do a final safety check for gas leaks using a soapy solution or approved leak detector.
Tip: If a leak is detected, disconnect gas, wait, and contact a professional.
FAQ
Do I need to turn off the gas supply before starting?
Yes. Always shut off the gas at the tank and control valves before inspecting or cleaning burners. This reduces the risk of leaks during maintenance.
Yes, always turn off the gas before you start and inspect any components.
What flame color should I expect after adjustment?
Blue flames with a stable, non-flaring edge indicate proper combustion. Yellow or orange flames suggest incomplete combustion or obstructions that need cleaning or adjustment.
Blue flames mean a proper burn; yellow flames mean you should check for obstructions or misadjustment.
Can I adjust burner's air intake screws?
Some grills have air shutter screws or cap adjustments. If your model supports this, follow the manual precisely. If not, rely on port cleaning and flame height adjustments via the knobs.
Only adjust air intake screws if your model explicitly provides them; otherwise use cleaning and flame height adjustments.
How often should I adjust burners?
Check burners at least once per season or after deep cleaning, and any time you notice uneven cooking or flame issues.
Do a seasonal check, or whenever you notice uneven heat.
Why is my grill showing uneven heat across zones?
Causes include clogged ports, warped burners, or obstructions in venturi areas. Clean ports, reseat burners, and verify consistent flame height across all burners.
Uneven heat often comes from clogs or misaligned burners; clean and reseat them for even heating.
What safety steps should I take if I smell gas after adjustments?
Evacuate the area immediately and call your gas supplier. Do not operate the grill until it’s inspected and cleared.
If you smell gas, leave the area and call for service—don’t use the grill.
Watch Video
Quick Summary
- Inspect, clean, and verify burner ports before adjusting.
- Blue flames indicate proper combustion; yellow suggests adjustment is needed.
- Document settings and test across low/high to ensure even heat.
- Use a thermometer to confirm even zone temperatures.
- Prioritize safety and regular maintenance for lasting performance.