Grill Parts Replacement Guide: Safe, Effective Home Grilling Repairs
Learn to replace grill parts safely and effectively. This comprehensive guide covers part selection, compatibility, tools, a step-by-step process, and maintenance tips for home cooks and grill enthusiasts.

In this guide, you’ll learn how to replace common grill parts safely and effectively, from diagnosing worn components to selecting OEM or aftermarket replacements. You’ll inspect ignition systems, burners, grates, hoses, regulators, and temperature probes, confirm compatibility with your model, install the new parts, and perform a leak test and functional check before cooking again.
Understanding Grill Parts Replacement
Grill parts replacement is a targeted maintenance approach that helps you restore performance and safety by swapping worn components, not rebuilding your entire grill. Whether you own a gas grill, charcoal grill, pellet grill, or hybrid, knowing which parts wear out and how to source the right replacements empowers you to grill with confidence. The term grill parts replacement describes the process of updating ignition systems, burners, grates, hoses, regulators, temperature probes, and heat shields to keep your grill performing like new. For home cooks, mastering this task reduces downtime, extends grill life, and preserves the flavor you expect from a well-tuned barbecue setup. Practical knowledge about parts selection, safety checks, and model compatibility matters as much as the fire you create when you grill.
Common Grill Part Categories
Grill parts fall into several core categories, and understanding each helps you diagnose issues quickly. The most frequently replaced components include burners (or heat plates), ignition systems (electrodes and spark module), grates, hoses and regulators, temperature gauges, thermometers, lids, and heat shields. Some grills also rely on knobs, gaskets, and valve assemblies. When you perform grill parts replacement, think both in terms of a single part and the subsystem it serves. Replacing a bad igniter without checking the wiring harness, for example, can lead to intermittent sparks or a failed ignition sequence. Budget and performance goals guide whether you choose OEM parts or trusted aftermarket equivalents, and compatibility checks ensure you don’t end up with a misfit or unsafe installation.
When to Replace vs Repair
Not every faulty grill component demands replacement. If a part shows minor wear, cleaning or recalibration may address the problem. Replacement becomes sensible when a component cannot be restored to safe operating standards, shows visible damage (cracks, rust-through, warped surfaces), or causes ongoing performance issues like uneven heat, inconsistent flame, or gas leaks. Common signs include burner tubes rusting through, ignition failure after a few uses, leaky hoses or regulators, and dull or inconsistent temperatures displayed by the gauge. For grill parts replacement, prioritize components that directly affect safety: gas lines, regulators, valves, and ignition systems. Regular maintenance reduces the frequency of major replacements and helps you avoid unexpected downtime at the grill.
How to Identify Compatible Parts
Compatibility is the linchpin of a successful grill parts replacement. Start by locating your grill’s model and serial numbers, usually stamped on the back or inside the lid. Use these details to search for OEM parts or verified aftermarket equivalents that explicitly state compatibility with your model. If you’re unsure, consult the manufacturer’s parts list or customer support, and compare part numbers rather than just descriptions. For gas grills, pay attention to connection types, thread sizes, and gas type (propane vs natural gas). Keeping a parts inventory with current numbers helps you source reliable replacements quickly and reduces the risk of fitment issues in the future.
Tools and Safety Before You Start
Before touching any grill parts, ensure you have a safe workspace and the right tools. Gather a screwdriver set (flathead and Phillips), an adjustable wrench, pliers, a nut driver, a rag, a tray or bin for small screws, and the replacement part itself. Put on heat-resistant gloves for protection, and keep a soapy water solution handy to test for leaks after installation. For gas grills, always disconnect the gas supply and keep the tank upright. Confirm the grill is fully cool before you begin, and work in a well-ventilated area. A calm, controlled approach reduces the risk of mistakes that could compromise safety or void warranties.
Equipment Setup and Planning
Plan your grill parts replacement as you would a small project. Review the replacement guide for your model, arrange parts and tools in a clean workspace, and set aside a dedicated block of time—ideally 45–90 minutes for a typical burner or igniter replacement. If you’re replacing multiple parts, tackle the most critical safety components first (ignition system, burners, gas lines) before moving to ancillary parts like knobs or heat shields. Having a digital photo log of the original setup can help you reassemble correctly. Remember: patience and organization reduce the chance of cross-connecting hoses or misplacing screws, which is a common pitfall for home cooks.
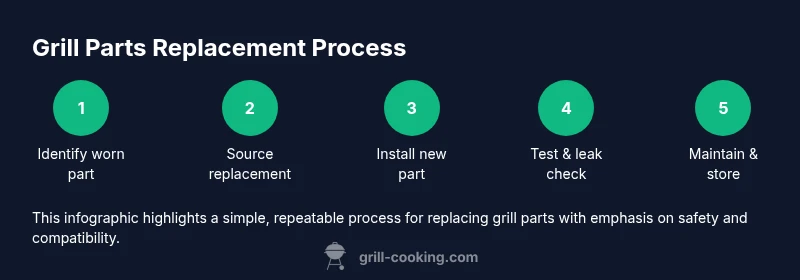
Step-by-Step Overview for Replacement Tasks
The core of grill parts replacement is methodical, model-specific work. It involves safely disengaging the old component, fitting the new one, and validating the system after installation. Always follow the manufacturer’s instructions for torque specs and connection sequences. If you encounter unfamiliar wiring or gas fittings, pause and consult the instructions or contact support. This section provides a structured plan for typical replacements, such as a burner or ignition module, while acknowledging that models vary and some steps may differ.
Maintenance and Longevity Tips
Even after a successful grill parts replacement, ongoing maintenance is essential to extend the life of your grill. Clean components regularly to prevent grease buildup, inspect seals and gaskets for wear, and perform seasonal checks on gas lines and regulators. Keep the lid closed when not in use to reduce corrosion on metal parts, and apply a light coat of high-heat appliance oil to grates to prevent rust during storage. A simple maintenance schedule—monthly checks during grilling season and quarterly deep-cleaning—helps ensure safe operation and consistent performance, making subsequent grill parts replacement less frequent and more predictable.
Common Pitfalls and How to Avoid Them
Home cooks often encounter a few predictable issues when doing grill parts replacement. One common pitfall is buying the wrong part due to model ambiguity—always double-check compatibility. Another is neglecting a proper leak test after installation, which can lead to dangerous gas leaks. Skipping the manual torque specs and over-tightening connections can damage threads and hamper performance. Finally, neglecting safety steps, like disconnecting the gas supply and letting the grill cool, increases risk. By planning, verifying compatibility, performing a thorough leak test, and following safety guidelines, you reduce the chance of these problems and ensure a successful grill parts replacement.
Tools & Materials
- Replacement grill part (burner, igniter, etc.)(Choose OEM or verified aftermarket parts matched to model number)
- Screwdriver set (flathead + Phillips)(Have both sizes to match screws on your grill)
- Adjustable wrench(For hose clamps and fittings)
- Pliers(Grip and remove stubborn connectors)
- Nut driver(Useful for hex-head fasteners)
- Rag or shop towel(Clean surfaces and wipe hands)
- Soapy water solution spray bottle(Test for gas leaks after installation)
- Heat-resistant gloves(Protect hands during handling hot components)
- Masking tape or zip ties(Label wires or hoses if needed)
- Grease-safe sealant (if recommended by manufacturer)(Only use if the manufacturer specifies)
Steps
Estimated time: 60-90 minutes
- 1
Prepare workspace and safety
Power down and disconnect the grill from any fuel source. Ensure the grill is completely cool, then remove tools and parts from the workspace. This step minimizes the risk of accidental ignition or injury during the replacement.
Tip: Lay a towel under the work area to catch screws and small parts; photograph connections for reference. - 2
Disconnect the old part
Carefully access the faulty component (burner, igniter, etc.). Disconnect any wires or hoses using the appropriate tool, keeping track of how each piece connects. Label wires if needed to simplify reassembly.
Tip: Take a quick photo before removal to document the original arrangement. - 3
Remove and remove the faulty part
Loosen and remove mounting screws or clamps. Extract the old part without forcing connections that could cause damage. Inspect adjacent components for wear or damage.
Tip: Check for hidden screws and ensure no cables remain attached. - 4
Install the new part
Position the replacement part and secure it with the original screws or clamps. Reconnect wires or hoses in the order you noted earlier, ensuring tight but not overtightened connections. Do a visual inspection to confirm alignment.
Tip: Do not bend gas tubes; align components so airflow won’t be obstructed. - 5
Reassemble and prepare for testing
Reinstall any panels, knobs, and covers you removed. Ensure all tools are cleared away before testing. Reconnect the gas supply only after you’re confident the assembly is correct.
Tip: Keep a safety distance while testing to observe any potential leaks or misalignment. - 6
Test and safety check
Perform a leak test with a soapy water solution on all connections and perform a controlled ignition to observe flame patterns. If anything looks abnormal, power down and recheck fittings. Let the grill reach normal operating temperature and verify performance.
Tip: If leaks are detected, stop and reseat connections before attempting another test burn.
FAQ
What parts are most commonly replaced on grills?
The most frequently replaced components are burners, igniters, grate assemblies, hoses, regulators, and temperature gauges. These parts directly affect flame quality, heat distribution, and safety. Replacing them promptly avoids performance drop-offs and safety risks.
Common parts to replace are burners, igniters, grates, hoses, regulators, and gauges. Replacing them promptly helps maintain performance and safety.
How do I know if a part is compatible with my grill model?
Start with your grill’s model and serial number, then cross-reference with OEM part numbers. If unsure, contact the manufacturer or check official parts lists. Compatibility details ensure the replacement fits correctly and remains safe.
Use your model number to check OEM part numbers, or contact the manufacturer for compatibility details.
Are aftermarket parts safe to use?
Aftermarket parts can be safe if they meet the same specifications and are from reputable brands. Verify compatibility and read reviews to confirm quality. When in doubt, choose OEM parts for guaranteed fit and warranty alignment.
Aftermarket parts can be safe if they match specs and come from reputable brands; OEM parts are the safest choice for fit and warranty.
Can I replace grill parts myself or should I hire a pro?
DIY replacement is feasible for basic components like burners or igniters if you follow the manufacturer’s instructions and safety guidelines. For gas line work or complex assemblies, consider a professional to avoid leaks or hazards.
DIY is possible for simple parts if you follow safety guidelines; for gas work, a pro is often the safer option.
What safety checks should I perform after replacement?
Perform a thorough leak test with soapy water, inspect for proper flame appearance, and ensure all connections are secure. After initial ignition, monitor flames for stability and listen for hissing sounds that indicate leaks.
Test for leaks with soapy water and confirm flames are stable during ignition.
How often should I inspect grill parts for wear?
Conduct a quick visual inspection before each grilling session. Do a deeper maintenance check quarterly or after heavy use to catch wear early and plan replacements.
Do a quick check before grilling and a deeper maintenance check every few months.
Watch Video
Quick Summary
- Identify the faulty part precisely before replacing.
- Choose OEM or verified aftermarket parts matched to model.
- Follow model-specific steps and perform a leak test.
- Maintain a clean, organized workspace to avoid mistakes.
- Regular maintenance extends grill life and reduces future replacements.