Mold on the Grill: Quick Fixes and Prevention
Urgent guide for home cooks: detect, clean, sanitize, and prevent a grill that is moldy from returning.

Most likely, your grill is moldy due to lingering moisture and organic residue that sheltered mold growth. Quick fix: 1) Move the grill to a sunny, ventilated area and remove any loose debris. 2) Scrub grates and surfaces with hot, soapy water or a degreaser, rinse well, and dry completely. 3) Burn off or rehearse cleaning cycles, then re-season if needed. If mold returns, replace affected parts.
Immediate safety concerns when mold is suspected on a grill
Visible mold, a musty odor, or slimy residues on grates signals more than an unsightly grill. A moldy grill can harbor bacteria and toxins that survive heat and may transfer to food. If you notice mold, keep children and pets away while you assess the situation. According to Grill Cooking, mold growth on grills is often due to lingering moisture and residue after cooking, plus improper drying. The first priority is safety: don’t grill until you verify the surface is clean and dry. Move the unit to a sunny, ventilated space, wear gloves, and begin with a thorough wipe-down of all non-porous surfaces.
This is not just about aesthetics—mold can affect flavor, safety, and overall grill lifespan. The Grill Cooking team emphasizes that rapid action reduces risk and simplifies re-use later. If you see extensive mold or persistent odor after cleaning, consider replacing compromised parts and re-evaluating storage practices to prevent recurrence.
How mold forms on a grill: moisture, heat, and residue
Mold needs three things to thrive on or inside a grill: moisture, warmth, and a food source. Moisture from rain, condensation, or improper drying creates a damp environment where spores take root. Heat alone doesn’t eliminate mold entirely if organic residue remains. Residual oils, marinades, and charred bits provide nourishment during warm weather, letting mold colonies establish quickly. Grill Cooking analysis underscores that moisture retention in drip pans, burners, and gasket channels is a common culprit, especially after seasonal storage. Effective prevention starts with drying all parts thoroughly and removing standing water before closing up. A quick reminder: always burn off or pre-clean after storage to reduce remaining residues that invite mold.
Quick inspection checklist before cleaning
- Check grates, flame shields, and burner protectors for visible mold, rust, or white/green growth.
- Inspect drip pans and grease traps for pooled moisture.
- Look for damp areas inside cabinet doors or storage compartments.
- Assess seals and gaskets for cracks that could trap moisture.
- Note any lingering smell in the grill hood or vents.
- If you see extensive rust or warped components, plan for replacement rather than intense cleaning.
A concise pre-clean checklist helps you decide how deep to go. Safety first: disconnect gas supplies or unplug electrical grills before taking any parts apart. The goal is to level moisture, surface residues, and airflow so cleaning is effective and safe.
Cleaning agents and sanitizers: what to use and what to avoid
Start with hot water and dish soap for the initial wipe-down, using a stiff brush for scrubbing. Degreasers can help break down baked-on fats; after washing, rinse thoroughly. White vinegar is a gentle sanitizer that can help with mineral buildup and mild mold spots, but it isn’t a complete sanitizer on its own. For tougher mold, a diluted bleach solution (about 1 part bleach to 10 parts water) can be used on non-porous surfaces, followed by a thorough rinse and multiple drying cycles. Avoid harsh abrasives on enamel coatings and never leave cleaning products sitting on surfaces. Always ventilate and wear gloves, and ensure you rinse away all cleaning agents so no residues remain that could flash when heated. Grill Cooking recommends performing a final burn-off to sanitize surfaces after cleaning and drying.
Step-by-step cleaning flow: disassembling parts and sanitizing
- Safety first: shut off gas or electricity and disconnect the propane tank if applicable; remove the propane bottle from the grill area.
- Remove all removable parts: grates, flame tamers, grease tray, and any accessible interior components.
- Scrub each component with hot soapy water; use a stiff brush on grates and tamer panels to remove baked-on residue.
- Soak metal parts in a hot cleaning solution for 10–15 minutes to loosen grime, then scrub again.
- Rinse thoroughly with clean water and dry completely before reassembly.
- Sanitize interior surfaces with a diluted sanitizer or vinegar rinse; avoid pooling on any crevices.
- Reassemble and perform a test burn to dry and sanitize the interior.
- After the burn, inspect for any remaining odor or residue; repeat cleaning if necessary.
- Ensure everything is dry before storing; moisture at rest invites mold re-growth.
Tip: Airflow matters—don’t pack the grill interior tightly; air should circulate to dry faster.
Reseasoning and restoring grill performance after mold cleanup
After cleaning and drying, reseason cast-iron grates or chrome-plated surfaces to restore the protective layer that helps prevent future buildup. Lightly coat grates with high-heat oil and heat the grill to 350–450°F for 30–45 minutes, wiping away any excess oil. This creates a seasoned surface that resists sticking and reduces residue where mold can hide. For stainless steel parts, a simple wipe with oil can keep the surface glossy and less prone to corrosion. If enamel coatings show pitting or discoloration, avoid aggressive scrubbing that could worsen the coating and consider professional attention if you’re unsure about safety.
Prevention strategies to keep it mold-free
Preventing mold starts with consistent post-use cleanup and proper storage. Clean after each use: scrub grates, wipe interior surfaces, and remove grease. Dry everything thoroughly; run the burn-off cycle or briefly heat to ensure all moisture evaporates. Use a breathable grill cover that fits well and doesn’t trap moisture; store charcoal and gas accessories in a dry, ventilated space. Periodically inspect seals and gaskets for wear that could trap moisture. Keep a small desiccant pack near storage if humidity is a concern. Grill Cooking emphasizes that small, regular maintenance beats large, infrequent deep cleans when moisture is involved.
When to replace components and seek professional help
If you find extensive rust, cracks, warped lids, or gaskets that can’t seal moisture out, replacement parts may be safer and more effective than cleaning. Mold can linger in hidden cavities and porous materials, so professional inspection is prudent if you notice ongoing musty odors or recurring mold after cleaning. A certified technician can assess gas lines, burner tubes, and seals to determine whether a repair or replacement is warranted. When in doubt, favor safety and replace compromised components rather than risking food contamination.
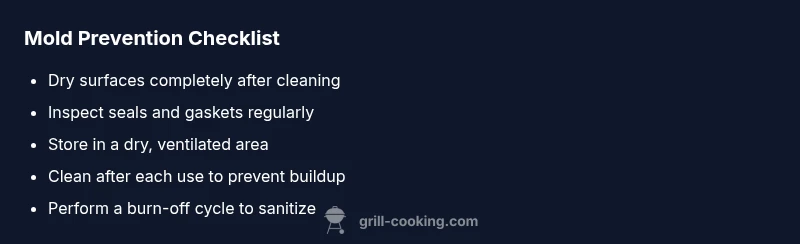
Quick-start mold prevention checklist (condensed)
- Dry surfaces and storage areas completely after each cleaning.
- Keep a sunlit, well-ventilated storage spot and use a breathable cover.
- Inspect seals, gaskets, and drip pans for moisture retention; replace if needed.
- Clean and inspect regularly, especially after seasons of use or storage.
Steps
Estimated time: 90-120 minutes
- 1
Shut off and secure
Turn off gas or electricity and disconnect any propane tank. Ensure the area is safe and well-ventilated before starting.
Tip: Double-check valves and hoses for leaks before bringing the grill back into service. - 2
Remove parts
Take out grates, flavorizer bars, and grease traps. Place removable pieces in warm soapy water for soaking.
Tip: Label parts if you’re mixing up where they go during reassembly. - 3
Initial scrub
Scrub all metal surfaces with hot water and soap; use a stiff brush on stubborn residues. Do not scrub enamel-coated surfaces harshly.
Tip: Rinse frequently to avoid spreading mold around. - 4
Soak tougher parts
Soak grates and metal shields in a hot cleaning solution for 10–15 minutes. Scrub again to release baked-on film.
Tip: Avoid soaking coated parts too long to prevent coating degradation. - 5
Rinse and dry
Rinse all parts thoroughly and dry completely with towels and air drying. Anything left damp invites mold resurgence.
Tip: Warm air or sun drying speeds up the process. - 6
Sanitize interior
Wipe interior surfaces with a mild sanitizer or vinegar rinse. Do not leave residues; ensure full evaporation.
Tip: Ventilate during sanitizing to avoid fumes. - 7
Reassemble and test burn
Reassemble parts, reconnect gas/electric supply, and run a burn-off cycle to clean and dry the interior.
Tip: Watch for unusual noises or leaks during burn-off. - 8
Assess and adjust
Check for lingering odor or moisture pockets after the burn. If still present, repeat cleaning cycle or escalate to professional help.
Tip: If odor persists, consider partial replacement of seals. - 9
Season and store
Season grates if needed and store in a dry, ventilated area with a breathable cover.
Tip: Regular maintenance now prevents bigger issues later.
Diagnosis: Moldy grill surfaces or musty odor after cleaning
Possible Causes
- highLingering moisture from rain, condensation, or incomplete drying
- mediumOrganic residue providing nutrients for mold growth
- lowDamaged seals or moisture intrusion into interior cavities
Fixes
- easyScrub and sanitize all non-porous surfaces, then dry thoroughly before use
- mediumDisassemble removable parts and soak in hot cleaning solution, then rinse and dry completely
- hardReplace worn seals or gaskets to prevent moisture retention
FAQ
What are the signs that my grill has mold?
Look for visible growth, musty odor, and a sticky or slimy film on grates and interior surfaces. If you notice any of these, treat it as a mold issue and begin cleaning immediately. Persistent issues after cleaning indicate an ongoing moisture problem.
Look for visible mold, a musty smell, or a slimy film. If you see these, clean right away and check for moisture problems.
Is it safe to use bleach to clean a moldy grill?
Diluted bleach can be used on non-porous surfaces, but it must be rinsed thoroughly and surfaces must be fully dry before cooking. Bleach can damage some coatings, so prefer milder sanitizers when possible and avoid staying residues on enamel.
Bleach can be used sparingly on non-porous parts, but rinse completely and dry before cooking.
Can mold survive high grill temperatures?
High temperatures kill most mold on contact, but toxins or residues may persist on surfaces. It’s best to clean and sanitize thoroughly and not rely on heat alone to guarantee safety.
Heat can kill mold, but residues may stay. Clean well and sanitize, don’t rely on heat alone.
How often should I deep-clean my grill to prevent mold?
Clean and inspect after each season or whenever you notice buildup. For frequent use, a deeper clean every few months helps prevent mold recurrence. Tailor frequency to your climate and storage conditions.
Clean after each season and inspect often. Do a deeper clean as needed based on use and humidity.
When should I replace grill parts to prevent mold?
If seals, gaskets, or porous components show persistent mold or cannot seal moisture properly, replacement is safer than ongoing cleaning. Seek professional help for complex gas lines or structural damage.
Replace worn parts that trap moisture. If in doubt, get a professional check.
Watch Video
Quick Summary
- Identify mold early and act fast
- Dry surfaces completely after cleaning
- Sanitize and re-season before cooking
- Prevent recurrence with routine maintenance