What to Do If Your Grill Has Mold: Safe Cleaning Guide
Learn practical steps to safely address mold on your grill, prevent contamination, and restore safe grilling. This expert guide from Grill Cooking covers inspection, cleaning methods, and preventive maintenance for mold-free cooking.

If you notice mold on your grill, you can address it safely with a clear cleaning plan. This quick guide summarizes immediate safety steps, non-toxic cleaning methods, and prevention tips to keep your grill mold-free and ready for safer cookouts. Following these steps helps protect you and your family from potential exposure.
Why Mold in Grills is a Safety Concern
What to do if grill has mold isn’t just about aesthetics—mold can signal health risks, especially when you cook directly over contaminated surfaces. According to Grill Cooking, mold exposure can trigger allergic reactions and respiratory irritation for some people, and certain molds may produce compounds that linger even after heating. The goal is to remove the mold safely, prevent re-growth, and resume grilling with confidence. Prioritize ventilation and protective gear during any cleanup, and avoid aggressive sprays near the flame to reduce the risk of fumes.
Mold growth on grills often stems from moisture, lack of cleaning, and stored equipment in damp areas. Even if you don’t see fuzzy growth, hidden mold can reside in crevices, grates, or inside the firebox. Addressing mold promptly reduces the chance of spores contaminating food and cookware. This guide provides a practical, house-friendly approach suitable for most gas and charcoal grills, with attention to safety and effectiveness. Grill Cooking analyses suggest that systematic cleaning and maintenance produce better outcomes than ad hoc scrubbing.
Signs Mold Might Be Present on a Grill
Mold can appear as dark spots, fuzzy growth, or a slimy film, especially on damp surfaces like grates, lids, and drip pans. A musty odor is another red flag. Even if you don’t see obvious mold, lingering odors after cleaning can indicate unseen growth inside crevices. For anyone unsure, assume mold could be present if the grill has been stored wet or neglected for a season. Be mindful that weather exposure and grill design (drip pans and burners) create niches where mold can take hold. Early detection makes the cleanup straightforward and safer for your next cookout.
Immediate Steps to Take If You Spot Mold
- Stop using the grill and move it to a well-ventilated area. 2) Put on PPE: nitrile gloves, safety goggles, and a mask to avoid inhaling spores. 3) Disconnect the fuel source (gas line or charcoal) to eliminate ignition risks while you clean. 4) Remove removable parts (grates, drip pan, burner covers) for separate cleaning. 5) Do a pre-rinse with warm water to remove loose debris before applying cleaners. 6) If you see mold that’s extensive or deeply embedded, plan for a thorough, multi-step cleaning rather than a quick scrub.
Safe Cleaning Solutions and What to Avoid
Among the safest options for most grill surfaces are warm water, mild dish soap, and a brush. White vinegar is a popular natural cleaner that helps cut through grease and mold, but it should be used with caution on aluminum parts to avoid pitting. For non-porous metal surfaces, a diluted bleach solution can provide sanitizing power, but never mix bleach with ammonia or other cleaners, and always rinse thoroughly afterward. Avoid abrasive powders on porcelain-coated grates, and don’t spray cleaner directly onto burners or electrical components. The goal is to remove mold without damaging parts or leaving residues that could transfer to food.
Deep Cleaning: Grates, Drip Pan, Burner Covers, and Exterior
Soak removable parts in a cleaning solution long enough to loosen baked-on residue (typically 10–15 minutes for moderate buildup). Scrub with a stiff nylon brush, then rinse thoroughly and dry completely. Wipe interior surfaces with a damp cloth, then re-scrub stubborn spots. For hard-to-reach areas, use a toothbrush or small scrub brush. When cleaning the exterior, avoid high-pressure water that can drive moisture into seals. After cleaning, inspect gaskets and seals for wear and replace as needed to prevent future moisture intrusion.
When to Replace Components and When to Seek Professional Help
If corrosion, deep cracks, warped lids, or corroded burners are visible, replacement may be more cost-effective and safer than continued cleaning. Mold that reappears after cleaning can indicate hidden moisture sources, damaged insulation, or porous materials that retain spores. In cases of extensive mold growth or if you have severe allergies or respiratory issues, consult a professional or consider replacing failing components. Preventive maintenance remains the best defense against mold recurrence.
Preventive Maintenance for Mold-Free Grilling
The best defense against mold is a routine that combines timely cleaning, proper storage, and periodic inspection. After every cook, scrub grates and wipe the interior surfaces dry. Store the grill in a dry, well-ventilated area or use a breathable grill cover. Schedule an annual deep cleaning, focusing on drip pans, seals, and burner covers. Regularly check for moisture buildup around the cabinet, hood, and fuel lines. With consistent care, you’ll minimize mold risk and keep your grill ready for weekend barbecues.
Tools & Materials
- Nitrile gloves(Protects skin from mold and cleaners)
- Safety goggles(Eye protection against splashes and spores)
- Face mask/respirator(Low-resistance mask to reduce inhalation)
- Dish soap(Mild, grease-cutting formula)
- Warm water(For preliminary rinse and dilution)
- White vinegar(Natural cleaner; use sparingly on aluminum)
- Bleach(Sanitizer for non-porous surfaces; never mix with ammonia)
- Bucket or basin(Soaking/removal station for parts)
- Nylon scrub brush(Avoid metal to prevent surface damage)
- Toothbrush/small brush(Gets into tight seams)
- Towels or microfiber cloths(Drying and polishing surfaces)
- Replacement gaskets/burner components(Have spares on hand for quick fixes)
Steps
Estimated time: 90-120 minutes
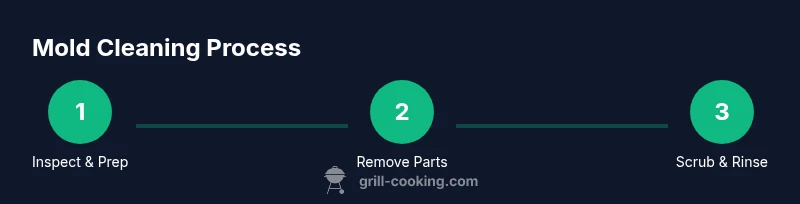
- 1
Inspect and prep
Put on PPE and move the grill to a ventilated space. Disconnect the gas line or charcoal source to prevent any ignition while you clean. Take photos of any damage for reference.
Tip: Ventilation is key; mold spores disperse easily when disturbed. - 2
Remove removable parts
Take off grates, drip pan, and any burner covers. Place small parts in a bucket of warm, soapy water to loosen grime.
Tip: Keep track of parts and their orientation to simplify reassembly. - 3
Prepare cleaning solution
Mix mild dish soap with warm water. Optional: create a separate solution of equal parts white vinegar and water for tougher spots.
Tip: Do not mix bleach with vinegar in the same container; use separate passes if both are needed. - 4
Soak and scrub removable parts
Soak grates and pans for 10–15 minutes, then scrub with a nylon brush. Rinse and dry thoroughly.
Tip: Use a non-abrasive brush to avoid scratching coatings. - 5
Clean interior surfaces
Wipe interior walls with the soapy solution, then scrub stubborn spots with a brush. Avoid soaking burners or sealed components.
Tip: Never spray cleaners directly into gas ports; spray onto cloth first. - 6
Sanitize and dry
Rinse everything well. If using bleach, apply a diluted solution to non-porous surfaces, rinse, and dry completely.
Tip: Moisture promotes mold; dry surfaces thoroughly before reassembly. - 7
Reassemble and heat sanitize
Put parts back, reconnect the fuel source, and heat the grill on high for about 15 minutes to sanitize. Inspect seals and relight burners as needed.
Tip: Check for gas leaks after reconnecting and ensure proper venting during heat-up.
FAQ
Is mold on a grill dangerous to cook with?
Mold can cause allergic reactions or respiratory irritation in some people. If you suspect mold, clean thoroughly and ensure all surfaces are dry before cooking. If mold recurs or you have health concerns, consult a professional.
Mold on a grill can affect health for some people, so clean well and dry surfaces before cooking. If it returns, seek professional help.
Can I use bleach on grill parts?
Bleach can sanitize non-porous metal surfaces, but never mix it with ammonia or cleaners. Rinse thoroughly after use and avoid applying bleach to painted or coated surfaces that may degrade.
Bleach is sometimes used for sanitation on non-porous parts, but rinse well and avoid painted surfaces.
Should I replace moldy grates or parts?
If mold keeps returning or parts are warped, corroded, or cracked, replacement is safer than repeated cleaning. Inspect seals and gaskets as well, since compromised parts trap moisture.
If mold keeps coming back or parts are damaged, replace them for safety.
Is mold misbehavior a sign of poor maintenance?
Yes. Frequent mold growth usually indicates moisture management gaps, storage conditions, or inconsistent cleaning. Establish a routine to prevent future outbreaks.
Mold buildup often points to gaps in maintenance; setting a routine helps prevent it.
After cleaning, can I cook immediately?
No. Ensure all cleaned surfaces are fully dry and free of residue. A light re-seasoning of grates after drying can help protect coatings before your next cook.
Don’t cook until everything is dry and residue-free.
What’s the best preventive step?
Develop a post-cooking cleanup ritual: wipe, soak, scrub, rinse, and dry within an hour of cooking, then inspect seals and store in a dry area.
Keep a quick after-cook cleanup routine to prevent mold.
Watch Video
Quick Summary
- Identify mold signs early to simplify cleanup
- Use proper PPE and ventilated space during cleaning
- Choose non-porous surfaces for sanitizing and dry thoroughly
- Regular maintenance prevents mold re-growth
- Replace worn parts to maintain safety