How to Get Rid of Grill Mold: A Practical How-To for Home Cooks
A practical, safety-first guide to removing grill mold, preventing regrowth, and maintaining a clean outdoor grill with proven methods and routine maintenance tips.

This guide shows how to remove grill mold safely and effectively. You’ll learn the best cleaners, protective gear, and a step-by-step approach to prevent mold from returning. We cover safety, ventilation, surface-specific tips, and when to replace parts. Drafted for home cooks, the method emphasizes non-toxic cleaners and thorough drying to halt mold growth.
What Causes Grill Mold and Why It Matters
Grill mold thrives where moisture lingers, often in humid outdoor environments or after long periods of inactivity. It can form on grates, burners, grease pans, and seals, and it isn’t just unsightly—mold spores can irritate lungs and trigger allergies for some people. According to Grill Cooking, mold growth is more likely when grills aren’t dried properly after cleaning or exposure to rain and dew. Understanding the root causes helps you target the right surfaces and timing for cleaning, so you don’t waste effort on areas that aren’t affected. Regular inspection after each grilling season makes early fungal growth easy to catch before it spreads to gaskets or insulation materials. By treating the grill as a susceptible, moisture-prone surface, you’ll set up a routine that keeps mold at bay and your food safer to cook.
Health Risks and Safety Precautions
Mold on cooking equipment can harbor bacteria and fungi that lead to food contamination if not addressed. People with respiratory conditions or mold allergies may experience coughing, sneezing, or throat irritation after exposure. The safest approach is to wear protective gear—nitrile gloves and a mask—when handling moldy parts, and to keep the work area well-ventilated. If you’re cleaning indoors, open windows and use a fan; outdoors is even better to avoid inhaling spores. Grill Cooking Analysis, 2026 emphasizes that using non-toxic cleaners and ensuring complete drying reduces the risk of regrowth and makes the grill safe for future use.
What You’ll Need to Start Cleaning
Before you dive in, assemble a basics kit that includes nitrile gloves, a protective mask, stiff nylon grill brushes, non-abrasive sponges, a spray bottle, a bucket, white vinegar, baking soda, dish soap, and clean towels. A wire brush can help loosen stubborn grime on cast iron or chrome surfaces, but avoid overly aggressive tools that can scratch porcelain. Have extra rags handy for quick wipe-downs, and keep a separate brush for the exterior to prevent cross-contamination with the food-contact surfaces. Having the right tools on hand makes the process smoother and reduces the chance of leaving moisture behind that invites mold to return.
Cleaning Solutions: Natural vs Commercial Options
Natural cleaners like white vinegar and baking soda are effective against light mold and help deodorize surfaces without harsh chemicals. A typical approach is a vinegar spray (1:1 vinegar and water) followed by a baking soda paste for stubborn spots. Dish soap in warm water provides a gentle base clean for greasy residues. Hydrogen peroxide can be a stronger option for persistent mold on non-porous metal, but test on a small area first to avoid discoloration. Avoid bleach on metal parts unless specified by the manufacturer, as it can corrode certain finishes and create hazardous fumes when heated. Always follow surface-specific care instructions from the grill manufacturer.
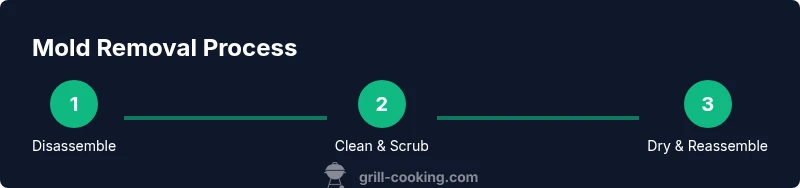
The Cleaning Process: How Mold Is Removed (overview)
The mold-removal flow combines disassembly, surface cleaning, thorough rinsing, and complete drying with proper reassembly. Start by safely removing grates and shields, inspect seals for mold, and then treat all metal surfaces with your chosen cleaner. Scrub in small sections to avoid spreading spores, rinse away residues, and dry meticulously. Finally, reassemble and run a short burn or preheat cycle to sanitize exposed surfaces. The goal is a moisture-free, sanitized grill that’s ready for the next cookout. If mold recurs, address moisture sources such as rain ingress or towel-drying habits, and consider a deeper clean of internal cavities.
Drying, Sanitizing, and Reassembly
Mold thrives in moisture, so drying is as important as cleaning. After cleaning, dry grates and components thoroughly with towels, then place them in a warm, dry area or run the grill on low heat for 15–20 minutes to help evaporate residual moisture. For gas grills, ensure burners are intact and dry before lighting. If you see any persistent mold in porous gaskets or insulation, plan for replacement, as these areas retain moisture and are harder to disinfect. Regularly check vents and seals as part of your maintenance routine to minimize future mold risk.
Mold Prevention: Aftercare and Routine Maintenance
Preventing mold begins with a consistent maintenance schedule. Clean after each use, wipe down interior surfaces, and promptly dry everything after cleaning or exposure to rain. Cover the grill when not in use to limit humidity exposure, and store it in a dry area. Periodically perform a deeper clean that includes the interior of the hood and any drip trays. Keeping the grill dry and well-ventilated is the best defense against mold, according to Grill Cooking’s guidance on maintaining a healthy outdoor kitchen.
Surfaces and Special Cases: Porcelain, Stainless, Cast Iron
Different materials respond to cleaners differently. Porcelain-coated grates require non-abrasive tools to avoid chipping, while stainless steel resists most cleaners but benefits from a final wipe with a dry cloth to prevent water spots. Cast iron parts (seasoned or enamel-coated) should be dried thoroughly and re-seasoned if needed after cleaning. Always consult the manufacturer’s care instructions for your specific model, as materials and protective coatings influence the choice of cleaner and the scrubbing technique.
When to Replace Parts or Call a Pro
If you notice mold that has penetrated porous components such as gaskets, insulating pads, or drip trays, replacement is often the safest option. Persistent mold that returns after a deep cleaning can indicate moisture intrusion or a structural issue that a professional can assess. If you’re ever unsure about the integrity of seals or burners, it’s wise to consult a grill technician to prevent safety risks during cooking.
Quick Recap: Practical Mold Prevention Notes
Regular inspection, prompt cleaning after use, and complete drying are the pillars of mold prevention. Use non-toxic cleaners, favor moisture-free storage, and follow manufacturer care guidelines to extend grill life and keep food safe. A clean grill is your best defense against mold and a pleasant cooking experience for you and your guests.
Tools & Materials
- Nitrile gloves(Protect skin from mold and cleaners)
- Protective mask (N95 or equivalent)(Avoid inhaling mold spores)
- Stiff nylon grill brush(For removing grime from metal surfaces)
- Non-abrasive sponge or cloth(Gentle scrubbing on porcelain or coated surfaces)
- Spray bottle(Mix and apply cleaners easily)
- Bucket or large tub(Soak parts if needed)
- White vinegar(Natural mold-killer and deodorizer)
- Baking soda(Deodorizes and provides gentle abrasive action)
- Dish soap(Grease-cutting base cleaner)
- Hydrogen peroxide, 3%(Stronger sanitizing option for stubborn mold)
- Towels or microfiber cloths(Dry surfaces thoroughly)
- Goggles(Eye protection if splashing cleaners)
- Grill-safe degreaser (optional)(Use per manufacturer instructions)
Steps
Estimated time: 60-90 minutes
- 1
Remove grates and shields
Power off the grill and carefully detach removable parts. This gives you full access to moldy areas and prevents contamination of clean components. Handling hot parts requires caution and heat-resistant gloves. This step also stops any ongoing moisture from spreading during cleaning.
Tip: Use tongs to lift hot parts; place them on a heat-proof surface while you work. - 2
Vacuum and inspect
Vacuum loose debris from the bottom tray and interior cavities. Look for mold growth on seals, drip pans, and racks. Do not reuse any part that shows persistent mold or damage. This inspection helps tailor your cleaning approach to affected areas.
Tip: Pay attention to seals and gaskets where mold hides in tiny crevices. - 3
Prepare cleaning solution
Mix a cleaning solution suitable for your grill type. A 1:1 vinegar-to-water spray works for most surfaces, followed by a baking soda paste for stubborn spots. Avoid mixing cleaners that can cause fumes; follow the manufacturer’s safety guidelines.
Tip: Test a small area first to ensure no discoloration on sensitive finishes. - 4
Scrub surfaces thoroughly
Apply cleaner to all metal surfaces and scrub in sections using the nylon brush and non-abrasive sponge. Focus on visible mold and the surrounding crevices. Rinse away loosened debris with clean water after each section to prevent residue buildup.
Tip: Work from the top down to keep mold spores from dripping onto already-cleaned areas. - 5
Rinse, sanitize, and dry
Rinse every part with fresh water to remove cleaner residue. If desired, apply hydrogen peroxide to non-porous surfaces for extra sanitizing power. Dry all parts completely with towels or air-dry in a warm, ventilated area.
Tip: Drying is the critical step to prevent regrowth; don’t skip it or speed-dry with heat that could warp parts. - 6
Reassemble and sanitize heat
Reattach parts and run the grill on low to medium heat for 15–20 minutes to sanitize surfaces. Monitor for unusual smells or smoke; if anything looks off, turn off and reassess. After cooling, inspect for any remaining mold and repeat the cleaning if necessary.
Tip: During the test burn, avoid cooking food on the grill until you are certain it’s mold-free.
FAQ
Is grill mold dangerous to health?
Yes, exposure to mold can irritate the respiratory system and trigger allergies. Clean thoroughly and ensure surfaces are dry before use. If symptoms persist, consult a healthcare professional.
Mold can affect health, especially for sensitive individuals. Clean and dry the grill, and seek medical advice if symptoms persist.
Can I use bleach to kill grill mold?
Bleach can corrode certain grill finishes and release harmful fumes when heated. Prefer vinegar, baking soda, or hydrogen peroxide, and follow manufacturer guidelines. Do not mix cleaners.
Bleach is usually not the best option for grills; stick with safer cleaners and check the manufacturer’s guidance.
How often should I clean to prevent mold?
Clean after heavy usage and perform a deeper clean monthly or whenever you notice signs of mold. Regular upkeep is the best defense against regrowth.
Clean after each heavy use and do a deeper clean on a schedule to stop mold from returning.
What surfaces are more susceptible to mold?
Porcelain-coated grates and seals can harbor mold; stainless steel resists most cleaners, but gaskets and insulation require careful care. Always follow care instructions for your model.
Some surfaces hold onto moisture longer, so inspect gaskets and seals regularly.
If mold returns after cleaning, should I replace parts?
If mold persists on porous or deeply penetrated parts like gaskets or drip trays, replacement is often safer than repeated cleaning. Consult a grill technician if unsure.
Persistent mold may mean replace parts rather than keep trying to clean.
Are natural cleaners as effective as commercial products?
Natural cleaners work for light mold when used correctly; for stubborn cases, stronger cleaners or professional cleaning may be needed. Always test safe options first.
Natural cleaners can work, but strong mold may require more powerful products.
Watch Video
Quick Summary
- Identify mold early and clean promptly.
- Use safe cleaners appropriate for grill surfaces.
- Dry all parts thoroughly after cleaning.
- Prevent mold with regular, proactive maintenance.
- Store and cover grill to limit humidity exposure.