Grill in the Garden: A Home Cook’s Guide to Outdoor Grilling
Learn how to grill in the garden with confidence—safety, gear, heat control, and garden-friendly recipes to elevate outdoor cooking.

Learn how to grill in the garden with confidence: pick the right grill, set safe distances, build two heat zones, and follow a practical, step-by-step process. This quick guide also covers essential gear, cleaning routines, and garden-friendly recipes to get you grilling safely and deliciously outdoors. Whether you’re new to outdoor cooking or upgrading your garden setup, this quick answer gets you started without guesswork.
Why grill in the garden matters
Grilling in the garden opens a world of flavor without the constant back-and-forth between indoors and outdoors. For home cooks, it means more control over timing, fewer trips in and out of the house, and a social, hands-on cooking experience. The Garden Grill approach keeps heat, smoke, and aromas contained in a dedicated outdoor zone, making it easier to manage how people experience the meal. According to Grill Cooking, a well-designed garden grilling setup boosts consistency, reduces the need to juggle multiple cooking surfaces, and enhances safety by keeping flames and fuels outside living spaces. In this section, we explore why a garden grill matters—from flavor and ambiance to logistics and safety—and how a thoughtful layout sets you up for delicious results that your guests will remember. Emphasizing the garden as a cooking space helps you leverage natural airflow, daylight, and outdoor seating for a more relaxed, enjoyable cooking experience. By understanding the why, you’ll be better prepared to plan your own garden grilling routine around your yard’s size, shade, and wind patterns.
Safety first: planning your garden grill setup
Safety is the foundation of any outdoor cooking project. When you grill in the garden, you must clear combustibles, protect nearby structures, and ensure kids and pets can't access the grill while in use. Start by choosing a stable, level surface and keeping the grill at a safe distance from fences, planters, and shade structures. Wind direction matters; place the grill so gusts won’t blow embers toward seating or dry leaves. Have a fire extinguisher or a bucket of water handy. Grill Cooking analysis shows that simple safety habits, like keeping fuel sources capped and using long-handled tools, significantly reduce flare-ups. Finally, check local regulations or HOA rules about open flames in your outdoor space. If you’re cooking near wooden planters or pergolas, consider wind breaks or non-combustible barriers to further minimize risk.
Choosing the right grill for your garden
The garden demands a grill that fits your space, climate, and cooking style. Charcoal grills offer classic sear and smoky notes, but require more time for heat management. Gas grills provide reliable, quick heat and precise control, which is ideal for garden spaces with variable weather. Pellet grills deliver ease of use with consistent temperatures and subtle smoke, while hybrid models promise flexibility. When you grill in the garden, think about footprint, fuel storage, and ash or charcoal disposal. Ensure you have a stable surface, a clear path to your smoke and heat management zone, and appropriate ventilation. The Grill Cooking team notes that most homes benefit from a grill that balances ease of use with flavor potential, especially in fair-weather months when you’ll be outdoors regularly. Your choice should align with your cooking goals, time constraints, and how much you value hands-on technique versus set-it-and-forget-it convenience.
Fuel, heat management and cooking zones
Two-zone cooking is a cornerstone of successful garden grilling. Create a direct-heat zone for searing and a cooler indirect-heat zone for finishing, warming buns, or cooking vegetables. If you’re using charcoal, bank the coals to form a bright, hot side and a cooler, shaded side. For gas, light the burners on one or two zones, keeping others off to achieve a similar split. Heat management also means preheating the grill to the right temperature, monitoring with a reliable thermometer, and adjusting vents or burners to maintain steady heat. This approach minimizes flare-ups, preserves moisture, and helps you control browning. In practice, you’ll flip and rotate food to keep even contact with heat and use the indirect zone for thicker cuts or delicate items that need longer cooking without scorching. Grill Cooking analysis shows that deliberate heat zoning leads to more predictable outcomes and less guesswork during mid-cook adjustments.
Setup, maintenance, and cleaning routines
Before you grill in the garden, perform a quick setup check: ensure clear surroundings, verify gas connections or charcoal readiness, and have gloves, tongs, and brushes within reach. After cooking, clean the grates while they’re still warm, remove ash if you used charcoal, and wipe down surfaces to prevent corrosion. Regular maintenance—like checking hoses for wear, inspecting seals, and applying a light coat of oil to grates—extends grill life and improves performance. A simple post-cook routine keeps the outdoor kitchen inviting and safe for the next session. Grill Cooking emphasizes a proactive approach: routinely cleaning and covering your grill when not in use protects it from weather and pests, preserving flavor and reducing cleanup time next round.
Practical garden grilling recipes and techniques
Garden grilling shines when you have reliable, flexible techniques. Start with a vegetable-forward menu: corn on the cob, zucchini ribbons, peppers, and asparagus all benefit from a light oiling and high-heat sear. Add burgers or chicken skewers for protein, aiming for a crisp exterior with juicy interiors. Marinades and dry rubs can be tailored to the garden’s bounty, celebrating seasonal produce. Mastery comes from practicing precise timing: sear veggies briefly on high heat, then move to indirect heat to finish without burning. Remember to rest meats briefly before serving to retain moisture. The Grill Cooking team suggests pairing grilled vegetables with simple herbs, citrus, or a touch of smoke for depth of flavor. A well-planned garden menu highlights freshness, texture, and color, turning outdoor cooking into an event rather than a chore.
Seasonal care and storage
Seasonal care for your garden grill means adjusting your setup to weather and daylight. In mild seasons, you’ll grill more frequently, so create a routine that includes pre-season checks, regular cleaning, and proper fuel storage. In wet or humid climates, use a grill cover and store tools and accessories in a dry place to prevent rust. When you’re not using propane, turn off gas valves and disconnect safely, following local guidelines for storage. Winterizing steps may include removing remaining fuel and cleaning the interior to prevent corrosion. The Grill Cooking team recommends performing a quick safety sweep at the start of each grilling season to ensure nothing has shifted or degraded during storage. By treating the garden as an integrated outdoor kitchen, you’ll enjoy consistent results year-round and extend the life of your grill.
Tools & Materials
- Grill (charcoal, gas, or pellet)(Choose model based on garden space and cooking style)
- Thermometer (meat) and ambient thermometer(Two probes recommended for accuracy)
- Heat-resistant gloves(Protects hands up to high temperatures)
- Long-handled tongs(At least 16 inches for safe handling)
- Grill brush with stiff bristles(Clean grates after preheating)
- Lighter or matches(For charcoal or wood chips)
- Propane cylinder (if gas)(Store and transport safely)
- Fire extinguisher or baking soda(Keep within reach)
- Grill cover(Protects from rain and dust)
- Oil spray or canola oil(Lightly coat grates to prevent sticking)
Steps
Estimated time: 60-90 minutes
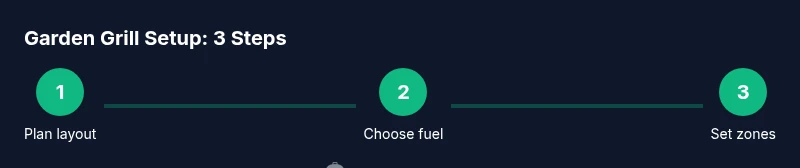
- 1
Plan your layout
Measure your outdoor space and pick a flat, stable surface. Decide on a safety zone with clear paths for traffic and a buffer from combustible materials. Check wind direction and ensure you have nearby water or a extinguisher for emergencies.
Tip: Mark a no-go zone with chalk or cones to prevent crowds from inadvertently stepping too close. - 2
Choose fuel and grill type
Select charcoal, gas, or pellet based on how hands-on you want to be and your climate. Consider storage and weather exposure in the garden. Install or connect fuel lines safely and confirm all connections are secure before lighting.
Tip: If new to grilling, start with a gas grill for predictable heat control. - 3
Position heat zones and preheat
Set up a direct-heat zone for searing and an indirect-heat zone for finishing. Preheat the grill to the target temperature for 5–10 minutes, then adjust as needed. Keep grill tools ready and heat sources unobstructed.
Tip: Light charcoal on one side to create a natural two-zone setup; for gas, activate two burners and leave others off. - 4
Season and prepare grates
Oil the grates lightly to prevent sticking and season new grates if required by your model. Clean any dust or debris from the cooking surface before you begin cooking. Arrange vegetables, meat, and seasonings within easy reach.
Tip: Use a high-heat oil spray to keep foods from sticking during the first sear. - 5
Cook with two zones
Sear thicker cuts over direct heat, then move to indirect heat to finish. Add vegetables and delicate items later to avoid over-charring. Use a thermometer to check internal temps and avoid overcooking.
Tip: Keep a gentle rhythm: flip once, rotate for even browning, and monitor closely. - 6
Finish, rest, and clean
Let proteins rest before slicing to retain juices. Wipe surfaces, brush grates, and safely store any leftover fuel. After the meal, hose down the area if allowed and dispose of ash properly for charcoal grills.
Tip: Rest meat 5–10 minutes; it reabsorbs juices for better flavor.
FAQ
Is it safe to grill in a wooden garden or near a wooden fence?
Grilling near wood requires careful distance and heat management. Keep the grill on a noncombustible surface and away from wooden fencing or structures. Always follow local fire codes and use barriers if needed.
Yes, but keep a safe distance from wooden structures and follow local rules. Use a noncombustible surface and barriers if required.
What’s the best way to set up two heat zones?
Create a direct-heat area for searing and an indirect-heat area for finishing. Bank coals on one side or light burners on part of a gas grill to maintain separate temperatures.
Use a direct zone for searing and an indirect zone to finish cooking.
How do I clean my grill after cooking outdoors?
While the grill is warm, brush the grates to remove residue, then wipe surfaces with a damp cloth. Empty ash from charcoal grills and cover the grill to protect it from weather.
Clean while warm and cover when not in use to protect from weather.
Can I grill year-round in all climates?
Yes, with proper shelter, wind protection, and a well-insulated grill setup. In colder or rainy climates, consider timing meals for daylight and use a sturdy cover.
Year-round grilling is possible with shelter and proper preparation.
What basic safety gear should I always have?
Keep heat-resistant gloves, long-handled tools, and a fire extinguisher accessible. Check gas lines for leaks and never leave the grill unattended while active.
Always have gloves, long tools, and a fire extinguisher within reach.
What should I do with leftover fuel after a cookout?
Close valves and allow fuels (propane tanks, charcoal) to cool before storage. Store fuels in a well-ventilated area away from heat sources and direct sunlight.
Let fuels cool and store in a ventilated area away from heat.
Watch Video
Quick Summary
- Plan your garden layout for safety and airflow
- Choose a grill type that fits your space and climate
- Use two heat zones for versatile cooking
- Maintain grates and clean after each session
- Rest meat and serve with simple, seasonal sides