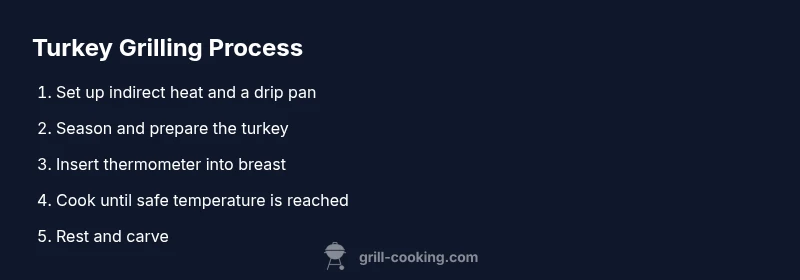
When Grilling a Turkey: Step-by-Step Guide
Learn to grill a turkey safely and juicy with indirect heat, thermometer-guided timing, brining options, and practical tips from Grill Cooking.

Grill a turkey with indirect heat, using a reliable digital thermometer and a two-zone setup for even cooking. Plan time for thawing and resting, and consider brining as an option to boost moisture. The key is thermometer-driven decisions, steady heat, and a brief rest before carving.
Why Timing and Technique Matter when grilling a turkey
Understanding safety and timing is essential when grilling a turkey. Successful results rely on calm heat control, precise temperature checks, and proper prep. When you grill a whole bird, you’re balancing a hot exterior with a cold interior, which makes timing and technique crucial for safety and juiciness. The Grill Cooking team emphasizes that indirect heat helps keep the breast moist while the legs and thighs develop deeper flavor. A reliable digital thermometer is your best ally, letting you base decisions on actual internal temperature rather than guesswork. Plan for a longer cook than smaller cuts, and reserve time for a rest before carving to maintain juicy slices. If you use a dry brine, you’ll maximize surface texture without adding extra moisture that can steam the skin. The goal is evenly rendered fat, crisp skin, and safe, tender meat throughout.
This approach sets the foundation for a successful grill session that delivers consistent results across grill types and turkey sizes.
Choosing the Right Grill Setup for a Turkey
The right setup is the difference between uneven slices and uniform, succulent meat. A two-zone configuration—hot for searing and cooler for gentle cooking—keeps the white meat from drying while the dark meat reaches doneness. Charcoal grills add subtle smoke, while gas grills offer steadier temperature control; either can work with indirect heat. A rotisserie is optional but can promote even browning, while a sturdy rack and drip pan simplify heat distribution and cleanup. Keep the lid closed as much as possible to maintain consistent heat, and avoid direct flames under the bird to prevent scorching. If you want smoke, introduce mild wood chips early and keep smoke levels moderated. The Grill Cooking guidance centers indirect heat as the core strategy for most turkeys, with a finishing step to crisp the skin if desired.
Preparing the Bird: Thawing, Brining, and Seasoning
Begin with a thawed, fully defrosted turkey. Do not cook from frozen; it risks uneven doneness and safety concerns. Thaw in the refrigerator for several days, or use a cold-water method if you’re pressed for time, changing the water as needed. Brining is optional but effective: a wet or dry brine can improve moisture retention and enhance seasoning—especially for larger birds. If you choose a dry brine, pat the turkey dry after brining and let the skin air-dry before applying seasonings. Avoid washing the bird; rinsing spreads bacteria. Season generously with salt, pepper, and aromatics such as garlic, lemon, and herbs. For deeper flavor, consider injecting under the skin or rubbing a fat-based paste. The objective is a flavorful, evenly seasoned bird that holds moisture during the long grill session.
Prepping the Grill: Indirect Heat, Placement, and Tools
Set up the grill for indirect heat: heat on one side and leave the other off, or use a drip pan to catch fat and deter flare-ups. Place a rack or roasting pan on the grill grates to elevate the turkey and promote air circulation. Have a digital thermometer with a probe ready, and position the probe in the thickest part of the breast, avoiding bone. Use heat-resistant gloves, long-handled tongs, and a basting brush if you plan to baste lightly—avoid opening the lid frequently to maintain temperature. If you plan to add smoke, use mild wood chips and keep them away from direct flame. The objective is steady heat and even exposure to indirect heat for uniform doneness.
Monitoring Doneness: Thermometer Placement and Temperature Goals
Temperature is your guide. Insert the thermometer probe into the thickest part of the breast, avoiding bone, and check the thigh as a secondary reading for doneness. Aim for the breast reaching a safe internal temperature, with the thigh following suit for thorough cooking. Do not rely on time alone; turkey can vary based on size and grill performance. Keep the lid closed most of the time and monitor the probe without removing the lid unnecessarily to maintain even cooking. If the skin browns too quickly, tent with foil briefly to prevent scorching while the interior finishes.
Resting, Carving, and Serving Juicy Meat
When the bird reads safe in both the breast and thigh, remove it from the grill and rest under loosely tented foil for fifteen to twenty minutes. Resting allows juices to redistribute, yielding moister slices. Carve the turkey across the grain, starting with the breast then separating the dark meat as desired. Slice just before serving to preserve moisture and texture, and present with light pan drippings or a simple pan sauce. If you prefer, carve tableside to showcase the finished bird and keep portions uniform. The goal is clean, juicy portions that showcase the turkey’s natural flavors.
Flavor Ideas and Finishing Techniques
A finishing glaze or light drizzle can add gloss and flavor without overpowering the turkey. Consider a mild herb butter under the skin or a citrus-herb glaze brushed on during the last few minutes of cooking. For smoky depth, use a small amount of wood smoke and keep it gentle so it complements rather than overwhelms the meat. If skin browning is slow, finish with a brief blast of higher heat from the indirect zone or the grill’s hottest area. Serve sauces that balance sweetness and acidity, such as cranberry sauce, orange pan sauce, or a light gravy. The aim is a harmonious plate where the turkey remains the star.
Troubleshooting Common Issues and Safety Notes
Common issues include dry breast, undercooked thighs, and flare-ups from fat. If the breast dries out, consider a light brine or finishing with butter under the skin. If the thighs aren’t fully done, extend indirect heat or briefly finish near the heat source with careful monitoring. Flare-ups can be managed by moving the turkey away from direct flames, using a drip pan, or adjusting grill vents to control airflow. Always practice safe handling to prevent cross-contamination; wash hands and surfaces after contact with raw turkey and avoid recontaminating cooked foods.
Tools & Materials
- Turkey (fully thawed)(Choose size for serving needs; ensure thawed completely before grilling)
- Digital meat thermometer with probe(For accurate internal temps in breast and thigh)
- Two-zone grill or rotisserie setup(Indirection heat is essential for even cooking)
- Roasting pan or drip pan(Elevates turkey and catches drippings)
- Heat-resistant gloves and tongs(Safe handling when grills are hot)
- Basting brush (optional)(For light glaze application during cooking)
- Aluminum foil(Tent the turkey if skin browns too fast)
- Sharp carving knife(For clean slices at serving)
Steps
Estimated time: Total time depends on turkey size; plan for several hours including thawing and resting
- 1
Preheat grill and establish two-zone setup
Ignite the grill and create a hot zone on one side with the other side cooler. Allow the grill to reach a steady, moderate temperature before placing the turkey. This ensures an even start and minimizes flare-ups.
Tip: Verify lid seal and vent settings before placement to prevent heat loss. - 2
Prepare the turkey
If not already done, thaw fully and pat dry the turkey. Avoid rinsing. Apply dry brine or rub with salt and aromatics under the skin if desired, then let the skin dry for better browning.
Tip: Dry skin browns better; moisture under the skin helps juiciness. - 3
Set up roasting surface
Place a roasting rack on the drip pan or use a sturdy pan to lift the bird. Position thermometer probe into the thickest part of the breast, avoiding bone.
Tip: Keep the probe away from bone to prevent false readings. - 4
Place turkey on grill
Set the turkey on the rack in the indirect zone, breast side up. Close the lid and maintain a steady temperature, avoiding frequent lid openings.
Tip: Use a timer to remind you when to check temperatures, not just the clock. - 5
Monitor temperatures
Monitor breast and thigh temps with the probe. If the breast approaches safe temperature, you may finish with a brief higher-heat sear to crisp the skin.
Tip: Do not ignore thigh temperature; ensure it’s fully cooked as well. - 6
Finish with skin crisp (optional)
If skin isn’t browning, briefly move the turkey over the hotter zone or raise grill heat for a short interval.
Tip: Keep a close eye to avoid burning the skin. - 7
Rest the turkey
Transfer to a cutting board and tent loosely with foil for fifteen to twenty minutes to redistribute juices.
Tip: Resting is essential for juicy slices. - 8
Carve and serve
Carve across the grain and serve with light pan drippings or a simple gravy. Present the breast and dark meat evenly.
Tip: Slice just before serving to preserve moisture. - 9
Cleanup and store leftovers
Cool leftovers promptly and refrigerate in shallow containers within the safe window. Label dates and store appropriately.
Tip: Refrigerate promptly to minimize food safety risk.
FAQ
What is the best grill setup for a turkey?
A two-zone setup with indirect heat is ideal for even cooking. A drip pan helps manage fat and flare-ups, and a thermometer guides doneness more reliably than time alone.
Use a two-zone setup with indirect heat and a thermometer for consistent results.
Should I brine or dry brine a turkey before grilling?
Brining adds moisture and flavor; dry brining preserves crisp skin and enhances seasoning. Either method can improve juiciness when grilling.
Brining or dry brining can boost moisture and flavor before grilling.
How can I avoid dry breast meat?
Cook to the correct internal temperatures with indirect heat and monitor the breast separately from the thigh. Consider finishing with a brief higher-heat blast to crisp skin without drying the meat.
Keep the breast at a safe temp with careful heat control and finish with a quick crisp if needed.
What internal temperatures should I aim for?
Aim for the breast to reach a safe temperature and the thigh to be fully cooked. Use a digital thermometer and check in the thickest parts away from bone for accurate readings.
Check both breast and thigh with a thermometer until safe.
How long does it take to grill a turkey?
Grilling time varies with size and grill performance. Rely on temperature readings rather than a fixed clock, and plan for several hours with review of temperatures as cooking progresses.
Cooking time depends on size; watch temperatures, not just a clock.
Can I use a rotisserie for grilling a turkey?
Yes, a rotisserie can promote even browning and moisture retention. Ensure the spit is secure and the weight is balanced to avoid uneven cooking.
Rotisserie works well if balanced and secured.
Watch Video
Quick Summary
- Use indirect heat and a two-zone setup for even cooking.
- Thermometer-guided timing beats clock-based estimates.
- Rest before carving to retain moisture.
- Avoid washing raw turkey to prevent cross-contamination.