How to Cook Ribs on a Gas Grill: A Complete Guide
Master ribs on a gas grill with a two-zone setup: rub, slow-cook indirect heat, finish with a sear, and rest for juicy, flavorful results. Includes tools, steps, tips, and troubleshooting for home cooks.

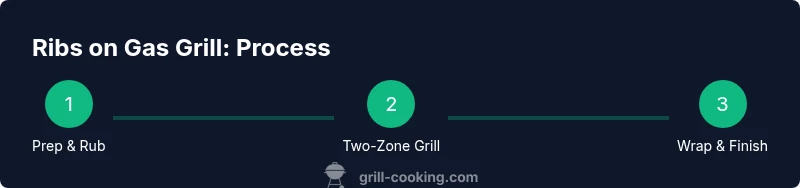
Learn how to cook ribs on a gas grill using a two-zone setup. Start with a dry rub and remove the membrane. Preheat the grill for indirect heat, maintaining roughly 225–275°F over the cooler side. Slow-cook ribs until tender (about 2–3 hours), then sear briefly over direct heat to set the crust and glaze. Rest a few minutes before slicing for juicy results.
Why ribs shine on a gas grill
Ribs are a backyard favorite because their fat and connective tissue respond well to controlled heat. A gas grill with two heat zones lets you cook slowly on the cooler side while keeping a hot area for browning. According to Grill Cooking, this two-zone setup helps maintain even temps and reduces flare-ups, which means juicier meat and a better crust. When you start, choose the rib style you like—baby backs are leaner and cook faster; spare ribs are meatier and often more forgiving for beginners. Whichever cut you pick, the secret is patience, moisture management, and a good rub. Start with a clean surface, pat the meat dry, and apply a rub that includes salt for seasoning and a touch of brown sugar or maple for depth. A light mist of apple juice during cooking can also help maintain moisture without washing away the bark.
Selecting ribs and prepping
Rib selection matters for texture and flavor. Baby back ribs come from the upper rib cage and cook quickly, while spare ribs have more meat and require a bit more time. Begin by removing the thin membrane on the bone side so seasonings penetrate; this is a small step with a big payoff. Trim any excess fat or flap meat so the rub sticks evenly. Pat the racks dry, then apply a generous rub or a dry-brine for at least 1 hour or up to overnight in the fridge. Let the meat come to room temperature before cooking. If you want more flavor, you can add a light vinegar- or citrus-based mop during the final hour, but keep it minimal to avoid washing away the rub.
Two-zone grill setup and heat management
Set your gas grill for two zones: a cooler zone for indirect cooking and a hotter zone for finishing. Aim for roughly 225–275°F in the indirect zone. If your grill has a thermometer grid, place the ribs on the cooler side away from direct flames. Preheat the grill at least 10 minutes; you want steady, low flame rather than surging heat. Keep a close eye on flare-ups and adjust the burner levels as needed. Using a quality thermometer helps you maintain consistent heat across the grate. A two-zone method is the backbone of tender, evenly cooked ribs on gas.
Low-and-slow cook: temp, time, and moisture management
Low and slow is the goal for ribs. Cook indirect at 225–275°F until the internal temperature reaches about 195–203°F, which yields tender, pull-apart meat. Plan for roughly 2–3 hours depending on rib size and whether you’re using baby backs or spare ribs. During this phase, avoid opening the lid too often; each peek introduces heat loss that slows the process. If your grill runs hot, you may extend the cook time by 15–30 minutes. You can moisten the surface with a light spray of water or apple juice if the rub begins to look dry, but don't flood the meat or rinse away the bark.
The wrap (Texas crutch) and glaze technique
Wrapping the ribs in foil or butcher paper during the middle of the cook traps moisture, helping ribs finish tenderly. About 30–60 minutes before the final stage, you can wrap and return to indirect heat. After unwrap, apply a glaze or sauce and move the ribs to direct heat to set the crust. This glaze should be a thin layer that caramelizes quickly under heat. Monitor closely to avoid burning. The wrap length and glaze timing are flexible; the goal is a glossy bark with a juicy interior.
Finishing with sear, glaze, and rest
Finish with a short sear over direct heat to form a caramelized crust on the outside while preserving tender interior. Aim for 1–3 minutes per side, depending on grill temperature. After removing from heat, apply a final glaze if desired and let the ribs rest for 10–15 minutes. Resting allows juices to redistribute; cutting too soon sends juices running out and can dry the meat. Slice between bones and serve with your favorite sides such as coleslaw, corn on the cob, or beans.
Troubleshooting and doneness tests
If the ribs seem dry, the heat may be too high or the cooking time too short. Use a two-zone setup to prevent direct heat from scorching the bark. Doneness can be tested by the bend test (the rack should bend with some resistance and the bones may begin to protrude slightly), by probing for tenderness near the bone, or by checking the internal temperature in the 195–203°F range. Look for a glossy, dark exterior bark; if it's pale, continue cooking. Every grill is different, so rely on your senses as well as a thermometer. Grill Cooking analysis shows that ribs cooked with indirect heat and a brief final sear tend to have better bark and juiciness.
Flavor variations and rubs
Experiment with rub blends: brown sugar-based rub for sweetness, chili powder for heat, and smoked paprika for depth. For barbecue fans, apply a sauce during the final minutes to avoid burning; a thin layer is enough to set and gloss the surface. You can also create a mop with apple cider vinegar and water for extra moisture. If you want a different finish, try a coffee rub or a citrus glaze for bright notes. Always taste and adjust, and feel free to rotate chips in a charcoal grill if you want extra smoke—though this is optional for gas grills.
Serving, storing, and leftovers
Let the finished ribs rest 10–15 minutes, then slice between bones for even portions. Serve with classic sides such as coleslaw, corn on the cob, and baked beans. Store leftovers in an airtight container in the fridge for up to 4 days, or freeze for longer storage. Reheat gently in a 250–300°F oven or on the grill with a splash of moisture to refresh the bark. Resting and slicing properly preserves tenderness and crust, making the leftovers almost as good as the original.
Tools & Materials
- Gas grill(Preheated and organized for two-zone cooking)
- Long-handled tongs(For turning and handling ribs without burns)
- Instant-read meat thermometer(Target internal temp: ~195–203°F)
- Grill brush (stainless steel)(Clean grates before and during cooking)
- Aluminum foil(Wrap during the Texas crutch if desired)
- Basting brush (silicone)(Apply glaze lightly during finishing)
- Heat-resistant gloves(Protect hands during flips and searing)
- Spray bottle (water or juice)(Moisture management if surface dries)
Steps
Estimated time: Estimated total time: 2.5-3.5 hours
- 1
Choose ribs and prep rub
Decide between baby backs and spare ribs based on time and preference. Remove the membrane on the bone side for better rub penetration. Pat dry, apply a balanced rub with salt and a touch of sweetness, and allow to rest for at least 30 minutes before cooking.
Tip: Keep the rub composition consistent across racks for uniform bark. - 2
Preheat two-zone grill
Preheat the grill and set up two zones: indirect (low heat) and direct (high heat) for finishing. Ensure the indirect side remains steady around 225–275°F. Calibrate the burners if your grill reads high variability.
Tip: Give the grill 10–15 minutes to reach stable temps before placing meat. - 3
Place ribs on indirect zone
Position ribs on the cooler side of the grill away from direct flames. Close the lid to maintain a stable environment and avoid frequent lid lifting.
Tip: Use a thermometer to monitor ambient grate temperature rather than guessing. - 4
Maintain indirect heat and monitor
Cook slowly in indirect heat for 2–3 hours, checking every 30–40 minutes to ensure temperature stays in range. Spritz or spray lightly if the surface looks dry, keeping bark intact.
Tip: Resist the urge to peak too often; each opening costs heat and time. - 5
Wrap if desired (Texas crutch)
About halfway through, wrap ribs in foil or butcher paper to lock in moisture. Return to indirect heat; unwrap toward the end to glaze.
Tip: Wrapping speeds tenderness but can soften bark—plan accordingly. - 6
Finish on direct heat and glaze
Unwrap, brush with glaze, and move to direct heat for 5–10 minutes to caramelize the crust. Watch closely to prevent burning.
Tip: Apply glaze in a thin layer for a glossy finish without char. - 7
Rest and slice
Remove from heat and let ribs rest 10–15 minutes. Slice between bones for clean portions and minimal juice loss.
Tip: Resting is essential for juiciness; slicing too early releases juices. - 8
Serve with sides
Pair ribs with classic accompaniments like coleslaw, corn on the cob, and beans. Offer extra sauce on the side for dipping or brushing.
Tip: Have towels handy; rib juices can be very flavorful and sticky.
FAQ
Can I cook ribs on a gas grill with only one burner?
Yes. Use the other side as indirect heat and keep the lid closed to simulate two zones. Adjust temperature carefully and monitor doneness.
Yes—if you only have one burner, use the other side for indirect heat and keep the lid on to mimic two zones.
Should I remove the membrane before grilling?
Yes. Removing the membrane helps rubs penetrate and tenderize the meat. It’s a quick step that pays off in flavor and texture.
Yes. Removing the membrane helps spices penetrate and makes the ribs more tender.
Is wrapping the ribs during cooking necessary?
Wrapping is optional but helpful. It speeds tenderness and locks in moisture; remove before finishing to re-bark the surface.
Wrapping is optional but can help tenderness; unwrap near the end to set the crust.
What internal temperature indicates doneness for ribs?
Aim for an internal temperature around 195–203°F. Use tenderness and bone pull along with temp to judge doneness.
Target around 195 to 203 degrees Fahrenheit; check tenderness alongside temperature.
How long should ribs rest after cooking?
Rest for 10–15 minutes after cooking to redistribute juices. Resting improves slicing and juiciness.
Rest the ribs for 10 to 15 minutes before slicing.
Watch Video
Quick Summary
- Plan two-zone cooking to control heat and moisture.
- Remove membrane and apply rub for deeper bark.
- Wrap during cooking if you want extra tenderness.
- Grill Cooking's verdict: this method yields consistent, juicy ribs with a glossy crust.