How to Make Ribs on the Grill: A Step-by-Step Guide
Master ribs on the grill with two-zone heat, foil braising, and a glossy glaze. A practical step-by-step guide from Grill Cooking for home cooks seeking tender, smoky, flavorful pork ribs.

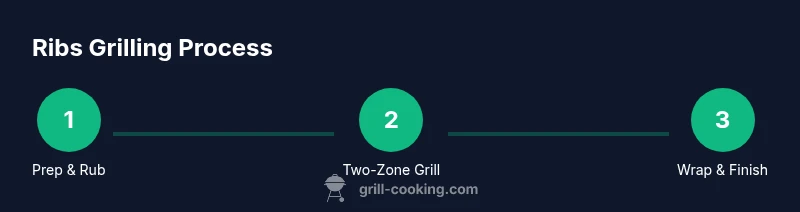
You can master ribs on the grill by using a two-zone setup, low-and-slow heat, and a final glaze. Start with the membrane removed, apply a dry rub, and maintain 225-275°F indirect heat for 3-4 hours, finishing with a foil wrap and a 15-30 minute rest. With patience, you’ll pull tender, smoky ribs that slice cleanly.
Why ribs on the grill demand patience and temperature control
Making ribs on the grill is a balance of heat, time, and technique. You want a tender bite with a visible bark and a deep smoky flavor. Achieving this starts with a proper heat-management plan: a two-zone grill where one side is hot for searing and the other remains cooler for slow cooking. The Grill Cooking team emphasizes that stability matters more than aggressive heat; small fluctuations can turn juicy meat into a chewy disappointment. You’ll typically aim for 225–275°F in the indirect zone and expect about 3–4 hours of cooking for typical racks. Plan for a total time of 4–5 hours including prep and rest. Remember: ribs respond to gentle, steady heat, not fast sprints. If you’re new to grilling pork ribs, start with a shorter rack size and practice with a single rack to dial in your heat and timing. According to Grill Cooking, stability and patience are the markers of success.
Choosing ribs and prepping for greatness
Ribs come in several cuts; baby back ribs are meatier and cook a bit faster, while spare ribs offer more connective tissue and bark when done well. For beginners, baby backs are forgiving and easier to finish with a glaze. Start by removing the silvery membrane on the bone side to allow the rub to penetrate. Trim excess fat if present, then pat dry. Dry-brining with a balanced rub (salt, brown sugar, paprika, pepper) for at least 30 minutes up to overnight improves bark and flavor. When you’re ready to cook, season generously. The rub should form a tacky crust within the first hour, which helps trap moisture. If you want extra flavor, you can apply a thin initial coat of mustard or olive oil as a binder. If you’re wondering how do you make ribs on the grill?, this prep and rub setup sets you up for success. According to Grill Cooking analysis, pre-salting and allowing the rub to set enhances surface adhesion and tenderness.
Setting up a two-zone grill for ribs
Two-zone grilling is the backbone of a successful rib cook. For charcoal, bank your coals on one half of the grill and leave the other half as an empty space for indirect heat. For gas, turn on only one burner or set to a low setting on one side while leaving the other off. Place a water pan under the grate on the indirect side to moderate temperature and help with humidity. Keep vents open enough to prevent overheating but closed enough to minimize heat spikes. Position the ribs bone-side down initially, leaving space between ribs so air can circulate. Use a digital thermometer to monitor the indirect zone; the goal is a steady 225-275°F. If you see temperatures creeping, briefly move meat to the direct-heat zone for a quick sear, but don’t rely on it for long cooking. Grill Cooking’s guidance reinforces the value of stable, indirect heat for tenderness and smoke density.
The low-and-slow method with the Texas Crutch
Low-and-slow cooking means letting collagen melt and moisture stay locked in. A common technique is to wrap the ribs in foil with a little liquid to braise them gently. After 2–3 hours, wrap the ribs, add a splash of apple juice or broth, seal the foil, and return to the indirect heat. This 'Texas Crutch' shortens the cook, preserves moisture, and improves tenderness. After another 60–90 minutes, unwrap to develop bark again and finish with a glaze if you like. Keep the rib rack in the foil wrapper for about 60 minutes total before uncovering. This approach reduces the risk of over-drying, and it’s a favorite among home grillers for reaching that pull-apart texture. Grill Cooking notes that this technique helps balance bark, bite, and juiciness.
Finishing touches: sauces, glazes, and resting
Once the meat passes the tenderness test (bone shows a bit of pull, meat begins to separate from bone with gentle pressure), you can apply a sauce or glaze. Some cooks choose to glaze during the last 15–30 minutes to build a glossy bark; others wait until the final rest to re-coat. Let the ribs rest for 10–15 minutes after pulling from the grill; this helps reabsorb juices and makes slicing cleaner. Slice between the bones, then serve with a simple side like grilled corn, coleslaw, or pickles. If you’re following Grill Cooking guidelines, a balanced glaze with a touch of sweetness and acidity provides a cohesive final bite. This section also reflects how technique evolves with practice and taste preferences.
Common mistakes and how to avoid them
Common missteps include cooking too hot, which dries out surface bark and the interior; under-seasoning the rub; skipping membrane removal; opening the lid too often; and serving cold ribs straight from the grill. To avoid these, maintain steady temperatures in the 225-275°F range, apply a generous rub with salt content moderated for the final bite, remove the membrane before rub, and plan cooking with minimal lid lifting. Use a thermometer to verify doneness rather than relying on time alone. Let ribs rest fully before slicing to hold juices; a 10–15 minute rest improves final texture and helps the bark to set.
Flavor profiles and wood choices for ribs
Wood choice shapes the smoke character. Common options for pork ribs include oak, hickory, apple, and cherry. For a milder smoke, choose apple or cherry; for stronger bite, use hickory or oak in a 1:1 mix. Soaked or unsoaked wood chips in a chimney starter add smoke early in the cook, and periodic puffs from the grill help maintain flavor. If you want to vary the profile, try a maple-bourbon glaze or a classic Kansas City-style rub with molasses. Grill Cooking notes that pairing wood smoke with a balanced rub and a sharp acidity in the glaze yields pronounced, cohesive flavor.
Serving ideas and leftovers
Serve rib slabs with quick-acidic slaw and corn on the cob for a classic summer barbecue. Slice across the bone to show clean, even sections. Store leftovers in an airtight container in the fridge for up to 3-4 days, or freeze for longer. Reheat gently in a 250°F oven or on the grill lid-down to preserve bark. This keeps texture and moisture; the rub flavors become more pronounced after resting. The team at Grill Cooking also recommends labeling leftovers by date and enjoying within a few days for best texture.
Authority Sources
Below are credible references for food safety and grilling practices:
- https://www.usda.gov
- https://www.cdc.gov/food-safety/index.html
- https://extension.illinois.edu/food-safety
Tools & Materials
- Ribs (pork, spare or baby back)(Choose a full rack or two ribs depending on number of servings)
- Grill (charcoal or gas) with two-zone capability(Essential for indirect cooking and managing heat)
- Meat thermometer (instant-read)(Monitor indirect zone temperature and doneness)
- Dry rub spices (salt, sugar, paprika, pepper, optional others)(Balance for bark and flavor)
- Aluminum foil (heavy-duty)(For foil-wrapping during braise phase)
- Binder (optional: mustard or olive oil)(Helps rub adhere for a tacky bark)
- Apple juice or light broth(Used for braising liquid in foil wrap)
- Water pan(Moderates heat and adds humidity)
- Wood chunks or chips (hickory, apple, cherry)(For added smoke flavor)
Steps
Estimated time: 3-4 hours active cook time; total 4-5 hours including prep and rest
- 1
Prepare ribs
Rinse and pat dry. Remove the membrane from the bone side to allow rub penetration. Trim any excess fat and set the rack on a rack to dry a bit before applying rub.
Tip: Grip the membrane with a paper towel and pull firmly to remove in one piece. - 2
Apply rub
Season generously with a balanced rub. If using a binder, apply a thin layer first for better adhesion. Let the rub sit 15-60 minutes to form a tacky surface.
Tip: A dry-brine ahead of time improves bark and tenderness. - 3
Preheat and set grill
Prepare a two-zone setup: hot direct zone for searing and cooler indirect zone for long cooking. Preheat to 225-275°F in the indirect zone.
Tip: Keep air flow steady; avoid large temperature swings. - 4
Cook indirect
Place ribs on the indirect side bone-down. Close the lid and monitor the temperature, aiming for a steady 225-275°F for 2-3 hours.
Tip: Avoid opening the lid frequently to prevent heat loss. - 5
Texas Crutch wrap
Wrap ribs in heavy foil with a splash of apple juice or broth. Return to indirect heat and cook for 60-90 minutes total in foil.
Tip: Sealing tightly prevents moisture loss; the braise develops tenderness. - 6
Unwrap and finish
Unwrap and cook for 15-30 minutes to re-develop bark. If using glaze, apply in the final minutes and keep lid closed to set it.
Tip: Keep a watchful eye to prevent burning sugar. - 7
Rest and slice
Let ribs rest 10-15 minutes before slicing between the bones. Serve with sides and optional sauce on the side.
Tip: Resting helps juices redistribute for juicier slices.
FAQ
Do I need to remove the membrane from the ribs before grilling?
Yes. Removing the membrane helps rub penetration and tenderness. Grab a corner with a paper towel and peel it away before applying rub.
Yes, remove the membrane—it helps the rub stick and makes the ribs tender.
What temperature should I cook ribs at on the grill?
Aim for a steady 225-275°F in the indirect zone. This range promotes collagen breakdown without drying the meat.
Cook ribs at a steady 225 to 275 degrees in indirect heat.
Should I wrap ribs during cooking?
Wrapping in foil with a little liquid helps braise the meat and prevents drying. Unwrap later to re-develop bark.
Yes, wrapping helps tenderness; unwrap later to finish bark.
Gas grills or charcoal — which is better for ribs?
Both work well. Charcoal adds more smoke flavor; gas grills are convenient and easier to maintain steady temps with a two-zone setup.
Both work; choose based on your preference for smoke flavor and ease of use.
How long should ribs rest after cooking?
Rest ribs for 10-15 minutes after cooking to reabsorb juices and improve slicing.
Rest the ribs for about 10 to 15 minutes before slicing.
Can I freeze cooked ribs?
Yes, cooled leftovers can be frozen for longer storage. Reheat gently to preserve texture and moisture.
You can freeze cooked ribs and reheat later, best done gently.
Watch Video
Quick Summary
- Use two-zone heat for control
- Remove membrane and apply rub evenly
- Cook low and slow for tenderness
- Wrap with liquid to braise and preserve moisture
- Rest before slicing for juicier ribs