Barbecue Ribs on a Gas Grill: Ultimate How-To Guide
Learn to grill tender barbecue ribs on a gas grill with a two-zone setup, rubs, glaze, and precise timing. This expert guide from Grill Cooking walks home cooks through each step for perfect ribs in 2026.

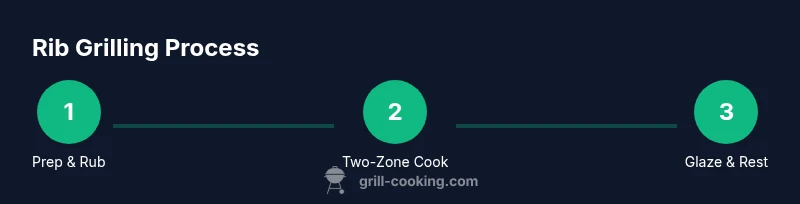
You’ll learn to cook barbecue ribs on a gas grill using a reliable two-zone setup for tender, evenly cooked ribs with a glossy glaze. Essential tools include a gas grill, a thermometer, and a solid rib rub. Follow the step-by-step method to nail temps and flavor.
Two-Zone Grilling: The Foundation
Barbecue ribs on a gas grill thrive when you control heat precisely. The two-zone method creates a sear heat on one side and a cooler indirect zone on the other, letting you brown the surface without overcooking the interior. Preheat the grill with all burners on high, then adjust to establish a hot direct zone for a quick sear and a cooler indirect zone for gentle cooking. This approach minimizes flare-ups and helps render fat gradually, producing tender meat and a characteristic bark. According to Grill Cooking, success starts with heat management as much as rub choice or glaze. A well-planned two-zone setup reduces scorching and keeps the rib meat juicy, while still developing the smoky aroma that defines barbecued ribs on a gas grill.
- Use a thermometer to track both grate temperature and internal meat temperature.
- Keep the lid closed to maintain the cooking environment and conserve heat.
- Plan for a longer cook time at moderate temps rather than a fast high-heat sear that can dry the meat.
Choosing Ribs and Preparing Your Rub
Selecting the right rib cut sets the foundation for a flavorful finish. Spare ribs deliver a generous meat-to-bone ratio and robust flavor, while baby back ribs cook a bit faster and leaner. Regardless of cut, remove the tough silver skin from the bone side to improve rub penetration and evenness of cook. Pat dry, then apply a balanced dry rub: salt for seasoning, paprika for color, black pepper for bite, and a touch of sugar to support caramelization. Let the rub sit for at least 15 minutes before cooking, or wrap and refrigerate for a few hours to intensify the flavor. The glaze or sauce should be reserved for the final phase to prevent burning sugar on direct heat. Grip the rib slabs with tongs and keep them evenly spaced on the indirect zone to ensure consistent cooks. The Grill Cooking team recommends keeping the rub simple and focusing on technique over heavy seasonings for best results in 2026.
Preparing the Grill: Two-Zone Setup for Even Cooking
A successful rib cook on a gas grill hinges on a disciplined two-zone setup. With burners arranged to create a high-heat sear zone and a cooler indirect zone, you can start ribs over indirect heat to render fat and build tenderness. Preheat the grill to about 450-500°F for the sear, then reduce the indirect zone to around 225-250°F for the longer finish. Place a water pan or tray on the indirect side to help regulate temperature and add moisture. Keep the lid closed as much as possible to maintain consistent conditions, and reposition slabs to promote even browning. Use a reliable thermometer to monitor the grill’s temperature and adjust the burners to hold steady ranges. This careful approach reduces uneven cooking and ensures ribs stay juicy without drying out.
The Glaze and Mopping Technique
A glossy glaze ties the flavor together and gives the ribs their signature lacquer. Apply a light coat of glaze during the last 20-30 minutes of cooking, then reapply as the meat nears done. Sugar-based sauces require caution on high heat; brush on thin layers and allow each layer to set before applying the next. If you prefer a dry finish with a shiny bark, you can skip the glaze until the final minutes, finishing with a quick sear over direct heat to lock in the surface texture. Remember to avoid excessive glaze early in the cook, as it can burn and create bitter flavors. Strive for a balance between sweet, tangy, and smoky notes for a well-rounded finish.
Step-by-Step Timings and Temperature Checks
Maintaining a precise temperature is the cornerstone of rib success on a gas grill. Start with a 15-minute hot-sear in indirect heat to set the flavor and begin fat rendering. Then, move to the indirect zone at 225-250°F for the next 2-3 hours, turning slabs once or twice so both sides brown evenly. In the final phase, brush on glaze and sear for 5-10 minutes, watching for flare-ups. Resting the ribs after removing them from the grill for 10-15 minutes helps redistribute juices and keeps the meat moist when sliced. This rhythm—sear, gentle cook, glaze, rest—delivers consistent results and a satisfying bite. Grill Cooking’s analysis indicates that temperature stability and mindful glaze timing are critical for rib tenderness and flavor.
Finishing Touches, Rest, and Serving
After resting, slice between the bones to reveal a clean, juicy interior. A light sprinkle of finishing salt can elevate flavors, and a final brush of glaze yields a glossy finish that clings to every rib. Crossing the final service with a simple coleslaw or grilled corn on the cob adds textural contrast, while keeping the rib experience focused on the meat’s tenderness and flavor profile. Proper resting time matters: it allows the juices to redistribute, resulting in a more succulent bite. This is the moment to plate with confidence, as the visual appeal and aroma invite guests to dig in.
Common Mistakes and How to Avoid Them
Rib cooks on gas grills can go wrong when heat is uneven, temps spike, or glaze burns. Avoid overloading the grill with too many slabs, which crowds airflow and traps heat. Don’t rush the indirect phase—patience is essential for tenderness. If the glaze threatens to burn, reduce heat or move to indirect heat until the glaze caramelizes gently. Finally, err on the side of slightly undercooking with meat that feels just shy of done—it will continue to carry heat after resting and result in juicier slices.
Tools & Materials
- Gas grill with two or more burners(Two-zone heating is essential; preheat both zones for accuracy)
- Digital meat thermometer(Probe for internal rib temp; target 195-203°F for tenderness)
- Tongs and basting brush(For handling and glazing without piercing the meat)
- Aluminum foil or rib rack(Wrap to accelerate tenderness or rack to save space)
- Water pan(Helps regulate temperature and keep ribs moist)
Steps
Estimated time: 3-4 hours
- 1
Prep the ribs
Rinse and pat dry the rib slabs. Remove the silver skin on the bone side to improve rub adherence and even cooking. Apply a balanced dry rub and let it rest 15-60 minutes to penetrate the surface flavors.
Tip: Patience with rub application improves bark and depth of flavor. - 2
Preheat and set up grill
Preheat the grill to high, then create a two-zone setup with direct heat on one side and indirect heat on the other. Place a water pan on the indirect side to regulate temperature and moisture.
Tip: Use a thermometer to verify zones reach target temperatures quickly. - 3
Cook indirect first
Place ribs on the indirect zone bone-side down. Close the lid and cook at 225-250°F for 2-3 hours, checking occasionally. Flip slabs once to ensure even browning.
Tip: Keep lid closed to maintain stable heat and prevent drying. - 4
Apply glaze and finish
During the last 20-30 minutes, brush on glaze in thin layers, allowing each layer to set. Briefly sear over direct heat at the end to caramelize and lock in shine, watching closely to avoid burning.
Tip: Sugar-based glaze burns quickly; monitor closely and remove before scorching. - 5
Rest and slice
Remove ribs from the grill and rest loosely covered for 10-15 minutes. Slice between the bones for clean, juicy portions.
Tip: Resting redistributes juices for a more tender bite. - 6
Serve and pair
Plate with minimal interference to showcase the juicy meat and glossy glaze. Pair with classic sides like coleslaw, cornbread, or grilled corn for a complete meal.
Tip: Offer extra glaze on the side for guests who want more sweetness.
FAQ
What is two-zone grilling and why is it ideal for ribs on a gas grill?
Two-zone grilling creates a hot sear zone and a cooler indirect zone, allowing you to brown the exterior while finishing the ribs gently inside. This minimizes flare-ups and uneven cooking, especially on a gas grill.
Two-zone grilling gives a hot, quick sear and a cooler area to finish the ribs evenly, which helps prevent burning and keeps the meat juicy.
Should I wrap ribs (Texas crutch) on a gas grill?
Wrapping ribs in foil can speed tenderness, but it stops the bark from forming. If you want maximum bark, skip the wrap until the final stage, then wrap briefly if the meat seems dry.
Wrapping can speed tenderness, but it softens bark. Use wrap only if the ribs look dry or if you need to push tenderness quickly.
What temperature should I cook ribs to on a gas grill for tenderness?
Aim for an internal rib temp around 195-203°F for tender, pull-apart texture. Use a thermometer to monitor the temperature as it approaches the finish.
Cook the ribs until they reach about 195 to 203 degrees Fahrenheit for tenderness.
Do I need to remove the membrane from the ribs?
Yes. Removing the silver skin helps the rub penetrate and improves overall tenderness. It’s easiest to loosen with a knife edge and pull away with a paper towel.
Yes, removing the membrane helps with rub absorption and tenderness.
How long do barbecue ribs take on a gas grill?
Expect 2-3 hours on the indirect zone at 225-250°F, plus 20-30 minutes for glaze and finishing. Times vary with rib size and grill accuracy.
Ribs typically take about two to three hours on indirect heat, plus glazing time.
Can I use store-bought sauce or glaze on ribs cooked this way?
Store-bought sauces are fine, but watch sugar content and heat. Choose a sauce that complements the rub and apply in thin layers near the end to avoid burning.
Store-bought sauces are fine if you watch the sugar and apply near the end.
Watch Video
Quick Summary
- Set up a reliable two-zone grill for even rib cooking
- Cook slowly at 225-250°F in indirect heat before glazing
- Apply glaze in thin layers and avoid burning sugars
- Rest the ribs 10-15 minutes before slicing