What to Do When You Cook: A Practical Guide for Home Cooks
A practical, step-by-step guide for home cooks to handle every stage of cooking—from mise en place to plating—on the grill and stove, with safety tips and timing.

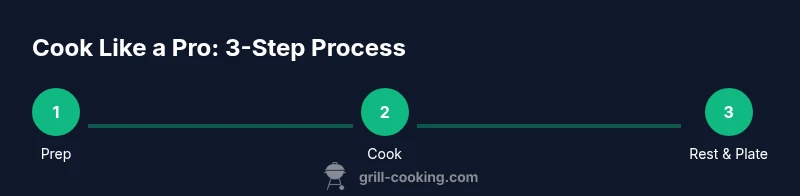
You’ll master cooking confidently from start to finish. The guide covers mise en place, heat control, safe handling, doneness checking, and plating ideas. Before you begin, gather essential tools, read safety tips, and choose appropriate cooking methods. By following these steps, you’ll reduce guesswork and improve texture, flavor, and consistency in every meal.
Mise en Place: Set Yourself Up for Success
For beginners wondering what to do when you cook, the answer starts with mise en place. This means gathering ingredients, tools, and towels before you touch heat. Lay out your proteins, chop vegetables, measure spices, and pat meats dry. Have tongs, a sharp knife, a cutting board, and a timer within arm’s reach. Preheat the grill if you’re grilling, and inspect the grates for residue. A clean, organized station reduces stress and helps you control timing better. Plan your cook times for each item, so you know when to move pieces between direct and indirect heat if you’re using a two-zone setup. When everything is ready, you can focus on technique rather than scrambling at the last minute.
Heat Management: Direct vs Indirect and Temperature Control
Two-zone heat is a common strategy for cooking on grills. Start with a hot sear over direct heat to develop flavor and color, then move foods to cooler indirect heat to finish without scorching. Avoid opening the lid too often, which drops temperature and lengthens cook time. Use a two-zone setup by banking coals on one side or dialing in zones on a gas grill. Thicker cuts benefit most from this approach, while delicate vegetables can cook quickly in indirect heat after a brief sear. As you gain confidence, you’ll learn how long to keep each item on each zone for different thicknesses and densities.
Safe Handling and Food Safety
Safety is a core part of every cook. Wash hands before handling food, and keep raw proteins away from ready-to-eat items. Use separate cutting boards or thoroughly sanitize between uses to prevent cross-contamination. Keep perishable ingredients chilled until ready to cook, and avoid leaving hot meat at room temperature for more than two hours. When grilling, always use a food thermometer to verify doneness and remove items from heat promptly to avoid overcooking. If you’re cooking for children, the elderly, or immune-compromised guests, follow stricter food safety guidelines and keep hot foods hot and cold foods cold.
Flavor Foundations: Seasoning, Marinades, and Oils
Flavor starts with salt and sweeteners balanced with acidity and heat. Season proteins evenly just before cooking to form a crust, and consider light marinades for extra moisture and aroma. Oils help prevent sticking and carry flavor to the surface. For vegetables, toss with a touch of oil and salt to promote even browning. Don’t over-marinate delicate proteins, and avoid acidic marinades long before cooking for lean cuts. Fresh herbs, citrus zest, and a final sprinkle of finishing salt right before serving can elevate the dish without masking the grill aroma.
Doneness, Temperature, and Rest
Doneness is about safety and texture. Use a thermometer to check internal temperatures appropriate for the protein you’re cooking, and know visual cues as a supplement to the reading. Remove meat just shy of the target temperature to allow carryover cooking. Resting is essential: it lets juices redistribute for juicier slices and more even coloring. While you rest, you can tent loosely with foil to retain heat without steaming the surface. With practice, you’ll internalize approximate times for different thicknesses and avoid the ’overdone on the outside, underdone inside’ pitfall.
Plating, Sides, and Timing
Plating is the final opportunity to impress. Plan sides and sauces to complement the main protein and coordinate timing so everything lands hot together. Use color contrast on the plate—bright greens, warm reds, and neutral bases—to create visual appeal. A light drizzle of finishing oil or a squeeze of fresh lemon can brighten flavors. Consider texture variety: a crisp side, a creamy sauce, and a juicy main. Clean plates go a long way in delivering a confident, restaurant-like experience at home.
Troubleshooting Common Scenarios
Grilling can present surprises. If you see flare-ups, move food away from the flames and close the lid to smother the fire. If meat is searing too quickly on the outside but remaining undercooked inside, reduce the heat or finish over indirect heat. Dryness is common with lean cuts; add a light brush of oil or a tiny knob of fat to regain moisture. If vegetables scorch or stick, raise them off the direct flame with a grill basket or skewers and turn frequently. When in doubt, pause, reassess heat, and recheck temperatures.
Authority Sources and Safety Guidelines
Rely on established food-safety guidelines and grilling best practices from reputable sources to inform your technique. For practical safety and temperature targets, consult government and educational resources. This section intentionally points readers to external authorities so you can verify temps and handling steps as you build confidence in the kitchen.
Maintenance, Cleaning, and Aftercare
A clean grill is a happier, safer grill. After cooking, while the grill is still warm, scrape off residue with a stiff brush and wipe surfaces with a damp cloth. Empty and clean drip pans as needed, and re-season grates if you have a cast iron surface. Store tools in an accessible spot and wash used utensils promptly to avoid lingering odors. A quick post-cook routine saves time later and extends the life of your equipment.
Tools & Materials
- Digital kitchen thermometer(For measuring air temperature and doneness accurately)
- Instant-read meat thermometer(Check internal temps quickly without cutting into food)
- Timer or smartphone timer(Keep track of cook times for multiple items)
- Tongs(Grip and turn food without piercing it)
- Long-handled heat-resistant gloves(Protect hands from hot surfaces)
- Cutting boards (separate for meat and produce)(Prevents cross-contamination)
- Sharp knife(Efficient prep and portioning)
- Cast-iron skillet or grill pan (optional)(Great for finishing and searing indoors)
- Oil with a high smoke point(Lubricates grates and foods to prevent sticking)
Steps
Estimated time: Total time: 60-90 minutes
- 1
Gather and prep ingredients
Collect all needed ingredients, pat proteins dry, trim excess fat, chop vegetables, and measure spices. This single action sets you up for a smooth cook and helps prevent last-minute scrambling. Keep everything within arm’s reach to minimize movement during cooking.
Tip: Label bags or containers to keep flavor profiles consistent. - 2
Preheat grill and set heat zones
Preheat the grill to your target temperature and establish hot direct heat for searing plus cooler indirect heat for finishing. Close the lid to bring the temperature up efficiently and avoid heat loss. Confirm the zones with your thermometer or grill gauge before you start.
Tip: Two-zone setup is especially helpful for thicker cuts. - 3
Season and oil foods lightly
Pat proteins dry and apply a light, even coat of oil and seasoning. Avoid heavy marinades that can burn at high heat. Season vegetables similarly to promote even char and flavor development.
Tip: Season just before cooking for best crust formation. - 4
Sear on direct heat to develop color
Place items over direct heat to form a flavorful crust. Don’t move them too soon; allow a proper sear before turning. Use tongs to flip instead of piercing the meat with a fork.
Tip: Resist the urge to flip constantly—patience yields better browning. - 5
Finish with indirect heat for even doneness
Transfer to indirect heat to finish cooking through without burning the exterior. This is especially important for thicker cuts or larger vegetables that need time to cook through.
Tip: Cover the grill when finishing to trap heat for even cooking. - 6
Check doneness with a thermometer
Test internal temperatures for safety and texture. Remove the item from heat when it’s just shy of target to allow carryover cooking. Rely on both thermometer readings and visual cues for best results.
Tip: Keep a small reference chart handy for target temps. - 7
Rest meat before slicing
Let meat rest for several minutes after cooking to redistribute juices. Resting improves juiciness and tenderness. Tent lightly with foil if needed to retain heat.
Tip: Cut against the grain for maximum tenderness. - 8
Plate, garnish, and serve
Arrange components on the plate with attention to color and balance. A drizzle of finishing oil or a squeeze of citrus can brighten the dish. Serve hot for the best texture.
Tip: Use a light touch with toppings to avoid overpowering the main flavor. - 9
Clean up and store leftovers
While things are still warm, wipe surfaces, clean the grates, and store leftovers promptly in shallow containers for quick cooling. Label leftovers with date and contents.
Tip: Store in small portions to reheat evenly.
FAQ
What is mise en place and why is it important when cooking on a grill?
Mise en place is the practice of prepping and organizing all ingredients and tools before you start cooking. It reduces stress, speeds up the process, and helps ensure consistent results when grilling.
Mise en place means getting everything ready before you cook. It makes grilling smoother and more reliable.
How do I know when meat is safely cooked on the grill?
Use a thermometer to check the internal temperature of the meat. Target temperatures vary by protein, and you should remove the food just before it reaches the exact temp to account for carryover cooking.
Check the inside with a thermometer, and pull it a little early so it finishes perfectly as it rests.
Should I always rest meat after grilling?
Resting allows juices to redistribute, resulting in juicier slices and more even texture. Plan rest times to align with plating for a hot, flavorful finish.
Let the meat rest a bit before slicing for better flavor and juiciness.
What are common issues and quick fixes when grilling?
Common issues include flare-ups, undercooked centers, and dry meat. Use two-zone heat, move items away from flames, and finish on indirect heat to even out cooking.
If you see flames, move the food away and finish with indirect heat to avoid burning.
Which tools are essential for successful grilling?
Key tools include a meat thermometer, tongs, a timer, a sharp knife, and heat-resistant gloves. A clean grill brush also helps keep grates in good shape.
Have a thermometer, tongs, timer, and gloves ready for better grilling.
Can I cook vegetables on the grill with meat?
Yes. Cut vegetables evenly, toss with a little oil, and place on the grill with adequate space. Use a grill basket for smaller pieces to prevent falling through grates.
Veggies cook nicely beside meat; keep pieces uniform and use a basket for small bits.
Watch Video
Quick Summary
- Plan mise en place before you cook.
- Use direct heat for searing; indirect heat for finishing.
- Monitor doneness with a thermometer for safety and flavor.
- Rest and plate thoughtfully for best texture and presentation.
- Clean as you go to simplify post-cook cleanup.