How to Grill on an Outdoor Grill: Step-by-Step Guide
Learn how to grill on an outdoor grill with expert heat control, safety, and flavor. This in-depth guide covers setup, direct/indirect heat, food prep, and cleanup for perfect results.

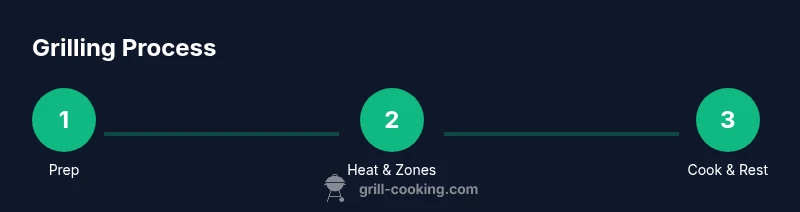
This guide shows you how to grill on an outdoor grill with confidence, covering setup, heat management, direct and indirect grilling, safe food handling, and clean-up. You’ll learn zone cooking, timing, and resting to achieve flavorful, doneness-consistent results every session.
Why mastering outdoor grilling matters
According to Grill Cooking, mastering outdoor grilling expands your weekly cooking repertoire, boosts flavor, and builds confidence behind the fire. Proper technique helps you manage heat, control flare-ups, and deliver evenly cooked meals with fewer mistakes. This section sets the foundation: you’ll understand why grill control matters, what the basic terms mean, and how heat behaves on an open flame. By the end, you’ll be ready to approach your grill with a plan rather than guesswork, whether you’re cooking burgers, chicken, or vegetables.
Grill Cooking analysis shows that consistent heat management reduces the likelihood of undercooked centers and over-charred exteriors. The goal is reproducible results: a nice sear, a juicy interior, and clean flavor without burning fat or marinades. Keep your workspace organized, keep tools within reach, and adopt a steady rhythm rather than chasing flames. This mindset makes backyard grilling approachable for beginners and rewarding for seasoned home cooks.
Essential tools and setup
Before you light the fire, gather the essentials and visualize your station. A well-organized setup speeds up cooking and reduces mistakes. You’ll want a reliable grill brush, long tongs, a sturdy spatula, and an instant-read thermometer to verify doneness. Have a heat-safe glove within reach, plus a spray bottle of oil and a small bowl of oil for greasing grates. Place a towel, a spray bottle, and a clean plate for rested meat nearby. A timer helps you track resting periods and avoid overcooking, while a perforated tray or cutting board keeps surfaces clean and ready for service.
For charcoal grills, basic charcoal, lighter fluid alternatives, and an indirect-heat setup are essential. For gas grills, ensure gas is connected, regulator is secure, and knobs respond smoothly. If you’re new to multi-zone grilling, practice with simple veggies first to feel the heat’s behavior in your setup.
Direct heat vs indirect heat: zone cooking
Direct heat is great for searing and fast-cooking items like burgers, thin steaks, hot dogs, and certain vegetables. Indirect heat, by contrast, uses heat radiating from the sides or from a different zone of the grill to cook slowly and evenly—perfect for larger cuts, bone-in pieces, or foods that benefit from gentle cooking. Mastery of zones means you can sear quickly, then move the item to a cooler area to finish without burning.
If your grill supports it, set up two zones: a hot zone for searing and a cooler zone for finishing. On a charcoal grill, banks of coals on one side create an indirect area; on a gas grill, turn on only one or two burners for the indirect zone. Practice with a simple test piece to see where the heat concentrates and how long it takes to reach the target internal temperature.
Preheating and heat management: getting it right
Preheating is a critical step that wakes up the grates and creates a consistent cooking surface. For most foods, a preheat of 10–15 minutes is sufficient, but plan longer for thicker cuts. Once you’re hot, oil the grates lightly to prevent sticking. Use a thermometer or your hand-height judgment (safely) to gauge heat: 425–450°F (218–232°C) for direct grilling and 350–400°F (177–204°C) for indirect grilling is a good starting range. Control flare-ups by moving food away from flames, opening the lid to starve the fire slightly, and having a spray bottle ready for minor flare-ups.
Seasoning should occur just before grilling or during the final minute of preheat so the surface can develop a crust without over-drying the interior. Remember that grill lids trap heat, so close them when needed to maintain a steady temperature in windy conditions or in cooler weather.
Food prep, marinating, and safety: getting ready to cook
Start with clean, dry surfaces and thoroughly rinsed produce. Pat proteins dry to encourage browning rather than steaming on the grate. Marinades add flavor and moisture, but be mindful of sugar-heavy marinades that burn quickly; apply later in the cook or keep the sugar away from the hottest zone. A meat thermometer is your best friend—target safe internal temperatures: for example, poultry should reach 165°F (74°C) and beef steaks vary by desired doneness.
Safe handling matters: wash hands after handling raw meat, use separate cutting boards, and keep raw proteins away from ready-to-eat foods. For vegetables, toss with a small amount of oil and salt to boost flavor and help browning.
Grilling techniques for common foods: beef, chicken, fish, vegetables
Beef: Sear over direct heat to form a crust, then move to indirect heat to finish to desired doneness. Chicken: start with indirect heat to avoid drying the outside, then finish with a quick sear. Fish: rely on direct heat with careful timing; fish cooks quickly and benefits from a light brushing of oil or butter. Vegetables: cut evenly and grill in batches if needed; smaller pieces cook rapidly and benefit from a light coating of oil. Throughout, maintain a clean grate, avoid pressing meat, and turn only once or twice to maximize browning.
Finishing, resting, and serving: the final touch
Resting is essential to redistribute juices and finish carryover cooking. Tent proteins loosely with foil after removing from heat for 5–10 minutes depending on size. Slice against the grain for beef, or carve along the line for poultry to maximize tenderness. Serve with a simple season of salt or a bright finishing sauce to complement smoky flavors. If you have a hot grill nearby, a quick flash of heat right before serving can refresh the crust without overcooking.
Cleaning, maintenance, and storage: keep it ready for next time
After grilling, burn off residue with the lid closed for 10–15 minutes or use a grill brush while the grates are still warm. Let the grill cool, then scrub with soapy water and rinse well. Oil the grates lightly to prevent rust and store tools in a dry place. Periodically check burners, hoses, and the regulator for leaks or wear. By keeping a routine, you extend the life of your outdoor grill and preserve the flavor quality you’ve built over the season. The Grill Cooking team recommends scheduling a periodic deep-clean every 3–6 months for best performance.
Tools & Materials
- Gas or charcoal grill(Ensure fuel source is accessible and in good working order)
- Grill brush(Wire or brass-bristle brushes; use with caution on hot grills)
- Long-handled tongs(Two sets for multitasking (flipping and moving))
- Instant-read meat thermometer(Probe into center of thickest part; avoid touching bone)
- Heat-resistant gloves(Protect hands during high-heat handling)
- Oil spray or brush(Lightly oil grates to prevent sticking)
- Oil for food (high smoke point)(Canola, grapeseed, or avocado oil work well)
- Serving platter and resting rack(Separate surfaces for raw and cooked foods)
- Fire-safe thermometer or timer(Helpful for timing rests and heat consistency)
Steps
Estimated time: 60-90 minutes
- 1
Prep grill and workspace
Clear the area, assemble tools, and set up a clean, dry surface for food. Wipe down the grill grates and ensure the fuel source is ready. This upfront organization reduces last-minute chaos and helps you stay in control as cooking begins.
Tip: Have all items arranged by access zone: near you but away from heat and flames. - 2
Preheat and establish cooking zones
Light the grill and bring it to the target temperature, then create a hot direct zone and a cooler indirect zone. Use the lid to retain heat during preheating and to control flare-ups while you monitor temperatures.
Tip: Hold the lid closed for most of the preheat; open only to place food or to check temperatures. - 3
Oil grates and prep food
Oil the grates lightly to prevent sticking and pat meat dry. Season or marinate as desired, mindful of sugar content in marinades that can cause flare-ups.
Tip: Apply oil to the grates, not directly on the meat, to improve browning without flare-ups. - 4
Sear on direct heat, then move to indirect
Sear each side for 1–3 minutes to build a crust, then shift to indirect heat to finish cooking. Use a thermometer to track internal temperature and avoid overcooking.
Tip: Avoid pressing down on meat; it squeezes out juices and dries the surface. - 5
Turn and monitor doneness
Turn foods only as needed to develop even browning. Check internal temps at the thickest part, and adjust proximity to heat as you approach desired doneness.
Tip: Keep a close eye on sugar-rich sauces or peppers that can burn quickly. - 6
Rest and slice strategically
Let meat rest 5–10 minutes (larger items longer). Slice against the grain for beef and hypertune flavor with proper rest to maximize juiciness.
Tip: Resting is just as important as the cook; do not skip this step. - 7
Clean and store equipment
While the grill is still warm, brush off residue, then wash tools and wipe surfaces. Oil the grates lightly for protection and store your setup ready for next session.
Tip: Annual deep-clean schedules help maintain performance and safety.
FAQ
What temperature should I aim for when searing versus finishing on indirect heat?
Searing is typically done at a high direct-heat zone around 425–450°F (218–232°C). Finish cooking on indirect heat at 350–400°F (177–204°C) to reach the desired doneness without burning.
Sear hot and finish with indirect heat to control doneness and avoid burning the outside.
How long should I preheat my grill before cooking?
Preheat for 10–15 minutes to establish a stable surface and even heat distribution. Longer preheat can help when cooking thicker cuts.
Preheat for about 10 to 15 minutes to ensure even heat.
Is it safe to grill poultry directly on the grill?
Poultry should be cooked to an internal temperature of 165°F (74°C) and can be started on indirect heat to avoid scorching the skin, then finished on direct heat for color.
Cook poultry to 165°F and monitor carefully to prevent overcooking.
How can I prevent flare-ups while grilling?
Move food away from flames, keep the lid closed to control oxygen, and use a spray bottle for minor flare-ups rather than adding fuel or moving food excessively.
Keep lids on to control flames and flick away flare-ups with a spray bottle.
What’s the best way to rest grilled meat?
Let meat rest 5–10 minutes after cooking to redistribute juices. Larger cuts may need longer rest to reach peak tenderness.
Rest meat after cooking to lock in juices.
Watch Video
Quick Summary
- Master heat zones for versatile grilling.
- Direct heat excels at searing; indirect heat finishes.
- Rest meat after cooking for juiciness.
- Safety and cleanliness protect flavor and equipment longevity.