How Long to Grill Steak: Timings by Thickness and Doneness
Learn how long to grill steak for reliable doneness on a home grill. This comprehensive guide from Grill Cooking covers thickness, heat, searing, finishing, resting, and temperature targets to yield juicy, evenly cooked steak.

Goal: Learn how long to grill steak for reliable doneness on a home grill. Timing varies by thickness, cut, and heat, so rely on internal temp rather than wall-clock time. According to Grill Cooking, starting with a hot sear and finishing on a cooler zone produces even cooking and juicy results.
Key factors that determine grilling time
Grilling time is not a fixed recipe. The primary variables are steak thickness, cut, grill temperature, and whether the meat is cold or at room temperature. Other influences include the amount of surface fat, whether you are searing first or cooking completely over indirect heat, and how you handle carryover cooking after removal from the flame. By recognizing these factors, you can estimate doneness more reliably and reduce the number of gut checks during grilling. For best results, always start with a hot sear to develop browning, then shift to a gentler zone to finish cooking. This two-zone approach helps you control the crust while avoiding overcooking the interior.
According to Grill Cooking, understanding the relationship between heat, time, and doneness empowers home cooks to avoid common mistakes like over-searing or undercooking.
Gauging steak thickness and cut for timing
Thickness is the dominant signal for cooking time. A 1-inch steak cooks faster than a 1.5- or 2-inch cut, even on the same grill. The cut also matters: a lean ribeye or sirloin behaves differently than a thick, marble-rich New York strip. Before you heat the grill, pat the steak dry and let it rest briefly to remove surface moisture. This improves browning. If you salt in advance (dry-brine), do so evenly on all surfaces and avoid covering the meat; you want a dry, seasoned crust when it hits the grill. Finally, measure doneness with an instant-read thermometer rather than relying on time alone.
Temperature targets and doneness levels
The most reliable guide to doneness is internal temperature. Common targets are: rare about 120–125°F, medium-rare 130–135°F, medium 140–145°F, and medium-well 150–155°F, with well done 160°F and above. Remember that temperatures rise a bit while resting, so pull the steak a few degrees before you reach your target. For a juicier result, aim for the lower end of a doneness range if you prefer medium-rare and adjust upward after resting. Use a probe thermometer for precise control and keep the sensor centered in the thickest part of the steak.
Practical timing charts by thickness and heat
Here are flexible guidelines to pair with your grill setup. These ranges assume a two-zone grill with a hot sear zone and a cooler finishing zone, and a steak about typical thickness:
- 1 inch: sear 1–2 minutes per side on high heat, then finish on indirect heat for a few minutes until target temp is reached.
- 1.25–1.5 inches: sear 2–3 minutes per side, then move to indirect heat and monitor with a thermometer.
- 1.75–2 inches: sear 3–4 minutes per side, then finish slowly on indirect heat, checking internal temp frequently.
Note that these are guidelines; actual times vary with grill heat, fat content, and starting temperature of the meat. Always rely on internal temperature rather than wall-clock time.
Prepping the steak for even grilling
To maximize even doneness, take several steps before you grill. Pat the steak dry, then apply a light coat of neutral oil and a generous sprinkle of salt or a dry-brine. Let the steak sit at room temperature for about 20–30 minutes, which helps it cook more evenly. Bring pepper or other seasonings just before grilling to avoid drawing moisture. If you’re using a marinade, keep acidity moderate to prevent tenderness loss. Finally, ensure your grill grates are clean and well oiled to promote immediate browning and prevent sticking.
Resting and serving for best results
Resting is essential after grilling, typically 5–10 minutes for a small steak and longer for larger ones. This pause lets juices re-distribute, continuing to cook slightly and resulting in a juicier bite. Slice against the grain for tenderness and serve with a simple salt-and-fat finish, or pair with a compound butter or quick pan sauce. If you must serve hot, a light tent with foil can help retain heat without steaming the crust.
Tools & Materials
- Grill (gas or charcoal) with two-zone setup(Preheat for sear and set up a cooler finishing area)
- Instant-read thermometer(Probe thermometer preferred for accurate temps)
- Long-handled tongs(At least 12 inches for safety and control)
- Resting platter or plate(Let take-home juices redistribute after cooking)
- Paper towels(Pat steak surface dry before seasoning)
- Kosher or sea salt(Even coating; dry-brine optional for deeper flavor)
- Freshly ground black pepper(Add just before grilling for aroma)
- Neutral oil with high smoke point(Oil grates or lightly oil the steak if needed)
- Optional: cast-iron skillet or grill pan(Useful for indoor finishing if needed)
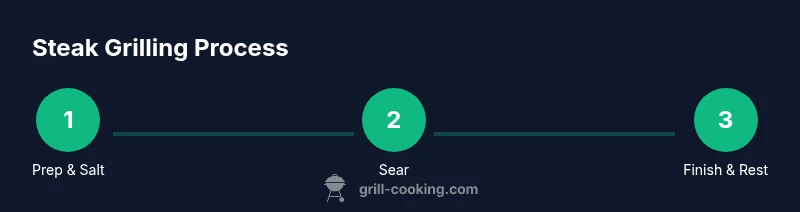
Steps
Estimated time: 25-40 minutes
- 1
Choose and prep the steak
Select a steak thickness around 1 to 1.5 inches. Pat dry and let rest briefly to minimize surface moisture, which improves searing. This creates a strong crust and predictable cooking behavior.
Tip: Starting with a dry surface helps browning; moisture on the surface delays crust formation. - 2
Salt and dry-brine
Evenly season the steak with salt or a light salt-and-spice rub. Allow it to sit on the counter or in the fridge for a short dry-brine, which enhances crust and flavor. Wipe away any excess moisture before grilling if moisture has pooled.
Tip: Dry-brining a bit longer (when possible) yields a deeper seasoned crust. - 3
Preheat grill and establish zones
Preheat your grill to high for searing, then create a cooler zone for finishing. Clean and oil the grates to prevent sticking. This two-zone setup is essential for control and even doneness.
Tip: A two-zone setup reduces the risk of overcooking the outside while the inside remains underdone. - 4
Sear the steak
Place the steak directly over high heat and sear until a deep brown crust forms, about a couple of minutes per side depending on thickness. Avoid moving it too soon to ensure a good crust.
Tip: Only flip once or twice during the sear to maximize crust formation. - 5
Finish on indirect heat and monitor
Transfer the steak to the indirect heat zone and cook until the internal temperature reaches your target. Use the thermometer to check the thickest part; carryover heat will continue cooking after removal.
Tip: Pull the steak slightly below your target temp to account for resting heat. - 6
Rest and slice
Let the steak rest on a warm plate for 5–10 minutes before slicing. Resting redistributes juices and yields a juicier bite. Slice against the grain for maximum tenderness.
Tip: Resting is not optional—it significantly improves texture and juiciness.
FAQ
What thickness is ideal for grilling steak?
Commonly, 1 to 1.5 inches works well for home grills, balancing sear time and even doneness. Thicker cuts require more indirect cooking and closer temperature monitoring.
For best results, start with steaks around one to one and a half inches thick; thicker cuts need more indirect cooking.
Should I salt the steak before grilling?
Yes. Salt helps flavor and improves crust. A dry-brine for 20 minutes to an hour, or even longer if possible, yields better crust and juiciness.
Salt in advance helps flavor and crust. A short dry-brine improves results.
Can I grill from frozen?
Grilling from frozen is not ideal because the exterior can overcook before the interior reaches doneness. Thaw first for more predictable results.
It’s best to thaw steak before grilling for even cooking.
What is the best doneness temperature for most steaks?
For most classic steaks, aim for a final internal temp around 125–135°F for rare to medium-rare, allowing for carryover cooking after removal.
Aim for about 125 to 135 degrees for a nice rare to medium-rare finish.
Is resting truly necessary?
Yes. Resting allows juices to redistribute, improving juiciness and preventing a pool of liquid on the cutting board.
Resting is essential for juiciness and even texture.
What if my grill has only one heat zone?
If only one zone is available, finish cooking with cautious temperature control and consider searing in shorter bursts, flipping frequently to avoid overcooking.
If you only have one zone, adjust heat, flip often, and monitor doneness closely.
Watch Video
Quick Summary
- Trust internal temperature over time alone
- Two-zone grilling yields even doneness
- Dry-brine enhances crust and flavor
- Resting is essential for juiciness
- Always slice against the grain