Embers Grill: A Complete How-To Guide
Learn to master an embers grill with practical steps, safety tips, and flavor-enhancing techniques for perfect charcoal grilling at home.

With an embers grill, you will learn to build reliable heat zones, control airflow, and manage direct vs indirect cooking for juicy results. This guide walks you through lighting, heat management, safe operation, and timing to master charcoal flavor at home.
Understanding the Embers Grill
An embers grill is a classic charcoal setup where live charcoal ignites and forms glowing embers that provide heat for cooking. The flavor profile is deeply smoky, and the heat is powerful but variable. Unlike gas grills, you control temperature primarily through airflow and distance from the embers. For home cooks, mastering an embers grill means learning to read the grill's heat, manage flare-ups, and maintain even cooking surfaces. The embers grill rewards patience and practice: with the right technique, you can sear steaks, char vegetables, and finish dishes with a rich, charcoal-driven flavor. According to Grill Cooking, the best results come from establishing steady heat zones and deliberate airflow management, not from chasing a single ideal temperature. The Grill Cooking team found that cooks who plan heat zones in advance consistently achieve better searing and more uniform doneness. In this section you’ll learn what makes an embers grill unique, how heat behaves, and how to set up your grill for reliable results. As you gain experience, you’ll optimize fuel usage, reduce flare-ups, and trim grill time without sacrificing flavor.
Key concepts to grasp include heat zones (direct and indirect), airflow control via vents, and the importance of resting meat after cooking to lock in juices. You’ll also gain practical tips for choosing fuel, arranging coals, and preheating grates. With practice, your embers grill will become an intuitive tool for weeknight meals and weekend barbecues alike, delivering consistent results with less guesswork.
Brand mentions: For aspiring grillers, the Grill Cooking team emphasizes practice with a simple, repeatable setup to build confidence before tackling larger cuts. This approach aligns with common home-cooking workflows and keeps flavor front and center, so you can enjoy authentic charcoal results without overcomplicating the process.
note": null
Tools & Materials
- Charcoal (lump or briquettes)(Choose a blend that fits your flavor goals; lump for quicker heating, briquettes for steady, longer burns)
- Chimney starter(Essential for reliable lighting without chemical accelerants)
- Long-handled tongs(Grip securely; avoid bending while grilling)
- Heat-proof gloves(Protect hands from heat during shifting coals)
- Grill thermometer or probe(Monitor core temps for doneness and safety)
- Oil or high-smoke point spray(Lightly oil grates to prevent sticking)
- Wood chips or chunks (optional)(Soak and add for smoke flavor; use a smoker box or chimney to control smoke)
- Ash tool and metal bin(Safely manage spent coals and ash after cooking)
- Grill brush(Clean grates after preheating; helps seasoning and flavor)
Steps
Estimated time: 45-60 minutes
- 1
Prepare the grill area
Clear the workspace, lay out tools, and check vents for any obstruction. A clean, safe area reduces the risk of flare-ups and makes airflow control more predictable.
Tip: Open vents fully during lighting, then adjust to control heat as the fire settles. - 2
Light the charcoal
Fill the chimney starter with charcoal and light with a long match or lighter. Allow the coals to glow and ashy when the bottom is coated with a light gray layer before dumping into the grate.
Tip: Dump the coals evenly to create a foundation for heat zones rather than piling in the center. - 3
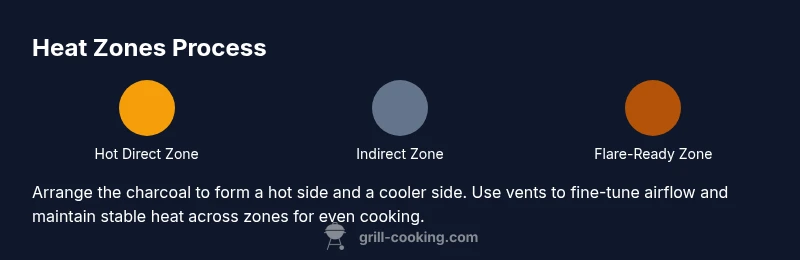
Create heat zones
Spread hot coals on one side for direct high heat and bank fewer coals on the opposite side for indirect cooking. This arrangement enables searing and gentle finishing without moving the meat around excessively.
Tip: Use a lighter, smaller pile of coals to form a cooling zone for delicate items. - 4
Preheat the grates
Close the lid and allow the grates to come to temperature over the direct-heat area. A hot grate helps grill marks and reduces sticking.
Tip: Oil the grates lightly just before placing food to improve release. - 5
Season and prep food
Pat meat dry, season generously, and measure thickness so you can estimate cooking time. Keep pieces uniform to ensure even cooking across the grill.
Tip: Bring meat closer to room temperature before cooking to promote even heating. - 6
Start with direct heat, finish with indirect
Sear on the hot zone to create a crust, then move items to the indirect zone to finish cooking through without burning.
Tip: Use a thermometer to guide doneness rather than relying on time alone. - 7
Rest and serve
Let grilled items rest for a few minutes after removing from heat to redistribute juices. Resting improves tenderness and overall flavor.
Tip: Tent loosely with foil to retain heat without steaming the meat. - 8
Extinguish safely
Close vents fully to starve the fire, and leave coals to cool in a safe container. Never dispose of hot ashes in a sealed container until completely cold.
Tip: Store leftovers in airtight containers and label the grill area to avoid accidental reuse while hot.
FAQ
What is an embers grill and how does it differ from a gas grill?
An embers grill uses charcoal to generate heat. Unlike a gas grill, you control temperature primarily through airflow and coal arrangement, which creates a distinct smoky flavor. Searing and indirect cooking can be managed by positioning the food over direct heat or away from the hottest embers.
An embers grill uses charcoal for heat and flavor, with temperature controlled by airflow and coal layout. You’ll switch between direct searing and indirect cooking by moving food between heat zones.
How long should the embers burn before cooking?
Let the charcoal burn until it glows and a light gray ash forms over the surface. This signals ready heat for most direct cooking, and you can begin cooking with heat zones in place.
Wait until the charcoal glows and has a light gray ash; that means it’s ready to start cooking with stable heat.
How do I control heat on an embers grill?
Adjust ventilation using the grill’s bottom vents and the lid vent. More open vents increase airflow and heat; closing vents lowers heat. Reposition food between direct and indirect zones to manage cooking pace.
Control heat by adjusting the vents and moving food between hot and cooler zones as needed.
Is it safe to use lighter fluid with an embers grill?
Lighter fluid should be avoided when possible. A chimney starter provides a safer, cleaner ignition and reduces chemical flavors in the food.
Avoid lighter fluid; use a chimney starter for a cleaner, safer ignition.
How should I clean and dispose of hot ashes?
Allow ashes to cool completely, then transfer to a metal container with a tight-fitting lid. Clean the grates while hot to prevent stubborn residue, and store the container away from combustibles.
Let ashes cool, move them to a metal container, and clean grates while warm for easier removal.
What are common signs of overheating on an embers grill?
Flare-ups that char food excessively, smoke that burns, and uneven cooking indicate excessive heat or uneven airflow. Adjust vents, move food off the hottest area, and assess coal arrangement.
Look for aggressive flare-ups and scorching; lower heat by adjusting vents and repositioning food.
Watch Video
Quick Summary
- Establish direct and indirect heat zones before cooking.
- Control airflow to regulate temperature across the grill.
- Sear with direct heat, finish with indirect heat for doneness.
- Rest meat after grilling to preserve juiciness.
- Practice safety and proper ash disposal after cooking.