Pellet Grill for Beginners: A Practical How-To
Learn how to choose, set up, and cook with a pellet grill for beginners. Practical steps, safety tips, and a starter menu to build confidence on your first smoke.

With this guide, you’ll master the pellet grill for beginners: pick a suitable model, install pellets, light safely, set reliable temperature control, and cook a basic menu from burgers to smoked chicken. You’ll learn clean setup, fuel management, and simple maintenance so your first grill session yields consistent results every time.
Why pellet grills are beginner-friendly
According to Grill Cooking, pellet grills offer consistent heat and automatic pellet feeding, which makes them especially forgiving for newbies. The digital controller maintains target temperatures with minimal user intervention, reducing the guesswork that often besets charcoal or flare-prone gas setups. Because the fire is controlled by software, beginners experience fewer dramatic temperature swings and fewer flare-ups, leading to steadier cooking. In practice, this means you can focus more on flavor exploration and timing rather than fighting an uneven fire. Grill Cooking's guidance emphasizes safety, predictable smoke, and straightforward cleanup as key reasons pellet grilling is a smart starting point for home cooks.
Beyond ease of use, pellet grills support a wide range of cooking styles—from direct grilling at higher temps to low-and-slow smoking at 225–250°F—making them a versatile entry point for learning different techniques. For many newcomers, starting with a pellet grill reduces the intimidation factor and helps build confidence before moving to more complex setups.
How pellet grills work
Pellet grills operate with a hopper that feeds hardwood pellets into a burn pot via an auger. An electric igniter starts the fire, and a fan circulates heat and smoke through the cooking chamber. A digital controller (often with a PID algorithm) maintains the desired temperature by adjusting pellet feed rates and airflow. The result is steady heat with a measurable smoke profile, which is why pellet grills consistently produce flavorful results with minimal manual adjustments. Grill Cooking analysis shows that the combination of automatic feeding and precise temperature control helps beginners achieve predictable outcomes and learn timing more quickly.
Key components include the hopper, auger, burn pot, convection fan, and the control panel. Understanding these parts helps you troubleshoot common issues—like a pellet jam or a temp drift—without getting overwhelmed. As you gain experience, you’ll learn how pellet type, grill placement, and wind exposure influence heat retention and smoke production.
Choosing your first pellet grill
Selecting your starting pellet grill is about balance: budget, space, and features that genuinely matter for a beginner. Look for a model with a sturdy chassis, good insulation, and a reliable temperature readout. A simple dial or app-based controller is fine for most learners, but ensure the unit provides clear feedback on internal temperature and pellet level. For beginners, a mid-sized grill with a 425–600 square inch cooking area offers enough capacity for family meals without overwhelming you with maintenance. Don’t forget to check hopper capacity (larger hoppers require fewer reloads) and the ease of cleaning the burn pot and grate. If you expect occasional outdoor use, consider a model with solid weather resistance and a protective cover.
In addition to the grill itself, think about practical aspects like space for placement, proximity to a power outlet, and whether you’ll want remote monitoring. The Grill Cooking team notes that starting with a known brand and a simple unit reduces the learning curve and helps you focus on technique rather than troubleshooting elaborate features. If you already own a smoker or grill, compare the dimensions and heat range to ensure a smooth transition to pellet grilling.
Essential accessories and fuels
To start strong, stock up on a few essentials that make pellet grilling safer and more enjoyable. Hardwood pellets are the fuel; choose a flavor profile that matches your planned foods (e.g., hickory for pork, fruitwoods for poultry). Always store pellets in a dry area to prevent clumping or moisture-related ignition issues. A digital meat thermometer is nearly indispensable for beginners to verify doneness without guesswork. Grilling gloves, a sturdy grill brush, and a high-quality spray bottle for moisture or oil help with handling and upkeep. A weatherproof grill cover protects the investment, and a well-organized workspace reduces the chance of spills or trip hazards near the grill. Finally, keep a small brush or scraper handy to clean the grates after each session for better flavor and efficiency.
Grill Cooking’s practical tip: start with a basic flavor profile using a single wood unless you’re testing multiple profiles for a future cook-off. This keeps early sessions simple and repeatable while you learn the basics of timing and temperature control.
Getting started: setup and ignition
Begin with a clean slate: unbox, inspect for shipping damage, and assemble any missing parts according to the manual. Place the grill on a stable, level surface with adequate clearance from walls or overhanging branches. Fill the hopper with hardwood pellets and power up the unit. Preheat to your target cooking temperature by setting the controller and letting the auger feed pellets until you reach steady heat. During ignition, keep kids and pets away and avoid standing directly in front of the exhaust. Once current temperature stabilizes, wipe down the grates if needed and lightly oil them to prevent sticking. A short initial burn (no meat) helps burn off any factory residues and primes the grill for cooking.
If you notice temperature drift, check for pellet clogging, inspect the hopper, and ensure the auger rotates smoothly. A well-prepped ignition improves your first cooks and reduces the chance of flare-ups caused by unburned pellets or ash buildup. Grill Cooking emphasizes patience during the first burn-in so you understand how your unit responds to airflow and pellet height.
Temperature control and cooking strategies
Mastering temperature control is the core skill for pellet grilling. Use the digital controller to set a target temperature and let the grill maintain it with automatic pellet feeding and fan adjustments. For beginners, aim for stable, moderate temps and avoid opening the lid too often, which can cause heat fluctuations. When you’re cooking gentle foods like chicken or fish, a lower range (roughly 225–275°F) helps render fat evenly and enhances smoke absorption. For hotter direct grilling, you’ll typically operate in the 350–450°F range and use shorter cook times. It’s helpful to build a basic cooking plan: sear if you want crisper surfaces, then finish with indirect heat to finish internal temps. Consistent probe monitoring ensures you land safe, juicy results. Grill Cooking recommends keeping a log of temperatures, cook times, and outcomes to fine-tune your approach over multiple sessions.
Cooking a first menu: basics
Your first pellet-grilled menu should mix approachable proteins with simple sides. Start with burgers or chicken thighs, elevated with a light rub and a quick smoke to begin building flavor. For a vegetarian option, grilled vegetables and corn on the cob complement grilled meats nicely. Whatever you choose, use a meat thermometer to verify internal temperatures and avoid overcooking. Remember to rest meats briefly after removal to lock in juices. As you gain confidence, experiment with different wood flavors, adding spice rubs, or infusing a brief smoke for deeper flavor. Grill Cooking’s practical takeaway: keep the first sessions consistent and organized, then gradually introduce new techniques as you gain experience.
Maintenance and safety for beginners
Safety and routine maintenance are foundational. Always unplug the grill before cleaning, and allow it to cool before scrubbing grates or wiping surfaces. Regularly remove ash and clean the burn pot to prevent build-up that can hamper airflow. Inspect the hopper and pellets for moisture or clumping, and replace pellets as needed. Protect the grill from the elements with a rain cover when not in use. Safety-wise, use dry pellets, wear heat-resistant gloves during loading, and keep a fire extinguisher or a bucket of sand nearby as a precaution. The Grill Cooking team recommends establishing a cleaning cadence after each cook and a quarterly deep-clean to maintain performance and longevity.
Common mistakes and how to avoid them
Common rookie mistakes include overloading the hopper, using flavored pellets that don’t pair well with certain proteins, and opening the lid too often during cooks. Another frequent error is neglecting preheating or neglecting to wipe the grates after use, which reduces flavor quality on subsequent cooks. Failing to monitor pellet levels can lead to temperature drops mid-cook, so check the hopper before starting. Finally, skipping a safety check—like ensuring kids and pets are away during ignition—can create hazards. By developing a simple routine (preheat, monitor, and clean), you minimize errors and maximize your early success with pellet grilling.
Tools & Materials
- Pellet grill(Choose a model with a reliable digital controller and adequate insulation.)
- Bag of hardwood pellets(Select flavor that matches your planned meals; store dry.)
- Long-handled tongs(For safe handling of hot meat and grates.)
- Digital meat thermometer(Essential for accurate doneness checks.)
- Grill brush(Clean grates after each cook to maintain nonstick surfaces.)
Steps
Estimated time: 45-60 minutes
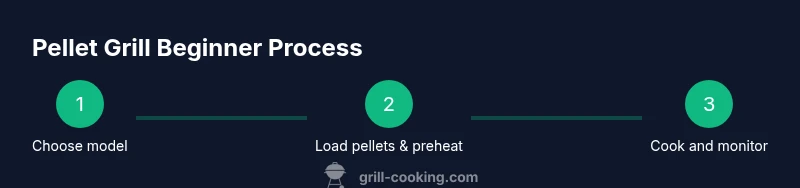
- 1
Unbox and inspect the grill
Remove packaging, check for damage, and verify all parts are included. Read the manual for assembly notes and safety precautions. Confirm the hopper and auger are clear of obstructions.
Tip: Have the manual handy and verify warranty terms before first use. - 2
Load pellets and power on
Fill the hopper with hardwood pellets, ensuring it sits firmly. Plug in the grill and turn on power, waiting for the controller to initialize. Check for any error messages before proceeding.
Tip: Use a clean, dry bag of pellets to prevent moisture-related ignition issues. - 3
Preheat and verify temperature
Set the target temperature and allow the grill to reach steady heat. Observe that the display stabilizes within a reasonable range and that the fan and auger respond smoothly.
Tip: Preheat for 10–15 minutes to ensure even heat distribution. - 4
Prepare foods and tools
Season meat or vegetables and arrange on a clean tray. Have thermometers ready and keep tongs handy for easy handling. Lightly oil grates to prevent sticking.
Tip: Pat meat dry for better browning and smoke adherence. - 5
Cook with monitoring
Place food on the grill and monitor internal temps. Resist the urge to peak too often; use the thermometer for accuracy and adjust temperature as needed based on doneness cues.
Tip: Keep a log of temperatures, times, and outcomes for future reference. - 6
Finish and clean
Remove food, let it rest briefly, then perform a post-cook cleanup: brush grates, empty ash if applicable, and wipe surfaces. Store pellets dry and organized.
Tip: A quick wipe after each cook extends grill life and flavor consistency.
FAQ
Do pellet grills require constant electricity or power?
Most pellet grills run on standard 120V power and rely on an electrical controller to manage heat and pellet feed. A few portable models have battery backup options, but a stable outlet is best for consistent performance.
Most pellet grills run on a standard outlet with a digital controller to manage heat; some portable units offer backup options, but a steady power source is best.
Can I use any pellets, or do I need special ones?
Use hardwood pellets designed for grilling. Avoid pellets with added flavor oils or those intended for wood stoves. Different woods (like hickory, apple, or mesquite) will influence flavor, so start with a single wood and adjust in future cooks.
Use hardwood grilling pellets without added flavors; start with one wood to learn flavor impact, then explore others.
Is it safe to cook at low temperatures on a pellet grill?
Yes. Pellet grills are well-suited for low-and-slow cooking. Maintain a stable temperature and monitor doneness with a thermometer to ensure safe results.
Yes, pellet grills are great for low-and-slow cooking as long as you monitor temps with a thermometer.
How should I clean the grill after cooking?
Let the grill cool, brush the grates, and wipe surfaces. Empty the ash or pellet debris as part of your routine, and check the burn pot for buildup.
Cool the grill, brush the grates, wipe surfaces, and empty debris after cooking.
Do I need a thermometer, and what should I look for?
Yes, a reliable digital thermometer is essential for monitoring internal temps. Look for fast read times, wide range, and a probe that fits your meats.
Absolutely—get a fast, accurate digital thermometer to track doneness.
How do I know when my grill is ready to cook?
Preheat until the controller shows a stable target temperature. This ensures even heat distribution and predictable smoke from the first minute of cooking.
Preheat until the temperature stabilizes; that signals the grill is ready.
Watch Video
Quick Summary
- Select a beginner-friendly pellet grill with reliable temp control
- Understand the hopper-pellet-feed system and ignition basics
- Cook with steady temps and limit lid openings during cooks
- Use a digital thermometer for accurate doneness
- Maintain grill cleanliness to protect performance