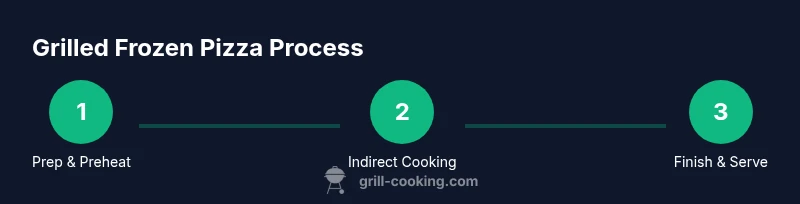
Can You Cook Frozen Pizza on a Grill: A Complete How-To
Learn how to cook frozen pizza on a grill for a crispy crust and melted toppings. This 1800-word guide covers indirect heat, temps, tools, safety, troubleshooting, step-by-step instructions, and expert tips from Grill Cooking.

Yes—grilling frozen pizza is possible and yields a crisp crust with melted cheese when done with indirect heat. Preheat the grill to 375–425°F, use a perforated pizza pan or a grill-safe stone, and top the pizza with the dough-side up. Cook about 8–12 minutes, rotating halfway, then finish with a brief sear over direct heat if the crust needs extra crispness.
Why Grilling Frozen Pizza Works
According to Grill Cooking, you can transform a budget-friendly frozen pizza into a grilled masterpiece by embracing indirect heat and a well-timed flip. The grill’s steady, radiant heat melts the cheese evenly and crisps the crust more reliably than many home ovens, especially when the pizza is cooked on a perforated pan or a stone. The key is keeping the heat level steady and avoiding direct flame contact that can scorch the crust while the toppings still seem pale. When done right, the crust develops blistered edges and a honeyed crust that resembles a café-style bake, with cheese that stretches and toppings that stay vibrant.
By using the lid to trap heat, you create an oven-like environment that speeds melting and browning without drying out the dough. This method also reduces sogginess by letting moisture escape through the perforations or the stone’s porous surface. For beginner grillers, this approach is more forgiving than cooking directly on grates, and it scales well for larger frozen pies.
In practice, expect a dip in texture if you open the lid too often or use a grill that runs hot and uneven. Keep sessions short and watch the pizza carefully during the last few minutes to prevent scorching. With practice, you’ll be able to estimate time by crust color rather than strictly relying on cheese melt alone.
Essential Setup: Indirect Heat, Temperature, and Tools
Grilling frozen pizza requires a deliberate heat strategy. Start with the grill set to a two-zone setup: one hot direct zone for finishing and one cooler indirect zone for gentle melting. Target an ambient grilling temperature around 375–425°F (190–218°C). If your grill runs hotter, close the lid sooner to prevent burnt edges; if your grill is cooler, extend the cooking time slightly.
Tools matter in this game: a perforated pizza pan or a grill-safe stone helps distribute heat and prevent soggy crust; a long-handled spatula and tongs let you maneuver without losing heat; a digital thermometer for the grill and, if you want, an instant-read thermometer for the pizza’s interior are useful gadgets. A spray bottle of water can help control flare-ups, but use it sparingly to avoid steaming the crust.
Preheating is essential. Give your pan or stone time to come to temperature so the crust starts crisping the moment the pizza touches the surface. If you don’t have a perforated pan, a well-seasoned grill-safe stone works just as well, but you’ll see slightly different melting patterns and textures.
Choosing Equipment: Perforated Pan, Stone, or Direct Heat
There are three common approaches when grilling frozen pizza. The perforated pizza pan keeps the crust drier and makes it easier to slide the pie onto the grill. A pizza stone absorbs moisture and radiates heat evenly, creating a uniform crust with a blistered underside. Cooking directly on grates is faster but riskier for uneven burning; this method works best with very thin crusts and preheated grates that are clean and oiled. Each method has pros and cons, so your choice depends on crust thickness, topping density, and how crispy you want the bottom.
If you’re trying a first run, a perforated pan is the simplest way to get a stable, crisp crust without losing toppings. For thicker crusts or larger pies, a stone can produce a more uniform bake. Either way, avoid sealing the crust under heavy foil; you want airflow to keep the exterior crisp and the interior soft.
Prep and Planning: Thawing vs. Grilling Frozen
Grill your pizza from frozen for best results in most cases. Thawing can lead to sogginess or topping sliding, especially with watery vegetables or heavy sauces. If you do thaw, do so in the refrigerator for 8–12 hours and dry the surface with a paper towel before grilling to reduce moisture.
If you’re using a pre-baked frozen pizza, you may be tempted to rush it, but the key remains the same: indirect heat first, then a short finish on direct heat to ensure cheese is fully melted and the crust browns. Avoid stacking multiple frozen pizzas on the grill; air circulation is critical for even cooking.
A successful grill session also depends on prep: remove plastic, leave the cardboard behind, and position toppings evenly. A little extra olive oil brushed on the crust can improve browning and prevent sticking on metal surfaces.
Troubleshooting and Common Pitfalls
Soggy crust is the most frequent complaint when grilling frozen pizza. This usually stems from cooking on too-low heat, using direct contact with the grate, or starting with a very moist topping. If you see steam pooling under the pizza, reduce the heat or move it to the indirect zone. Burnt edges with pale centers indicate too-high heat on direct zones; dial down the flame or relocate to indirect heat and finish with a brief direct-sear.
Another pitfall is toppings sliding or sliding cheese. Use a perforated pan or stone rather than placing the entire frozen pizza directly on a hot grate, and ensure the surface is well oiled. If you notice topping separation, slice the pizza after a few minutes to keep toppings in place as the cheese melts.
Sometimes, a grill with uneven heat will brown one side faster. Rotate the pizza every 2–3 minutes and use the lid to regulate even browning. Finally, keep an eye on the crust’s color; a deeply dark crust means you’re pushing the limits of the heat, not the time.
If using a cold grill or one with large gaps in heat distribution, consider lowering the cooking temperature slightly and adding a small amount of time to the total cook, rather than chasing a perfect color at the risk of burning.
Finishing Touches: Crisp Edges, Melted Cheese, and Slicing for Service
As you approach the end of the cook, listen for a gentle crackling from the crust, which signals crispness. If the cheese isn’t fully melted, give the pizza a final 1–2 minute blast on direct heat, lid closed, to nudge the toppings toward bubbly perfection. When removing the pizza from the grill, transfer it to a cutting board and let it rest for 2–3 minutes; this rest allows the cheese to settle and slices to hold together when cut.
Cheese pull matters with presentation. If you want sharper toppings, add a light drizzle of olive oil or a sprinkle of grated Parmesan right before slicing. For a smoky finish, a pinch of smoked paprika can add color and depth. Finally, serve with a simple green salad to balance the richness of the melted cheese and crust.
Authoritative Sources and Safety Notes
When handling grilled foods, safety matters. The USDA and FDA offer guidance on safe handling, reheating leftovers, and cooking temperatures to minimize risk. For more authoritative information on safe cooking temperatures and practices, consult official sources from the U.S. government and recognized educational institutions.
Authoritative sources and practical safety reminders:
- USDA Food Safety and Inspection Service: https://www.fsis.usda.gov
- FDA Food Safety: https://www.fda.gov/food
- CDC Food Safety: https://www.cdc.gov/foodsafety/index.html
Following these recommendations helps ensure that reheated leftovers are safe and delicious while you explore grill techniques in your own kitchen.
Quick Recap: Can You Cook Frozen Pizza on a Grill? A One-Page Snapshot
Grilled frozen pizza is a convenient, tasty option when you use indirect heat, the right equipment, and mindful timing. You’ll end up with a crisp bottom, bubbling cheese, and evenly warmed toppings. Practice makes perfect, but with the right setup, you can consistently nail a restaurant-quality crust and toppings in under half an hour.
Tools & Materials
- Gas or charcoal grill with two-zone fire(One zone hot for finish, one cooler for melting)
- Perforated pizza pan or grill-safe pizza stone(Helps prevent soggy crust and promotes even browning)
- Long-handled tongs and spatula(Handles hot surfaces safely)
- Digital grill thermometer (optional)(Useful for monitoring ambient temp)
- Aluminum foil or heat-resistant mat (optional)(For clean-up and heat management)
- Pizza cutter or rocker knife(For clean slices after resting)
- Oil spray or brush (neutral oil)(Lightly oil grates or pan if needed)
Steps
Estimated time: 25-35 minutes
- 1
Preheat grill and set up heat zones
Ignite the grill and establish a two-zone setup: indirect heat for cooking, direct heat for finishing. Let the grill reach 375–425°F (190–218°C) and monitor for even heat distribution. Having a steady temperature is the foundation for a crisp crust without burning toppings.
Tip: Use the lid to build an oven-like environment and avoid opening the grill too often, which drops temperature. - 2
Prepare pizza surface
If using a perforated pan, lightly oil the pan. If using a stone, slide the slice onto the surface directly when ready. Keep the crust edge slightly away from toppings to promote even browning.
Tip: Remove packaging and cardboard; keep frozen dough sealed until you’re ready to cook to prevent moisture loss. - 3
Position pizza on grill
Place the pizza on the perforated pan or stone over the indirect heat zone. Close the lid to trap heat and begin melting the toppings. Avoid placing directly over flames to prevent scorching the crust.
Tip: If you notice heavy steam buildup, move the pizza slightly away from the flame or lower the heat. - 4
Monitor progress and rotate
Cook for 8–12 minutes, depending on thickness and grill heat. Rotate the position every 2–3 minutes to ensure even browning and melt.
Tip: Keep an eye on the crust color; you’re aiming for golden-brown edges with bubbly cheese. - 5
Finish on direct heat if needed
If the top is melted but the crust isn’t crisp enough, move to direct heat for 1–2 minutes with the lid closed to finish browning.
Tip: Watch closely—direct heat can burn cheese quickly; short bursts are safer. - 6
Rest, slice, and serve
Remove from grill using tongs and let rest 2–3 minutes. Slice with a sharp cutter and serve with a simple side salad for balance.
Tip: Resting helps the cheese set for cleaner slices and better presentation.
FAQ
Can I cook any frozen pizza on a grill?
Most frozen pizzas can be grilled successfully, especially those with standard crusts. Thick-crust varieties may benefit from extended indirect heat or a shorter initial bake time. If toppings look crowded or wet, consider baking partially on the grill and finishing in the oven for optimal texture.
Most frozen pizzas work on a grill, but thick crusts may need extra indirect time or oven finishing.
Do I need to preheat the grill to a specific temperature?
Yes. Preheat to about 375–425°F (190–218°C) to balance melt and browning. If your grill runs hot, adjust the indirect zone to stay within this range. A stable temperature yields a crisper crust and evenly melted cheese.
Preheat to roughly 375 to 425 degrees for best results.
What if the crust burns before toppings melt?
Move the pizza to the indirect heat zone and lower the lid. Reduce heat or switch to the stone/pan method if needed. Flip or rotate to encourage even browning and prevent scorching.
If the crust browns too fast, move to indirect heat and adjust the heat.
Should I thaw the frozen pizza before grilling?
Grilling from frozen is generally preferable because thawed toppings can release moisture and sogginess. If you do thaw, pat dry and proceed with slightly longer indirect cooking times and careful heat management.
Usually grill from frozen for best texture, thaw only if you want quicker melting.
What toppings work best for grilled frozen pizza?
Opt for pre-cooked or sturdy toppings that don’t release a lot of water, like pepperoni, mushrooms, onions, or olives. Avoid heavy fresh veggies that release moisture, such as fresh tomatoes, unless you pat them dry.
Choose pre-cooked or moisture-resistant toppings to avoid soggy slices.
How do I ensure food safety when reheating on a grill?
Aim for an internal temperature hot enough to reheat leftovers safely (165°F/74°C where applicable) and ensure cheese is fully melted and hot. Use a thermometer if needed and avoid cross-contamination by handling raw and cooked items with clean tools.
Reheat to a safe internal temp and melt the cheese fully.
Watch Video
Quick Summary
- Prepare two heat zones for controlled cooking.
- Use perforated pan or stone to optimize crust crispness.
- Cook frozen pizza from frozen for best texture and flavor.
- Finish with a brief sear on direct heat to perfect the crust.