Why is grill not heating up: urgent troubleshooting guide
Struggling with a grill that won't heat? This step-by-step guide from Grill Cooking helps home cooks diagnose fuel, ignition, and maintenance issues fast to restore safe, reliable heat.

Most grills fail to heat up for simple reasons: power supply issues, a faulty regulator, or clogged burners. Start by confirming the outlet or gas cylinder is delivering fuel, then inspect the regulator and valve settings. This quick-steps guide from Grill Cooking walks you through a fast, safe check to get your grill hot again.
Common causes at a glance
If a grill won't heat, the root causes are usually simple and fixable. The most frequent culprits include a power or gas supply interruption, a failing regulator, clogged burner ports, closed vents, or a safety switch tripping. Before digging into parts, verify fuel flow and ignition. For propane grills, ensure the tank valve is fully open and the regulator isn't pinched. For charcoal or pellet grills, confirm the fuel is lit and heat is building as air vents are opened to appropriate settings. By methodically ruling out these basics, you can avoid unnecessary repairs and heat your grill to cooking temperature quickly. Grill Cooking recommends checking connections and fuel flow first, then moving to components that govern flame control.
Safety first: power, gas, and heat safety
Safety is non-negotiable when grills fail to heat. Begin by turning off the grill, unplugging any electric ignition, and closing the gas valve or cylinder valve. If you detect a gas smell, move away and ventilate the area. After ensuring it's safe, you can proceed with inspections. Wear heat-safe gloves when handling hot grates and never place your hands near hot burners. Keep children and pets away during troubleshooting. If a gas leak is suspected, contact your gas supplier or emergency services immediately. Grill Cooking emphasizes calm, methodical checks and safe shutdowns as the foundation of any fix.
Burner and ignition: diagnosing clogs or misalignment
Inspect each burner for bent or misaligned ports, yellow-tipped flames, or uneven lighting. Remove grates and heat plates to view the burner ports; use a soft brush to clear rust and debris. Check the ignition system by listening for a click while pressing the switch and observing a blue flame. If you see a weak spark or no spark, the igniter or wiring may need replacement. For electric ignitions, verify the power indicator on the control panel lights up. After cleaning, reassemble and try a test fire at medium heat to confirm consistent ignition across burners.
Regulator and propane level: ensuring proper fuel flow
Troubleshooting starts at the source. Confirm the propane tank valve is fully open and the hose is not kinked. Check the regulator for frost or ice formation at the connection; frost indicates pressure regulation problems. If you have an adjustable regulator, set it to the grill's recommended level. Some grills have a secondary regulator on the hose; ensure it's not overdue for replacement. If you must replace parts, use OEM or equivalent quality parts from reputable suppliers.
Venturi tubes, hoses, and leaks: visual checks
Venturi tubes mix air with gas; blockages reduce heat production. Inspect tubes for corrosion, cracks, or disconnections. Use soapy water to test hoses and connections for leaks; a bubble indicates a leak that requires tightening or replacement. Do not operate if a leak is detected. For gas grills, always work in a well-ventilated area and avoid smoking while inspecting. Grill Cooking highlights that many heat issues arise from simple leaks or mis-seated hoses, which are easy to fix when caught early.
Cleaning and maintenance steps to restore heat
Routine cleaning restores consistent heat. Start by turning off and cooling, then remove grates and flame tamers. Brush burner ports clean with a soft wire brush; never use metal shims that could widen ports. Wipe out debris from the burner cavities with a dry cloth. Reassemble, then perform a slow preheat test to confirm even flame and heat distribution. If heat remains low, recheck gas flow and consider replacing worn parts. A clean grill not only heats faster but also cooks more evenly.
When to call a pro and prevention tips
Some issues require professional service: deep gas leaks, failed regulators, or compromised hoses pose safety risks. If you cannot restore heat after the above steps, contact a certified technician or the grill's support line. To prevent future problems, schedule annual cleanings, store hoses properly, perform regular flame tests, and keep vents clear. A small investment in maintenance saves bigger headaches and keeps your grill safe and dependable.
Steps
Estimated time: 60-90 minutes
- 1
Power and safety prep
Begin by turning off the grill and unplugging the ignition (if electric). For gas grills, ensure the fuel valve is closed and the area is well ventilated. Wait until the grill is cool before touching any components. This keeps you safe while you inspect essentials.
Tip: Never work on a live flame or a hot grill with the gas line connected. - 2
Check fuel supply
For gas grills, confirm the propane tank valve is open and the hose is free of kinks. If you use a natural gas line, ensure the supply is uninterrupted. If you suspect a tank issue, try a different regulator or temporarily swap tanks if safe to do so.
Tip: A simple valve adjustment can restore flow without replacing parts. - 3
Test ignition system
Inspect the igniter by turning the knobs to find the burner and listening for a steady click while looking for a flame. If no spark, test the spark module with a multimeter or replace the igniter. For electronic ignition, ensure the connections are dry and free of corrosion.
Tip: Keep ignition area dry; moisture kills sparks. - 4
Inspect burners
Remove grates and heat shields to inspect each burner port for blockages and misalignment. Use a soft brush to clear debris and verify that flames light evenly across all burners. Re-seat burners firmly after cleaning.
Tip: If you see a yellow flame, the burner likely needs cleaning or replacement. - 5
Check regulator and hoses
Examine hoses for cracks, glazing, or frost near connections. If you suspect regulator issues, gently disconnect and reattach, or replace with an identical spec part. Test flame consistency after reassembly.
Tip: Do not force hoses through tight gaps; replace if damaged. - 6
Leak test and vent checks
Mix soapy water and apply to connections. Look for bubbles indicating a leak; tighten or replace seals as needed. Ensure vents and air inlets are open to permit proper combustion.
Tip: Perform leak tests away from flames and in a well-ventilated area. - 7
Reassemble and preheat
Reassemble the grill and perform a slow preheat at medium heat to verify uniform ignition and heat. If some burners fail to light, target those parts first and consider component replacement.
Tip: Always monitor flame height; uneven flames signal misadjustment. - 8
Escalation if needed
If heat performance remains poor after these steps, contact a professional technician or the grill brand’s support line. Document the symptoms and parts inspected for faster service.
Tip: Don’t attempt dangerous repairs beyond your skill level.
Diagnosis: Grill won't heat up to cooking temperature
Possible Causes
- highPower or gas supply interrupted
- mediumRegulator failure or incorrect gas pressure
- highClogged burners or blocked vents
- lowThermal fuse or safety switch tripped
Fixes
- easyConfirm power outlet is live or gas cylinder valve fully open; replace batteries if there is an electronic ignition
- mediumInspect and clean burner ports; verify gas pressure and regulator operation; replace if needed
- easyClear obstructions in burners/vents with a brush, and re-seat burners; test flame quality
- easyIf a safety switch or fuse is tripped, reset or consult a professional
FAQ
Why is my gas grill not heating up even with the tank full?
Gas grills can fail to heat due to a closed valve, a faulty regulator, or clogged burner ports. Start by verifying the tank valve is fully open and that the regulator is functioning. If the flame is weak or uneven, clean the burners and test for leaks. If unresolved, inspect hoses and seek professional help.
Gas grills may fail to heat due to valve or regulator issues or clogged burners. Start with the fuel supply, then clean the burners and test for leaks. If unresolved, contact support.
How do I test a grill regulator?
To test a regulator, confirm frost or ice at the connection, which signals a pressure problem. Disconnect, inspect for damage, and replace if needed. After replacement, re-test fuel flow and flame height across all burners.
Look for frost at the hose connection; replace if damaged and re-test.
Is a dirty burner definitely causing low heat?
A dirty burner can restrict gas flow and produce uneven or weak flames. Clean burner ports with a soft brush and ensure ports are fully open. After cleaning, re-test with a controlled flame to confirm even heat.
Yes, a dirty burner often reduces heat. Clean ports and re-test.
When should I call a pro for grill heating issues?
Call a pro if you detect gas leaks, persistent regulator failure, or damaged hoses. These issues pose safety risks and require professional assessment. If in doubt, use brand customer support for guidance.
If you smell gas or see leaks, stop and call a pro.
Why won’t the ignition spark while pressing the start button?
A non-sparking ignition can result from a wet or corroded igniter, loose wiring, or a dead battery. Dry and clean connections, replace batteries if needed, and test again. If no spark, the ignition module may need replacement.
If there's no spark, check the igniter and water/dust buildup.
Why is there uneven heat after cleaning?
Uneven heat after cleaning often means one or more burners aren’t lighting evenly or vents are blocked. Reconfirm burner alignment, reseat heat shields, and ensure air flow is balanced. If it persists, inspect for warped grates or damaged heat distribution plates.
Uneven heat usually means uneven burner light or blocked vents.
Watch Video
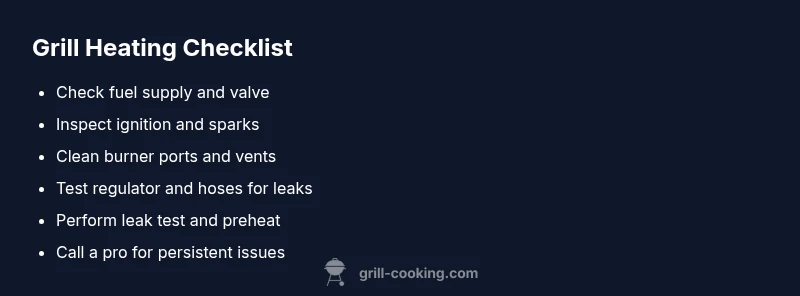
Quick Summary
- Check fuel and power first before deeper fixes
- Inspect ignition, burners, and ports for cleanliness
- Test regulator and hoses for leaks or frost signs
- Clean vents and re-test with a controlled preheat
- Call a pro for leaks or failed regulators