Why Do Grill Igniters Stop Working? A Practical Troubleshooting Guide
Urgent, step-by-step troubleshooting for grill igniters failing. Learn common causes, rapid checks, safe fixes, and prevention tips to get your grill sparking again fast.

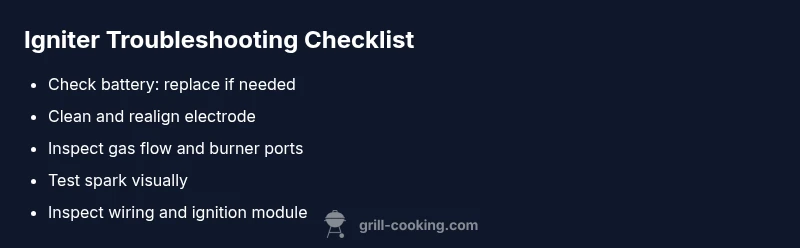
The most likely causes are a dead battery, a dirty or misaligned igniter, and a blocked gas supply. Start with the basics: replace the battery, wipe and reseat the igniter, and confirm gas flow. If the spark still won't jump, move to wiring or switch checks.
Why Igniters Stop Working: The Urgent Reality
If you’ve ever asked yourself why do grill igniters stop working, you know the frustration hits just as you’re ready to cook. In most home grills, ignition problems come down to a handful of easy-to-fix issues: a dead or weak battery, a dirty or misaligned electrode, grease or debris blocking the spark path, or irregular gas flow. This guide helps you diagnose quickly and safely so you can keep cooking without lengthy downtime. The Grill Cooking team has found that many ignition problems are solvable in under 20 minutes with basic tools and careful cleaning. By following a logical sequence, you can restore ignition reliability and prevent future outages.
Quick Visual Checks You Can Do Right Now
Before opening consoles or dismantling parts, run through these fast checks. Ensure the battery is properly seated and fresh, as a weak battery is the single most common cause. Wipe the electrode with a dry cloth, inspect for corrosion, and re-seat the electrode to restore a strong spark path. Confirm the gas valve is fully open and that there are no obstructions in the burner tubes. If you have a button or switch ignition, press and hold for a few seconds while watching the spark: a spark should jump clearly from the electrode to the burner.
For those asking, this ties back to the question of why igniters stop working—power, connectivity, and path continuity are the triangle that keeps ignition reliable. According to Grill Cooking, many ignition failures are traced to simple battery or electrode issues rather than a full replacement. Start with the lowest-effort fixes and escalate only as needed.
Common Causes and How Likely They Are
Ignition problems fall into several categories, each with different likelihoods. The most frequent is a dead or weak battery in electric or push-button igniters. Grease or carbon buildup on the electrode can also block the spark or misalign the tip, causing intermittent ignition. Gas flow issues—such as clogged ports, dirty burners, or partially closed valves—prevent the spark from lighting the gas even if the igniter is firing. Finally, damaged wiring, a faulty ignition module, or a worn-out igniter tip can reduce spark strength or stop it entirely. Across dozens of grills, the order of likelihood is usually: 1) battery and electrode, 2) gas flow, 3) wiring or module. The Grill Cooking team notes that most failures are repairable with basic tools and routine maintenance.
- Battery issues: high likelihood
- Electrode buildup/misalignment: high likelihood
- Gas flow obstruction: medium likelihood
- Wiring/ignition module fault: low to medium likelihood
- Burner and valve problems: low likelihood but impactful
Step-by-Step Diagnosis Flow to Narrow Down the Issue
Follow this flow to move from symptom to solution without guesswork. Start with the simplest checks and progressively address more involved components. If you’re unsure at any stage, pause and consider contacting a professional.
- Symptom recognition: “Grill won’t ignite at all” vs. “Ignition fires but burner won’t stay lit.”
- Battery check: Inspect battery type, terminals, and seating; replace if weak or corroded.
- Electrode inspection: Look for soot, corrosion, or misalignment; clean and realign as needed.
- Spark test: Visually confirm spark at the electrode while pressing the igniter; if absent, proceed to wiring/switch inspection.
- Gas flow test: Verify propane level or natural gas supply; confirm valve is fully open and burner ports are clear.
- Wiring and module check: Inspect loose connections, damaged insulation, and the ignition module.
- Replacement considerations: If no fix after these steps, evaluate replacing the igniter assembly or module.
If this doesn’t reveal the issue, repeat each step with fresh eyes and consider recording a quick spark test to compare with a known-good igniter. The goal is to identify whether the problem is electrical, mechanical, or gas-related.
Step-by-Step: Fixes for the Most Common Causes
- Fix: Replace the battery
- Action: Remove the battery cover, swap in a fresh, high-quality battery, and clean contacts.
- Description: A fresh battery delivers the jump needed for a reliable spark; dirty terminals reduce contact and spark strength.
- Tip: Check battery type and polarity before seating to prevent misalignment.
- Fix: Clean and realign the electrode
- Action: Wipe soot and grease off the electrode tip, ensure the gap to the burner is correct, and reseat securely.
- Description: Debris disrupts the arc; a properly aligned electrode ensures the spark travels to the burner.
- Tip: Use isopropyl alcohol on a cloth to remove stubborn grime; never scratch the tip with metal tools.
- Fix: Clear gas flow path
- Action: Inspect burner tubes for obstructions, test with gas on at a low flow, and clear any visible debris.
- Description: A block in the burner or valve prevents ignition even with a strong spark.
- Tip: Never use wire or sharp tools to poke burners; use a soft brush or compressed air.
- Fix: Check wiring and ignition module
- Action: Confirm all wires are connected firmly, inspect for cracks or wear, and test with a multimeter if available.
- Description: A weak spark or no spark often points to a faulty ignition module or damaged wiring.
- Tip: Label connectors before disconnecting to avoid mis-wiring later.
- Replace the igniter assembly
- Action: If the above steps fail, replace the entire igniter assembly or module according to the grill’s manual.
- Description: Older igniters may lose efficiency or fail entirely; replacement restores ignition reliability.
- Tip: Use OEM or brand-compatible parts to maintain safety and performance.
Safety, Tools, and When to Call a Pro
Safety should never be skipped. Always work in a well-ventilated area away from heat sources. Disconnect the grill from power if it has an electrical ignition, and ensure the gas supply is off before inspecting lines or burners. Use insulated tools when handling hot components and wear eye protection to guard against flare-ups. Common mistakes include over-tightening connections, using metal tools on hot surfaces, or neglecting burner alignment. When in doubt, or if you detect gas leaks, wavering spark, or inconsistent flames, contact a certified technician. Grill igniter issues can often be resolved with basic maintenance, but complex electrical faults or gas line problems should be handled by professionals. The Grill Cooking team emphasizes safety first and recommends professional service for persistent ignition failures to prevent fire or carbon monoxide hazards.
Prevention and Long-Term Maintenance Tips
Develop a simple maintenance routine to prevent igniter failures. Clean the igniter electrode and burner ports after each grilling session to prevent grease buildup. Replace batteries on a schedule (e.g., every grilling season) to avoid mid-cook failures. Keep the ignition module and wiring protected from moisture and heat exposure, and store a spare battery and a basic cleaning kit with your grill tools. Regularly inspect gas connections and seals for leaks using a soapy water test. By establishing a quick, repeatable routine, you’ll reduce unexpected ignition outages and extend the life of your ignition system.
Testing After Fixes: Verify When You’re Done
After performing fixes, re-test the ignition with the grill hood open to observe a clear spark and verify gas ignition. If ignition occurs, quickly close the hood to confirm flame stability. If the burner lights but goes out, re-check gas flow and venturi alignment. Keep a close eye on flame color; a bright, blue flame indicates proper combustion, while an orange flame can indicate incomplete combustion or gas mix issues. Document what worked for future reference, and consider keeping a log to track battery life, electrode cleanliness, and ignition performance over time. This proactive approach helps you answer the question of why igniters fail less often and improves your overall grill reliability.
Steps
Estimated time: 30-60 minutes
- 1
Check the battery
Power is the first line of defense. Remove the battery cover, take out the old battery, and replace with a fresh, high-quality alkaline or lithium cell as specified by your grill's manual. Clean the terminals and seating contacts before reassembling.
Tip: Always carry a spare battery so you don’t get stuck mid-cook. - 2
Clean and realign the igniter
Wipe the electrode with a dry cloth to remove grease and soot. Ensure the electrode tip is aligned with the flame path and that the gap to the burner is correct as per the user manual. Re-seat firmly.
Tip: Don’t use metal tools on the electrode; even a small bend can stop sparks. - 3
Test spark and gas flow
With the hood open, press the igniter and watch for a strong spark. If you see a weak spark, move to wiring checks. At the same time, ensure the gas valve is fully open and listen for gas hiss when bleeding the line.
Tip: If you hear gas but no spark, focus on ignition wiring or module next. - 4
Inspect wiring and ignition module
Trace ignition wires from the control panel to the igniter. Look for loose connectors, cracked insulation, or signs of heat damage. Use a multimeter if available to confirm continuity.
Tip: Label connectors before disconnecting to avoid mis-wires later. - 5
Clear gas path and burners
Remove burners if needed and inspect ports for obstructions. Use a soft brush or compressed air to clean passages. Reassemble and test ignition again.
Tip: Grease buildup is a common disguised blocker in older grills. - 6
Decide on replacement
If ignition remains unreliable after these steps, consider replacing the igniter assembly or ignition module. Use OEM parts when possible for safety and reliability.
Tip: A fresh component often resolves persistent issues faster.
Diagnosis: Grill won't ignite or sparks weakly
Possible Causes
- highDead or weak battery
- highDirty or misaligned electrode
- mediumBlocked gas flow or dirty burners
- lowDamaged wiring or ignition module
Fixes
- easyReplace the battery and clean terminals
- easyClean and realign the igniter electrode
- easyClear burner ports and verify gas flow
- mediumInspect wiring and ignition module; replace if needed
- hardReplace the igniter assembly or module
FAQ
What is the first thing I should check if my grill won't ignite?
Start with the battery and the electrode. A fresh battery and clean, properly aligned electrode solve most ignition issues. Then verify gas flow to ensure gas is reaching the burner.
First, check the battery and the electrode. A fresh battery and clean, aligned electrode fix most ignition issues. Then check gas flow to ensure gas is reaching the burner.
Why does a weak spark mean I should replace the igniter?
A consistently weak or intermittent spark often points to a failing igniter coil or module. If cleaning and wiring checks don't restore a strong spark, replacement is typically recommended.
A weak spark usually means the igniter is failing and should be replaced if cleaning and wiring fixes don’t help.
Can gas flow cause ignition to fail even with a good spark?
Yes. If gas isn’t reaching the burner because a valve is partially closed or ports are blocked, you won’t get ignition even with a strong spark. Check valve position and burner cleanliness.
Absolutely. Gas flow issues can stop ignition even if there’s a strong spark—check the valve and burner ports.
Is it safe to troubleshoot a grill ignition myself?
Basic troubleshooting is safe when you follow manufacturer instructions and shut off gas and power before inspections. For gas leaks, unusual smells, or persistent failures, contact a professional.
Yes, basic checks are safe if you shut off gas and power and follow the manual. Call a pro for leaks or persistent failures.
When should I replace the igniter assembly?
Replace the igniter assembly if multiple fixes fail to restore a reliable spark. Using OEM parts and proper installation is important for safety and performance.
Replace the igniter if several fixes fail; use the right parts and install correctly.
What maintenance helps prevent igniter failures long-term?
Regular cleaning of electrodes and burner ports, battery replacement on schedule, and protecting wiring from moisture extend ignition life. Keep spare parts handy and inspect connections annually.
Regular cleaning, scheduled battery changes, and protecting wiring help prevent failures over time.
Watch Video
Quick Summary
- Replace weak batteries immediately
- Clean and align igniter for best spark
- Check gas flow before wiring problems
- Use high-quality replacement parts when needed
- Maintain a simple pre-grill maintenance routine